Jump to content
SAU Community

Recommended Posts

HI all, my name is justin,

been posting for a while, haven't really had time or car on road to be going out and doing things but i thought it's time to change that!

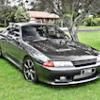
Car goes as-

gun metal grey R32GTS-t with engineered RB25det

GTR kit

high flow turbo

nismo springs

bilstien shocks all round

DBA discs

white 17in intermilano wheels (big dish)

ok sound system (126.6db outta one 10in!)

just alot of fun!

  • 3 weeks later...
  • 3 weeks later...

white r33 GTST

18 265 vok racing rims

olims fully adjustably suspension

AB-Flug full body kit

Custom FMIC

2 peice ratchet locker

remaped EFI comp

HKS air filter

brass button clutch

black as windows

and the list goes on

  • 1 month later...

Well I guess I should put the ol' Mitsu up

The only mod she's had so far is a HD Clutch.

Pulled a 14.2 On gtec, not too bad for a tired old girl. But I love her.

Not as much fun as the 86 I had, but in the wet, god it's fun to rip round on full throttle

:kick:

  • 3 weeks later...

GTR R32 November 1993

Engine Bay

R34 GTR N1 Turbos

Nismo BIG fuel pump

SARD 700cc injectors and fuel reg

Splitfire Coils

N1 Water Pump

N1 Oil pump

JE Pistons

Tomei Poncams 260 degrees

Eagle rods

Gates Timing belt

Os Giken Adjustable Cam Gears

Os Giken Twin Plate Clutch

HKS Super Drag 3.25" Exhaust System

HKS Wastegate Adjustable Actuators

TRUST FMIC with HKS Piping

Apexi Super Suction kit (Pods)

HKS Super BOV's

HKS EVC III Electronic Boost Controller

HKS Electronic Torque Controller & Drag Controller

Nismo Strut Brace with Master Brake Cylinder Stopper

Trust Clear Timing Belt Cover

Nismo Radiator Cap

Nismo Oil Cap

Greddy Oil Catch Can

Polished Chrome Engine and Parts

Interior

Apexi Power FC Pro with Hand Controller

Blitz Boost Gauge with 2 Pce Pillar

Greddy Turbo Timer

Nismo Shift Knob

C's Short Shift

Illuminus Blue/Green White Face Dash Dials with Controller keypad on dash

Recaro SP Seats - Black/Grey

Rear Seats Recovered in Black/Grey Imitation Leather

Front Doors & Rear Side Trims Recovered in Grey Imitation Leather

Factory Drift Pad[/color][/font]

Spitfire Monster Tacho / Shift Light (removed)

Custom Silver Dash & Parts

Aftermarket Steering Wheel

Stereo

JVC CD/MP3 Head Unit

Pheonix gold Splits

Rockford Fosgate Tweeters

Boston 12.5" subs x 2

Orion Xtreme 800w amp

Orion 250w amp

Exterior/other

Light weight 3 peice Panasport Racing Rims G7 17" x 9"

Bilstien Height Adjustable Suspension

Original Trust Front Bar

Nismo Side Skirts

T-Style Carbon Fibre Bonnet

C-West Electronic GT Wing [/color][/font]

Tomei Black Afterburners Tail Light Covers[/color]

Bosch Hydrogen Light Globes [/color]

Phillips Extra White Parker Lights[/color]

D-Speed Clear front Indicators[/color][/font]

'Sinista'

Rebuilt June 2006 - Balanced/blue printed

305 rwkw's @ 18psi

Edited by Sinista32

Hello EVERYONE. Most people have heard or come and had a look at my old mans GTR. I decided to post a dedicated list of everything so here gos.

SHY32

1989 R32 Skyline GTR

Engine capacity 2.7L via 87.1mm Forged Pistons

2mm TRUST Metal Head Gasket

Single Trust T77/88 Garrett HYBRID Turbo (Roller Bearing Centre)

APEX Power FC and Hand Controller Engine Management

700cc SARD Injectors

GReddy Fuel Rail

Sard Rising Rate Fuel Pressure Regulator

800hp Fuel Pump

HKS Camshafts and Adjustable Cam Gears

50mm HKS External Wastegate with Removable Dump Pipe

4” Mandrel Bent exhaust from turbo back with two 3” Cat Converters

GRex Remote Oil Filter System

HKS Oil Catch Can

TRUST Intercooler

HKS Intercooler Piping Kit

Nissan 5 Speed Manual

OS Giken Cross Gearset

GReddy Shifter Kit

OS Giken Multiple Plate Clutch

V-Spec Diff

TEIN Adjustable Coil Over Suspension

TEIN Spherical Rod End Adjustable Castor Rods

CUSCO Front and Rear Strut Brace’s

Slotted Rotors and Standard Callipers on Front and Standard on Rear

18” x 10” 3 Piece NISMO 400R Wheels and FALKEN Azeni Tyres

Skyline GTRV-Spec Body Kit and Boot Lip

NISMO 260 Kph Speedo

Autometer 5” Monster Tacho with Shift light

OMORI Exhaust Temperature Gauge

CS Boost Gauge

HKS Boost Controller

Blitz Turbo Timer

2 x BRIDE Seats

MOMO Steering Wheel

Engineered to meet ADRS and NSW RTA requirements

have posted up one pic below if anyone wants a look. Had to bring the quality down on the photo so does not look all that good.

See ya all Later

Dan

Hey Stirlo, long time no see... everytime I see your old car it brings back so many memories.

NJR 34TT - yeah I like your car, picked it up from Big Boys toys I see, very nice. Haha I have already been confused :rofl: but its all good. Like to catch up sometime.

Leech - Yeah thats my baby in the photo, thanks for the compliment, look forward to meeting you at some stage.

Hey guys

Thought i would add my ride up here, its my first ride and things are comming along nicly, tell me what you think, personally i dont like the wheels but theyre getting changed to 18's very soon, hopefully this week!!!

Its a 1995 R33 GTS, its got the basic mods:

Cannon exhaust,

Lowered on pedders suspension

M spec front bar i think

New paint on most of the car,

Aftermarket 17" wheels (255's on the back)

Aftermarket wing

Full stereo

And thats about it.

If you see me around gimi a wave, it'll be me or my brother driving.

Dayne

Create an account or sign in to comment

You need to be a member in order to leave a comment

Create an account

Sign up for a new account in our community. It's easy!

Register a new account

Sign in

Already have an account? Sign in here.

Sign In Now


  • Similar Content

  • Latest Posts

    • Stock ECU (or more accurately stock tune) absolutely refuses to go over 10psi and behaves like you have seen. The Nistune is the same if it is the stock tune. If the Nistune chip has been tuned, the resulting tune could be literally anything for any combination of parts. The Nistune just makes the stock ECU Tunable.
    • So stock ECU does not like anything above 10 psi?  That Nistune one is just for "try" if it will be any different, I know it need to be tune for that. I know but YOU may know about these problem but i/we dont. They few little Skylines here let alone people who know anything about tham so that is why iam asking here  
    • So now we have a radiator with no attachments whatsoever. It lifts up with a particularly tight spot between the drivers side air box mount and the lower radiator outlet, but if you've got this far you will sort that too. This is the lower mounts with the rad out so you can see where the rubber bushes go, it is a straight shot upwards Done! Assembly is the reverse of disassembly, with blood less likely to be shed.
    • Right, onto the second last trick. The Air Con condenser is mounted to the front of the radiator and stays in the car when the radiator is removed. There are 2x 10mm headed self tappers holding the top of the condenser to the radiator, remove those The bottom of the condenser is attached to the radiator with clips. You need to lift the condenser out of those clips and clear (up, then forward). f**ked if  could work out how to do that last bit with the front bumper on. I hope you can, and you share the trick.  Bumper removal probably deserves its own thread one day once I've recovered the will to live, but basically you need to remove the wheels, front inner guard liners (clips and 10mm headed bolts), the self tapper between the guard and the bumper at the rearmost point of the bumper (same as an R32 that bit), any remaining clips at the top/front of the grill, an absolute bastard design with a plate that holds the top of the bumper above the headlight each side (only 1 bolt which is tricky to get to, but the plate catches 2 places on the bumper and must be removed....carefully!) and push clips between the bumper and guard under the headlight. If you've done all that you will be faced with wiring for the fog lights on both sides and in ADM Q50 RS at least, 4 nasty tight plugs on the driver's side for the ADAS stuff. So, the clips at the bottom look like this on drivers side (looking from the front) And on the passenger side (also from the front), you can see this one is already out Clearance on both of these are super tight; the condenser needs to move up but the upper rad support mount prevents that, and the radiator can't move down far because it is (rubber) mounted. Once you achieve the impossible and drop the condenser off those mounts so it does not stop the rad moving, you are good to go
    • OK, next the shroud needs to come off and there are a couple of tricks. Firstly, there is a loom from near the passenger side headlight to the fans, coolant temp sensor etc and there is no plug to undo.  In my case I was OK to leave the shroud on top of the engine so I just undid the passenger side fan plug and about 10 of the clips which gave enough free wire to put it aside. The fan plugs were super tight, the trick I used was a small falt screwdriver to push down on the release tab, then a larger flat screwdriver to lever the plug out of the fan unit....be careful with how much force you apply! If you need to remove the shroud altogether for some reason you will have to deal with all the plugs (tight) and clips (brittle)....good luck. I removed all of the clips and replaced them with cable ties that I will just cut next time. Also, in the Red Sport / 400R at least, the intake heat exchanger reservoir hose is bolted to the shroud in 2 places with 10mm headed bolts; so remove them (the hose stays in the car; no need to undo it at the t fittings down at the radiator lower mount. Once you've dealt with the HX hose and the wiring loom, there are 3x 10mm headed self tappers holding the top of the shroud to the radiator; remove those.   The shroud then lifts out of the bottom mounts where it sits on the radiator, up and onto the engine out of the way. Simples
×
×
  • Create New...