Jump to content
SAU Community

Recommended Posts

  • Replies 49
  • Created
  • Last Reply

Top Posters In This Topic

well with a remaped ECU and FMIC at 13psi and 12:1 air fuel i was on 216rwkw dont think i would like to push more with out a new pump and injectors, and possiabably somesort of piggy back ecu

That was a happyish Dyno in shootout mode + a bottle of ocatan booster

Next is the GCG highflow.

Edited by race_snooze

for those that aren't sure of where the sarcasm with stock injectors is coming from, we've seen in the past cars making high power on stock injectors go bang and cost the owner lots of $$$. the main one that comes to mind was a car in perth see here http://www.skylinesaustralia.com/forums/in...c=55318&hl=

high figures are certainly possible, just not safe and not a good idea.

you should ensure you have adequate fuel systems to keep it safe.

this means injectors, pump, regulator and anything else in that area

good god - these WA lads sure as hell are snakey at each other LOL (still??!!)

Im now begining to "see" that I wont crack past 200awkw with stock injectors. :(

We love to jump on people around here don't we.

What dyno did you use?

Who owns it?

Is it an RB25 or RB30?

If you answer these questions some of the apparent anomalies in your first post may become clearer.

He has put that down. RB25 block, RB26 crank and rods. From memory with the bore it needed too it was between 2.6-2.7L. I'll let old mate confirm that tho. Its a QLD car.

Im betting thats the reason for more power, more displacement :no:

its only an extra 100cc or so.

hardly anything to write home about in terms of probably the highest reading on a stock ECU yet

But added with a potentially higher compression ratio, the headwork, redone cams, a tighter engine etc, and maybe a dyno that reads a bit higher... adds up.

It COULD also of been done in 3rd so the car didnt hit speed limiter. Just speculating with that tho.

He has put that down. RB25 block, RB26 crank and rods. From memory with the bore it needed too it was between 2.6-2.7L. I'll let old mate confirm that tho. Its a QLD car.

Im betting thats the reason for more power, more displacement ;)

Simply stroking out a motor only increases average power, it doesn't increase peak power.

i did over 270kw from stock injectors (RB25)...but as suggested not a great idea....btw that was the only bit that was stock the rest was upgraded...

I assume the injectors would be max'd at max rpm...if u drive it under 4k I would assume it would be ok for std driving??? not on a track of course.

Edited by khunjeng

The one thing that no one has seemed to mention throughout this thread is "why the hell would your tuner take your care to such extremes when he (or she) knows it is dangerous to the engine at that point"

330rwkw or hp; from a stock set of injectors... I'm no expert but I'm going to ASSUME that at this power your injectors would be at 99.99% duty cycle. The tuner would be able to see this if they were doing their job correctly; shouldn't they stop and warn you that your car could blow up?

When I got my car tuned (has pretty much everything except for injectors as well... the tuner stopped at the first instance and he warned that if he kept going for more power; I ran the risk of blowing up my motor. Even when I asked him if there were any other ways of doing it; he insisted that the session ended and I went away and got injectors.

I wonder who tuned this car and why they would keep pushing it despite the apparent risks.

Please dont get the dyno sheet debate running again, they mean shit unless we have a before and after sheet off the same dyno. the figures arent whats important, its the difference between the figures after the modification that matter.

My stock inj are maxing out now at approx 190 -200 rwkw and i have an b0shch040. R u sure you made 259 rwkw on stock injectors and without timeing and a/f management...

Wont your motor detonate if you were to give it a bit on a hot day with those stats????? It would be running pretty lean!!!!!!

( i must have got a shite set of stock inj!!!!!!!!! or you are missing somehting!!!!!)

Good power figure for a highflow though!!!!!!! (if it is real) --> have you got a dyno sheet?

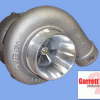
i have a plain bearing hiflow turbo sitting on 12psi

power fc

standard injectors (75%) /AFM/Engine

Have a walbro fuel pump

FMIC

AVCR

Currently on 306hp,

I am changing the injectors and afm for next tune.

i think it would be possible hitting 250rwkw on stock injectors

but i reckon the afm would cark it first. Cause mine is sitting on 5.1 volts or whateva it is

you gotta get a 300zx AFM or the VG30 or wotever which I think is the same thing. Also the Bosch fuel pump is the go...u can do it on std injectors but its not the greatest idea as suggested. also get a new fuel filetr...no point if that is old and full of crap.

i pulled mine of another car and replaced it...the difference was amazing in my mums Camry!

Guys, it might actually be possible. someone has done something like this in the past before. you'll need to find out who though.

do you remember chris?

his name was kryzuie or something like that. he had a white r33.

hks 2535. pulled about 250 rwkw before tune.

Create an account or sign in to comment

You need to be a member in order to leave a comment

Create an account

Sign up for a new account in our community. It's easy!

Register a new account

Sign in

Already have an account? Sign in here.

Sign In Now


  • Similar Content

  • Latest Posts

    • Hi, is the HKS  Tower Bar still available ? negotiable ? 🤔
    • From there, it is really just test and assemble. Plug the adapter cables from the unit into the back of the screen, then the other side to the car harness. Don't forget all the other plugs too! Run the cables behind the unit and screw it back into place (4 screws) and you should now have 3 cables to run from the top screen to the android unit. I ran them along the DS of the other AV units in the gap between their backets and the console, and used some corrugated tubing on the sharp edges of the bracket so the wires were safe. Plug the centre console and lower screen in temporarily and turn the car to ACC, the AV should fire up as normal. Hold the back button for 3 sec and Android should appear on the top screen. You need to set the input to Aux for audio (more on that later). I put the unit under the AC duct in the centre console, with the wifi antenna on top of the AC duct near the shifter, the bluetooth antenna on the AC duct under the centre console The GPS unit on top of the DS to AC duct; they all seem to work OK there are are out of the way. Neat cable routing is a pain. For the drive recorder I mounted it near the rear view mirror and run the cable in the headlining, across the a pillar and then down the inside of the a pillar seal to the DS lower dash. From there it goes across and to one USB input for the unit. The second USB input is attached to the ECUtec OBD dongle and the 3rd goes to the USB bulkhead connected I added in the centre console. This is how the centre console looks "tidied" up Note I didn't install the provided speaker, didn't use the 2.5mm IPod in line or the piggyback loom for the Ipod or change any DIP switches; they seem to only be required if you need to use the Ipod input rather than the AUX input. That's it, install done, I'll follow up with a separate post on how the unit works, but in summary it retains all factory functions and inputs (so I still use my phone to the car for calls), reverse still works like factory etc.
    • Place the new daughterboard in the case and mount it using the 3 small black rivets provided, and reconnect the 3 factory ribbon cables to the new board Then, use the 3 piggyback cables from the daughterboard into the factory board on top (there are stand offs in the case to keep them apart. and remember to reconnect the antenna and rear cover fan wires. 1 screw to hold the motherboard in place. Before closing the case, make a hole in the sticker covering a hole in the case and run the cable for the android unit into the plug there. The video forgot this step, so did I, so will you probably. Then redo the 4 screws on back, 2 each top and bottom, 3 each side and put the 2 brackets back on.....all ready to go and not that tricky really.      
    • Onto the android unit. You need to remove the top screen because there is a daughterboard to put inside the case. Each side vent pops out from clips; start at the bottom and carefully remove upwards (use a trim remover tool to avoid breaking anything). Then the lower screen and controls come out, 4 screws, a couple of clips (including 3 flimsy ones at the top) and 3 plugs on the rear. Then the upper screen, 4 screws and a bunch of plugs and she is out. From there, remove the mounting brackets (2 screws each), 4 screws on the rear, 2 screws top and bottom and 3 screws holding in the small plates on each side. When you remove the back cover (tight fit), watch out for the power cable for the fan, I removed it so I could put the back aside. The mainboard is held in by 1 screw in the middle, 1 aerial at the top and 3 ribbon cables. If you've ever done any laptop stuff the ribbon cables are OK to work with, just pop up the retainer and they slide out. If you are not familiar just grab a 12 year old from an iphone factory, they will know how it works The case should now look like this:
    • Switching the console was tricky. First there were 6 screws to remove, and also the little adapter loom and its screws had to come out. Also don't forget to remove the 2 screws holding the central locking receiver. Then there are 4 clips on either side....these were very tight in this case and needed careful persuading with a long flat screw driver....some force required but not enough to break them...this was probably the fiddliest part of the whole job. In my case I needed both the wiring loom and the central locking receiver module to swap across to the new one. That was it for the console, so "assembly is the reverse of disassembly"
×
×
  • Create New...