Jump to content
SAU Community

Recommended Posts

Hi folks. Just been reading through a couple of you guy's build up threads and learning some valuable information and thought you might be interested in my build. I have been slowly trying to build basicly stock R32 GT-R into a bit of a circuit/hillclimb car over the last 12 months since I destroyed the motor from an oil surge at our local hill climb here in Townsville. When it's done I'm really keen to head south for Superlap as it looks fantastic and our pissy little track dosen't really offer the sort of excitement I'm after.

I bought it with a set of 2560 garretts, Power FC, injectors, Greddy pipe kit, Twin plate Direct Clutch, HKS manifolds and dumps and a big exhaust. Good enough for a 11.6 at 117mph on streeters. But after I found the #6 rod had pounded its way into the bellhousing and the piston up side down in the bore I thought it was time to build something a little more worth while.

So heres some picks and a few details about what I've been up to over the last 14 months or so.

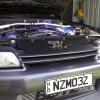
This is how it looked after owning it a few months. Nothing special but tidy.

smaller1.jpg

Then I broke it.......

DSC00041.jpgDSC00046.jpgDSC00049.jpgDSC00054.jpg

So I started building. Bought a new N1 block, new crank(grub screwed and balanced), Eagle rods, Cp pistons, ACL bearings and Arp studs.

DSC00178.jpg

Then I got a head and filled it with Tomei Pro cams, buckets, guides, type b valve springs and new Nissan Valves and stem seals. I put a tomei 1.2mm head gasket in aswell as got some port work carried out. Had the exhaust opened up a bit and the inlets cleaned up.

DSC00183.jpg

Then I bought some new turbos cause some of the old motor had gone through the 2560s and damaged the wheels. I settled on HKS GTRS turbines and also picked up some Trust dump pipes that I though looked the goods. Still using the HKs manifolds off the old motor but port matched them.

motor.jpg

After some major deliberation and saving some more dollars I decided that all the band aid fixes for the Rb26 oiling system were not gonna put my mind at rest with a now quite expensive long motor so I bit the bullet and bought a dry sump kit. Now it's all just sitting in the corner till the car is ready to recive it's new motor.

DSC00007.jpgDSC00370.jpg

I bought a second hand ARC twin entry intercooler from an R34 and mounted that up, but as it turned out I had to make all new mounts for it anyway cause when i bought the new PWR radiator to fit in where the AC condensor used to be I had to change every thing anyway. Still haven't made the radiator support panel yet but it's on the to do list. I have the template cut out and the ally sheet. Just gotta find the time.

cooler.jpg

DSC00436.jpgDSC00439.jpg

I put a roll cage in to. It's Made from CDS mild and is basicly a 6 point tagged to the pillers, side intrusion bars, roof bar, windscreen bar, harness bar, cross and diagonals and one under the dash. Back seats are gone and replaced with a 1.6mm folded parcel shelf and rear fire wall and sealled up as per Cams spec for the fuel system in the boot which at this point consists of a SX 1000hp pump and 4.2ltr surge tank. The fuel system in the pic is just mocked up and still needs work fo fit properly.

DSC00381-1.jpgDSC00379-1.jpg

DSC00387.jpgDSC00123.jpg

I have changed to a FC D-jetro for management and mounted all the map sensors on the plenum.

2.jpg

But yeah. So thats about where it's all up to. There area heap of other little details that are going on but this is pretty much the sumerised version to get this thread started.

So the Goal here for me is to get some feedback to see if I'm on the right track as there is no precedent in North Queensland that I know of as far as GTRs are concerned and any ideas or advice from the guys with the experience circuit racing GTRs will be golden. I've already had some help from some of you and that has been a tremendous help so I know there is a lot of experience and knowlage on this forum so please feel free bounce some ideas my way.

Cheers

Coop

Link to comment
https://www.sau.com.au/forums/topic/246908-nzmo32-r32-gtr-build-up/
Share on other sites

  • Replies 170
  • Created
  • Last Reply

Top Posters In This Topic

Lookin good Coop...well done mate....keep the updates coming.

to get the GT-RS's to respond the exhaust ports should look something like this...

http://www.skylinesaustralia.com/forums/po...27-2759-IMG.JPG

Edited by DiRTgarage

Nice buildup mate, as the others have said keep the updates coming, its really interesting to follow this sort of thing (which I will probably end up having to as well at some stage when my standard motor expires)

Lookin good Coop...well done mate....keep the updates coming.

to get the GT-RS's to respond the exhaust ports should look something like this...

http://www.skylinesaustralia.com/forums/po...27-2759-IMG.JPG

Thanks. that looks like you've taken a fiar bit outta there. I wasn't too sure how far to go but if need be i can take some more out later. I wish i took a better pic of the ports now. As a guide i took the lump out from near the stud and left it about 2.5 mm smaller than a Tomei steel exhaust gasket. Then matched the manifold to the gasket. A shop up here told me that this step was needed to create a small vortex to help scavenge the exhaust gas. The shop specialises in NA pro stock drag motors so I'm not certain they are that cluded up on jap gear. Time will tell but. I have followed the progress on your 32 for a while since i found out you were running the GTRS turbos. Very impressive.

wrxkilla Posted Today, 08:13 AM

well done, looking fantastic.

Can't wait to see the results come in. Would be great if it could make it down to QR one weekend also!

Michael

Thanks Michael. It is a plan to get down to QR for the time attack thing. I was a spectator a few months back the week after Jamboree. So defo Keen for that. Was talking to Cameron Dyal with the orange EVO 8 and he got me all keen.

N1GTR Posted Today, 10:02 AM

Looks good!

More info on the dry sump kit please?

Definatly keep the bent rod, it would make a nice, but expensive paperweight - ive got 6 CP pistons doing the same thing

The rod. Haha yeah i'll do something with it as a momento.

The dry sump Kit is just a basic Hi Octane kit consisting of a Barns pump, peterson tank and I think they get performance metalcraft to do the sump mods but not sure. I had the hi octane big sump and a tomei pump and an accusump to go on it but I changed my mind and sold the pump and sump and still need to sell the accusump if anyone's interested. Still in the box and never used.

What sort of Plenum is it?? Who makes it??

Yeah mate like Count Grantleyish said. It's a stocker with a pretty rough polish job.

I've bought a set of brand new 1000cc HKS injectors to fit in that rail but.

very nice mate. love it. the dry sump kit is a good investment. a bit hard to swallow at first I imagine but the guys that are running them don't seem to be blowing up any motors...

Great Buildup going on :)

I'm somewhere in the middle of doing one too. heading in a very similar direction to you, just doing the motor at the moment..

the drysump may very well be back on the cards too seems like a wise investment to save money by spending moar.

The accusump kit i have is a 3 quart accumulator, mounting clamps, electric solonoid, 20-25 psi pressure switch and a half inch check valve to go into the oil cooler line. They do make a universal install kit but you can make that yourself easy with a few speedflow fittings and some -10 braded line.

I paid over 700 bucks for what I have here back befor the exchange rate went to shitt so was chacin 650.

I have no pics just yet cause they're on my broken phone's memory card.

Marlin Posted Today, 08:23 AM

Great build coop All looks great, and that ARC cooler looks serious! I don't think I've seen one of theres like that before.

Yeah I'm really happy with it. Turns out it's already been modfied so the dry sump header tank can go behind the headlight. It's got a sharper bend on the outlet side to kick the pipe work back in tighter. Didn't expect that when i was offered it but I guess was just ment to be.

Thanks for the other kind comments. They keep me motivated. I just finished welding in the header tank mounts and cutting the holes for the pipe work.

These are my Work Emotions I'm using as track wheels. They've got some old RE55s rubber on but I've only used them once. My first time out with them I spilt the motor. :) They're only 17x9s but they were well priced when i picked them up. I actually lent them to my mates more than I've used them.

DSC00139.jpg

I Pretty much finished the mock up of where everything is gonna fit in the front half of the engine bay. Got the ali plate cut out for the radiator support panel and it's all rubber mounter with modified and flush mounted originals in the bottom and S15 rubbers on the top. Finished all the mounts for the dry sump header tank. They just need to be tidyed up a bit and gusseted. New mounts for the intercooler off the bumper reo are a little agricultural but that's the only place for them. Heres some pics.

DSC01349.jpg

DSC01348.jpg

DSC01347.jpg

Interesting place for the dry sump tank

Also, are you going to run a shroud on the radiator? Wouldve thought the unshrouded areas that arent drawn through by the fan will just be a waste of space. The factory wouldnt put it there for nothing, unless it only matters on cars that have to sit in traffic and dont get constant flow over the core

Interesting place for the dry sump tank

Also, are you going to run a shroud on the radiator? Wouldve thought the unshrouded areas that aren't drawn through by the fan will just be a waste of space. The factory wouldnt put it there for nothing, unless it only matters on cars that have to sit in traffic and dont get constant flow over the core

Apparently It uses a V8 supercar core so there's probably more cooling power in the bit in front of the fan as there is in the whole of the original radiator.

Create an account or sign in to comment

You need to be a member in order to leave a comment

Create an account

Sign up for a new account in our community. It's easy!

Register a new account

Sign in

Already have an account? Sign in here.

Sign In Now


  • Similar Content

  • Latest Posts

    • Seat of the pants assessment of the new intake: The car is way less "doughy" when hitting the loud pedal, especially off idle when stopped or in traffic, I did use a cheapo lazer thermal thingo to measure the temp around where the pod filter got its air, it was between 55 - 60°C, in saying this the car was shut off and not moving, so the OEM intake pipe was not supplying any fresh air to where the pod was when the car was at least moving A weird bonus was induction noise on the throttle in the cabin increased a bit,  I was worried that I was actually going to lose some of that induction noise I love so much, outside though, when I got the daughter to do a WOT drive by pass for me, the induction noise has increased alot when on the throttle, not quite ITB doort, but well up there I'm extremely happy with the results and have been exploring the country roads in the region  As for house mods: 1.New front fence is up and is awesome, it really upgraded how the joint looks from the street, and the added security is nice 2. Electricians have replace some interior lights, and with more lighting in the garage, a few new motion detecting lights out the front above the garage, front room, and at the front door, which I have already found heaps helpful coming and going, also now has fancy pants CCTV all round the house The only hold point for power though is the solar and batteries due to supply issues, although this will happen over the next few weeks 3. I have done a heap of landscaping out the front and I'm almost ready to do a new small retaining wall with some nice blocks to replace the brick and cemented in rocks around the raised garden beds cemented in river stone "was the fashion at the time" the house was built. I currently have a pallet of retaining wall blocks and 2 bulka bags of 20mm blue metal to replace the wood chip that is in the raised garden beds around the house 4. I now have 3 big raised garden beds for out the back to grow some vegetables, about 70cm high, 200cm long and 100cm wide 5. My 2 compost bins are already pretty full with brown, green and kitchen waste from the landscaping I'vedone so far, but they will probably take a few months to break down, so anything else that gets chopped, trimmed, and kitchen waste will just start filling the base of the raised garden beds to about 30cm before I start throwing 40cm of good compost, and stuff, for the vegetables to grow in, I'll need a few ton of compost and soil, but the local supplier can sent me bulka bags of the stuff Basically the logs, wood chips and a few strategically placed rocks for drainage, will give the beds some good organic materials down low to break down over time, and they will hold moisture during the warmer months to save the water in my big arse water tank if we don't get alot of rain So, all in all, the car and house mods are going well, and I'm really enjoying being retired, I sleep in too 0700 and slowly plod around inside until I feel like actually doing anything, and only work in the yard for as long as want, which has actually been alot over the last few weeks,  although when you look at it, it seems that not a huge amount of work has been done,  until I look at the before I started the work pics Happy days and good times indeed 
    • hahaha yeah. Plan is to get side skirts and probably just rear pods. But going to do them one-by-one. I've got a set that I really like from RHDJapen, but that one isn't shipped to AU. So need to find someone who can get it for me
    • Here's an idea, answer the questions I asked you as they are trying to work out WHY the LSD will be binding up in a straight line.
    • You haven't driven many modern cars then have you? Most of them have sfa steering feel with their stupid electric bullshit steering systems.
×
×
  • Create New...