Jump to content
SAU Community

Recommended Posts

thanks for your kind words pete :P

Oath. That seriously is nothing. They aren't even bent!

Any wheel repair shop half their worth can fix that easy, and it wouldn't be that expensive either which is good.

I've seen heaps worse than that!

Oath. That seriously is nothing. They aren't even bent!

Any wheel repair shop half their worth can fix that easy, and it wouldn't be that expensive either which is good.

I've seen heaps worse than that!

easily fixed dude. dont stress :P

thanks guys .. you put me at ease :P

Loaded my ARX onto a truck to go back back to Sydney for warranty repairs. Ahh living in the country fresh air, the mountain views and no bastard has the slightest idea what is what if it is if not a smelly falcodore!

:P

Now waiting to see how many scractches and chips the spotless paint gets in transit. :O (Still)

picked up a 1250kg aluminium jack for $100 (rrp $400)

the joys of having mates at supercheap

i got a 2500kg one for 100 today.......... form sca too

i got a similar thing this week, but it's 4000kg and cost me $3500 :P

DSC00900.jpg

09112010060.jpg

09112010064.jpg

Edited by Big Fella
i got a similar thing this week, but it's 4000kg and cost me $3500 :O

hahahaha show off :P

i got my gizzmo kmon in the mail this week. i'll be hooking it up and having a play next week sometime.

Edited by QWK32
Nice.. what's the torry got in it? :P

that torrie is the spare car, it runs a big port 253, trimatic and straigh out pipes, throwing it together to attck some hill climb events next year for fun. we bought it as a parts car for the wifes Lh 4 dr. and then scored the driveline for free so i've painted it and i'm in the process of putting a cage in it.

the other torrie is a SLR mock up, 308, 288 cam, vn heads and rods, flat tops, turbo 350 trans, 9 inch rear end, 330mm front discs with 4 piston calipers. that one is currently at the chassis shop getting seam welded from fron to rear.

now you see why i need a hoist!

i got a 2500kg one for 100 today.......... form sca too

mine is the aluminium "race" jack, should have been $200 cos its reduced to clear (don't sell enough of them)

just adjusted my handbrake on each hub and put some stop squeak on the back of the pads while i was there

i adjusted the handbrake from memory, is it tight till the rotor wont move then back off 6 clicks?

also

if anyone wants a specific page of the workshop manual with the characters recognized just pm me and i'll send you them

i left my computer slaving away for a few days and i think it converted most of the images into a searchable document :)

so now it can be translated into ingrish by google translate

finished cleaning the stagea in preperation for the adelaide stagea cruise in the morning. luckily it's forecast for rain(cause i did a pretty half arsed job of drying the car)

Edited by Big Fella
finished cleaning the stagea in preperation for the adelaide stagea cruise in the morning. luckily it's forecast for rain(cause i did a pretty half arsed job of drying the car)

Have you put the swaybars on?! should have been the first job for the new hoist! :)

Have you put the swaybars on?! should have been the first job for the new hoist! :)

nope. got called in to work early on friday and then had to fit my new whitewalls to my dodge this arvo, it was on the hoist already.

and then i got lazy and fell asleep on the couch.

They'll probably get fitted in between getting my towabar fitted monday morning and and going to metallica monday night. hopefully!

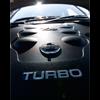
Retrofitted m35 stagea arx turbo actuator on hks gtrs turbo on the r33 - andys turbo saved the day.

found boost cut solonoid and disconnected it and now running proper ramping and auto duty cycling from the gizzmo without creep or boost drop off between gear changes.

retarded timing via cam angle sensor.

took off entire cooler and piping and front bumper inspected piping replaced silicon reducer to cooler that was split. gave cooler water test for leaks.. all good.

modified the plastic rubber intake pipe as it was squeezing in on itself under high boost to turbo with a stainless pipe. - because of this stock bov had to go ..and was blocked off for the time being to keep idle - with a plumbing one way valve- lawl. yes theres flutter.

Put in new ngk 7res plugs as previous owner had 6res in there and it was jumping spark to the side of plugs ..they were black as. (confirmed it had the blue spitfires in there .. he wasnt lying :)

Put in 4 litres of royal purple 5-40watt oil.

Degreased the entire engine bay.

Swapped out the 18's for 17' stagea m35 rims.. (18s tyres were like dragway slicks and total cop bait)

Ripped off rhs front panel that was dented and replaced with spare black gt panel.

Replaced dented mud gaurds on rhs.

wheel alignment monday and camber reset ..i dare say its out heaps as the hicas is going spazzo

pics to come.

mods to come -coil overs (the first thing - anyone know good sources?) ,sard fpr, sway bars , new front bushers , nismo lsd diff

proper plenum , z32 afm and 650cc injectors , , power fc is sitting on the garage floor (with tune) - new bonnet .. this one is mad dented

car was purchased 3 days ago and wouldnt even do a skid.. now kicks at 80!

Edited by PetroDola

Not today, but pulled intake plenum and stack off and clean out with brake clean/petrol. Sludge free!

Replaced ribbed intake rubber with silicon joiner.

Next mission, catch can so oil blow by doesn't go back into intake.

DSC00730.jpg

DSC00731.jpg

Create an account or sign in to comment

You need to be a member in order to leave a comment

Create an account

Sign up for a new account in our community. It's easy!

Register a new account

Sign in

Already have an account? Sign in here.

Sign In Now


  • Similar Content

  • Latest Posts

    • When I said "wiring diagram", I meant the car's wiring diagram. You need to understand how and when 12V appears on certain wires/terminals, when 0V is allowed to appear on certain wires/terminals (which is the difference between supply side switching, and earth side switching), for the way that the car is supposed to work without the immobiliser. Then you start looking for those voltages in the appropriate places at the appropriate times (ie, relay terminals, ECU terminals, fuel pump terminals, at different ignition switch positions, and at times such as "immediately after switching to ON" and "say, 5-10s after switching to ON". You will find that you are not getting what you need when and where you need it, and because you understand what you need and when, from working through the wiring diagram, you can then likely work out why you're not getting it. And that will lead you to the mess that has been made of the associated wires around the immobiliser. But seriously, there is no way that we will be able to find or lead you to the fault from here. You will have to do it at the car, because it will be something f**ked up, and there are a near infinite number of ways for it to be f**ked up. The wiring diagram will give you wire colours and pin numbers and so you can do continuity testing and voltage/time probing and start to work out what is right and what is wrong. I can only close my eyes and imagine a rat's nest of wiring under the dash. You can actually see and touch it.
    • So I found this: https://www.efihardware.com/temperature-sensor-voltage-calculator I didn't know what the pullup resistor is. So I thought if I used my table of known values I could estimate it by putting a value into the pullup resistor, and this should line up with the voltages I had measured. Eventually I got this table out of it by using 210ohms as the pullup resistor. 180C 0.232V - Predicted 175C 0.254V - Predicted 170C 0.278V - Predicted 165C 0.305V - Predicted 160C 0.336V - Predicted 155C 0.369V - Predicted 150C 0.407V - Predicted 145C 0.448V - Predicted 140C 0.494V - Predicted 135C 0.545V - Predicted 130C 0.603V - Predicted 125C 0.668V - Predicted 120C 0.740V - Predicted 115C 0.817V - Predicted 110C 0.914V - Predicted 105C 1.023V - Predicted 100C 1.15V 90C 1.42V - Predicted 85C 1.59V 80C 1.74V 75C 1.94V 70C 2.10V 65C 2.33V 60C 2.56V 58C 2.68V 57C 2.70V 56C 2.74V 55C 2.78V 54C 2.80V 50C 2.98V 49C 3.06V 47C 3.18V 45C 3.23V 43C 3.36V 40C 3.51V 37C 3.67V 35C 3.75V 30C 4.00V As before, the formula in HPTuners is here: https://www.hptuners.com/documentation/files/VCM-Scanner/Content/vcm_scanner/defining_a_transform.htm?Highlight=defining a transform Specifically: In my case I used 50C and 150C, given the sensor is supposedly for that. Input 1 = 2.98V Output 1 = 50C Input 2 = 0.407V Output 2 = 150C (0.407-2.98) / (150-50) -2.573/100 = -0.02573 2.98/-0.02573 + 47.045 = 50 So the corresponding formula should be: (Input / -0.02573) + 47.045 = Output.   If someone can confirm my math it'd be great. Supposedly you can pick any two pairs of the data to make this formula.
    • Well this shows me the fuel pump relay is inside the base of the drivers A Pillar, and goes into the main power wire, and it connects to the ignition. The alarm is.... in the base of the drivers A Pillar. The issue is that I'm not getting 12v to the pump at ignition which tells me that relay isn't being triggered. AVS told me the immobiliser should be open until the ignition is active. So once ignition is active, the immobiliser relay should be telling that fuel pump relay to close which completes the circuit. But I'm not getting voltage at the relay in the rear triggered by the ECU, which leaves me back at the same assumption that that relay was never connected into the immobiliser. This is what I'm trying to verify, that my assumption is the most likely scenario and I'll go back to the alarm tech yet again that he needs to fix his work.      Here is the alarms wiring diagram, so my assumption is IM3A, IM3B, or both, aren't connected or improper. But this is all sealed up, with black wiring, and loomed  
    • Ceste, jak se mas Marek...sorry I only have english keyboard. Are you a fan of Poland's greatest band ever?   
×
×
  • Create New...