Jump to content
SAU Community

Recommended Posts

IMG_0125.jpg

IMG_0127.jpg

skygea

IMG_0129.jpg

looks really good with the stocky stagea rims on the skyline.. less ricer and looks a bit like a celica from the side.

more stealth is what im going for.

anyone want some cheap 18's ?

Edited by PetroDola
Those first two look just like the engine bay on my C34! :thumbsup:

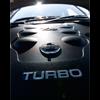
hehe its a dodgy pic ..doesnt really highlight my intake mods ... hiding in the dark with the grease and turbo.

i know.. haha its so easy to work on :)

now i can hassle c34 ppls for advice whilst avoiding those pesky skyliners , they got attitude problems :D

they just dont have the maturity of stagea owners. they'll grow up one day though :P

Edited by PetroDola
Retrofitted m35 stagea arx turbo actuator on hks gtrs turbo on the r33 - andys turbo saved the day.

found boost cut solonoid and disconnected it and now running proper ramping and auto duty cycling from the gizzmo without creep or boost drop off between gear changes.

retarded timing via cam angle sensor.

took off entire cooler and piping and front bumper inspected piping replaced silicon reducer to cooler that was split. gave cooler water test for leaks.. all good.

modified the plastic rubber intake pipe as it was squeezing in on itself under high boost to turbo with a stainless pipe. - because of this stock bov had to go ..and was blocked off for the time being to keep idle - with a plumbing one way valve- lawl. yes theres flutter.

Put in new ngk 7res plugs as previous owner had 6res in there and it was jumping spark to the side of plugs ..they were black as. (confirmed it had the blue spitfires in there .. he wasnt lying :blink:

Put in 4 litres of royal purple 5-40watt oil.

Degreased the entire engine bay.

Swapped out the 18's for 17' stagea m35 rims.. (18s tyres were like dragway slicks and total cop bait)

Ripped off rhs front panel that was dented and replaced with spare black gt panel.

Replaced dented mud gaurds on rhs.

wheel alignment monday and camber reset ..i dare say its out heaps as the hicas is going spazzo

pics to come.

mods to come -coil overs (the first thing - anyone know good sources?) ,sard fpr, sway bars , new front bushers , nismo lsd diff

proper plenum , z32 afm and 650cc injectors , , power fc is sitting on the garage floor (with tune) - new bonnet .. this one is mad dented

car was purchased 3 days ago and wouldnt even do a skid.. now kicks at 80!

What Have You Done To Your Stagea Today?, Mods and tunes, bring it on

:rolleyes:

What Have You Done To Your Stagea Today?, Mods and tunes, bring it on

:D

it got filled with empty boxes and its been sitting on the grass for 4 days since i dented its rim.. scared to drive it actually. :D

kept my promise on the ban.. until i get the rims fixed :D

Edited by PetroDola

Took the stagea on an excursion today.

Finally got my towbar fitted. It's only a 1200kg bar, but it should be good enough to tow the boat and the bikes.

The guys @ Salisbury towbars did an awesome job, dropped it off @9:30, picked it a 1pm all done.

Wiring is hidden in the spare wheel compartment, plenty of clearance to the exhaust and fuel tank.

DSC00924.jpg

DSC00921.jpg

DSC00922.jpg

DSC00923.jpg

Edited by Big Fella
Took the stagea on an excursion today.

Finally got my towbar fitted. It's only a 1200kg bar, but it should be good enough to tow the boat and the bikes.

The guys @ Salisbury towbars did an awesome job, dropped it off @9:30, picked it a 1pm all done.

Wiring is hidden in the spare wheel compartment, plenty of clearance to the exhaust and fuel tank.

Very nice fit. Missed the dayz kit. just as well. hayman reese are cheap. how much was yours delivered?

do want your tail light covers. missed out with mikes super duper bonanza sale. lol

Edited by dirtyRS4
Very nice fit. Missed the dayz kit. just as well. hayman reese are cheap. how much was yours delivered?

do want your tail light covers. missed out with mikes super duper bonanza sale. lol

Tow bar was custom made with hayman reese hitch. all up including wiring $380.

Salisbury towbars have done a few stageas now, but he does them all custom, no jig set up that i know of.

Could prob call him while it's fresh in his mind, he's the only bloke i found that knew what a stagea was and was willing to do it a reasonable price.

And no, my tailight covers are staying right where they are thanks.

Hi Robbie,What about Swaybar`s

they are still sitting on my bench in my shed, i managed to unwrap them today tho.

With all the towbar business i didn't get time to get my other car off the hoist and this one onto it.

while the towbar was quick to fit, Salisbury Towbars is about and a half from my place, so i ran outta daylight

Looks the goods, Bob. Not a fan of the gate being plumbed though :D

Have you put the swaybars on?! should have been the first job for the new hoist! :)

Bubba, how much of a difference do the swaybars make on a scale of 1-10?

Only got the front one on so far but I would say about 8, 10 would be a bigger whiteline bar (just get 33gtr whiteline if you want bigger). For the ~$50 per bar, excellent bang for buck upgrade!

With only the front on, turn in is very noticably better, steering is slightly heavier and there seems to be a tad more understeer BUT, I also put the tight as fk shimmed LSD in at the same time SO I actually think the push (understeer or tendancy to wash out in bends) is due to the diff as I have had to change my driving style to more like I drive the 32 with the 2-way.

Once I get the rear bar on, that should counter the slight push* and make it even more tail happy (hiflow + 2WD + LSD = super happy fun sideways time).

*Note: the push is only noticably when maintaining a speed round a long sweeping bend (and that feels more like the diff), or at like 2km/h when chucking a spewy.

P.S. welcome to come for a ride if you want, might even let you behind the wheel :D

Edited by bubba
Took the stagea on an excursion today.

Finally got my towbar fitted. It's only a 1200kg bar, but it should be good enough to tow the boat and the bikes.

The guys @ Salisbury towbars did an awesome job, dropped it off @9:30, picked it a 1pm all done.

Wiring is hidden in the spare wheel compartment, plenty of clearance to the exhaust and fuel tank.

+1

Got mine done earlier this year. They guy is good at towbars. I too got mine for the odd towing jobs for the house, and towing my bike around.

:D

Is that going to fit under the bonnet Bob?
I think so! Good thing about putting RB30 in Stagea is the extra height available compared to a Skyline. Also have FF plenum so all that stuff is gone from top of engine.
Looks the goods, Bob. Not a fan of the gate being plumbed though :D

Bubba, how much of a difference do the swaybars make on a scale of 1-10?

Massive increase in rear sway bar from skinny hollow one to 24mm solid was the biggest single improvement in handling on my S1! (Used to be called BNR11XXZ 24mm)

Create an account or sign in to comment

You need to be a member in order to leave a comment

Create an account

Sign up for a new account in our community. It's easy!

Register a new account

Sign in

Already have an account? Sign in here.

Sign In Now


  • Similar Content

  • Latest Posts

    • Place the new daughterboard in the case and mount it using the 3 small black rivets provided, and reconnect the 3 factory ribbon cables to the new board Then, use the 3 piggyback cables from the daughterboard into the factory board on top (there are stand offs in the case to keep them apart. and remember to reconnect the antenna and rear cover fan wires. 1 screw to hold the motherboard in place. Before closing the case, make a hole in the sticker covering a hole in the case and run the cable for the android unit into the plug there. The video forgot this step, so did I, so will you probably. Then redo the 4 screws on back, 2 each top and bottom, 3 each side and put the 2 brackets back on.....all ready to go and not that tricky really.      
    • Onto the android unit. You need to remove the top screen because there is a daughterboard to put inside the case. Each side vent pops out from clips; start at the bottom and carefully remove upwards (use a trim remover tool to avoid breaking anything). Then the lower screen and controls come out, 4 screws, a couple of clips (including 3 flimsy ones at the top) and 3 plugs on the rear. Then the upper screen, 4 screws and a bunch of plugs and she is out. From there, remove the mounting brackets (2 screws each), 4 screws on the rear, 2 screws top and bottom and 3 screws holding in the small plates on each side. When you remove the back cover (tight fit), watch out for the power cable for the fan, I removed it so I could put the back aside. The mainboard is held in by 1 screw in the middle, 1 aerial at the top and 3 ribbon cables. If you've ever done any laptop stuff the ribbon cables are OK to work with, just pop up the retainer and they slide out. If you are not familiar just grab a 12 year old from an iphone factory, they will know how it works The case should now look like this:
    • Switching the console was tricky. First there were 6 screws to remove, and also the little adapter loom and its screws had to come out. Also don't forget to remove the 2 screws holding the central locking receiver. Then there are 4 clips on either side....these were very tight in this case and needed careful persuading with a long flat screw driver....some force required but not enough to break them...this was probably the fiddliest part of the whole job. In my case I needed both the wiring loom and the central locking receiver module to swap across to the new one. That was it for the console, so "assembly is the reverse of disassembly"
    • But first....while I was there, I also swapped across the centre console box for the other style where the AV inputs don't intrude into the (very limited !) space.  Part# was 96926-4GA0A, 284H3-4GA0B, 284H3-4GA0A. (I've already swapped the top 12v socket for a USB bulkhead in this pic, it fit the hole without modification:) Comparison of the 2: Basically to do the console you need to remove the DS and PS side console trim (they slide up and back, held in by clips only) Then remove the back half of the console top trim with the cupholders, pops up, all clips again but be careful at the front as it is pretty flimsy. Then slide the shifter boot down, remove the spring clip, loose it forever somewhere in the car the pull the shift knob off. Remove the tiny plastic piece on DS near "P" and use something thin and long (most screwdrivers won't fit) to push down the interlock and put the shifter down in D for space. There is one screw at the front, then the shifter surround and ashtray lift up. There are 3 or 4 plugs underneath and it is off. Next is the rear cover of the centre console; you need to open the console lid, pop off the trim covering the lid hinge and undo the 2rd screw from the driver's side (the rest all need to come out later so you can do them all now and remove the lid) Then the rear cover unclips (6 clips), start at the top with a trim tool pulling backwards. Once it is off there are 2 screws facing rearwards to remove (need a short phillips for these) and you are done with the rear of the console. There are 4 plugs at the A/V box to unclip Then there are 2 screws at the front of the console, and 2 clips (pull up and back) and the console will come out.
    • So, a bit of a side trip, but one that might be interesting for people with JDM cars and japanese head units. I know @Pac previously posted about a carplay/android auto adapter he installed which used the AUX input, and @V35_Paul put in one of the Tesla style units that replace both screens. The option I went with was a Lsait LLT-YF-VER5.87_2 (https://www.alibaba.com/product-detail/Lsailt-8GB-Android-Multimedia-Interface-for_1601187633672.html). Price was $1,150 for a single unit although they are much cheaper if you are willing to buy 2....$857ea. Make you you get the version 2 not version 1, it is faster and has a better UI - this is the manufacturer listing: http://www.lsailt.com/product/348.html. BTW if you've never bought from Alibaba before, don't be concerned....these guys can't stay in business unless they are responsive, ship fast etc, they were excellent (probably faster shipping than most local places) So, this was my task for a lazy Sat afternoon....looks complex but was all done in a few hours (it probably helps that I had some of it apart before so it was a bit familiar). I also decided to add a HD USB drive recorded at the same time and the unit also supports an aftermarket reverse cam (if you don't want to retain factory) and also AV in and HDMI out It looks much worse than it is, in fact in was genuinely all plug and play (no custom wiring at all). This video was pretty good (skipped a few steps), unfortunately they are an Aussie seller but no longer sell this unit (I guess Carplay/AA adapters are easier to install and much cheaper) https://www.youtube.com/watch?v=T5hJfYOB8Dg
×
×
  • Create New...