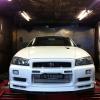
Jump to content
SAU Community

Recommended Posts

Here is my 2001 R34 GTR V-spec 2.

I've owned it for about a year and a half now. Its come a long way from since i bought it back in 09. The car use to have 350kw@wheels on the standard engine with tomei turbo's, v-cam, e85 etc. As usual, the power bug bites so i decided to have a big motor built. I chose Powertune Australia to build it because of the knowlegde and tech support they give when questioned. I've been to other workshops before but they didnt provide the extra edge/support i looked for in a workshop.

Engine :

Head -

Brian Crower custom Powertune spec cams

Brian Crower springs

Brian Crower valves

Brian Crower titanium retainers

Brian Crower adjustable cam gears

Powertune ported head

Block -

Brian Crower 2.8litre billet crank

Brian Crower rods

CP Pistons

Turbo -

Precision PT7175 Turbo (975HP)

2x Tial 38mm external wastegates

Powertune Exhaust manifold

Fuel System -

Powertune twin intank fuel pump kit

I.D. 2000cc injectors

Aeromotive fuel reg

Sard fuel rail

Misc -

Tomei oil pump

High Octane extended oil sump

Earls lines and fittings

Blitz air filter

ARC air separator

Greddy aluminium radiator

Greddy aluminium pulleys

Plazmaman drag intercooler

Mine's cam cover baffles

Garage Defend cf cooling panel

Kansai front strut brace

ARP head studs

Metal head gasket

ATI Balancer

Gates Racing timing belt

Haltech platinum pro sport ecu

Splitfire coilpacks

Optima dry cell battery

Transmission :

Standard Getrag 6 Speed

Ogura Quad plate clutch

Wheels :

Track - AME Tracer (grey) 18 x 10 +15 on Mickey Thompson ET Street radials

Street - TE37 (black) 19 x 9.5 +12 on Bridgstone Potenzas

Interior / Exterior :

Nismo MFD

Nismo B-pillar garnish

Nismo oil cap

Nismo gear knob

Nismo floor mats

Nismo 320kph cluster

Nismo GT tail lights

Bodyform copied nismo side skirts

Bodyform copied nismo rear pods

image0059o.jpg

image0038v.jpg

image0061rg.jpg

More pics of the build will be uploaded in the next few days.

  • Replies 296
  • Created
  • Last Reply

Top Posters In This Topic

The car got a run-in tune on 28/2/11. Drove it around town for 1000kms which wasnt too fun being restricted to 6000rpm.

Finally got it run in and lightly tuned on 1/3/11. we had trouble keeping it strapped to the dyno under boost. but here it is for now. will be upping it again soon. currently on 35psi. we needed 3ppl sitting in the boot and 2 ppl in the the car to keep the car partially down

image0097g.jpg

I drove the car to WSID on 2/3/11 the day after the 602kw tune. At the top of the track the car felt unstable at 230kph. So this morning i went to Heasman steering to get it checked out and this is how far off my wheel alignment settings were when i raced last night. Still running all the stock arms so camber still couldnt be taken out of the front or rear. but it goes straight now atleast. =)

http://www.youtube.com/watch?v=H7a2kboctz0

image0108s.jpg

image0107o.jpg

image0109c.jpg

Powercruise 2011! 4/3/11 I drove it to the event on friday, saturday and sunday and ran around the track racing anything and everything that wanted to line up. The car has proven its reliable and able to crush v8's / tubbed / supercharged cars. Nothing broke down, nothing overheated. I was out there on nearly every chance i had. was a blast and very fun event. Not bad for a car thats just been completed. =)

awsome....any video of your beast at power cruz

What do you think those last videos were??? lol

A credit to all involved with this build, top shelf stuff!

Performed flawless all weekend, was great to watch.

Please tell me you let the capri win in the final? There was no doubt that the gtr had it the whole race, except that very slow change into third :)

That is one damm impressive beast you have there Anthony. Please please get some better photos up of the engine bay. It looks killer

lol, will do.

=)

awsome....any video of your beast at power cruz

those last ones are all from powercruise.

=)

What do you think those last videos were??? lol

A credit to all involved with this build, top shelf stuff!

Performed flawless all weekend, was great to watch.

Please tell me you let the capri win in the final? There was no doubt that the gtr had it the whole race, except that very slow change into third :)

thank u! lol.

yea from 2nd gear i smashed it into 5th missing 3rd. then i pulled it out of 5th and smashed it into 3rd. i had alot of airspace on him just before that happened. its all on the incar camera. hahahaha all good. was a fun event that i'd love to do again.

=)

WOW

big dollar spend GTR, that actually geting USED.... now this is rare and nothing is blowing up either :)

i looked at the videos, "you photos needs a bit of work mate"

and thought to my self god he must be running a Dog box or something and read

Transmission :

Standard Getrag 6 Speed

Ogura Quad plate clutch

how on earth does the standard Getrag keep up with this much POWER , "i must abuse mine a bit more now"

if you can build this car then you can get a guy to take some nice photos of that engine bay

lol, car isnt done yet so no use in taking high res pics.

Awesome work!! Must be a great feeling to have so much kw's rushing through the blood :) any plans for the box? Is it 3rd gear that u start to annihilate everyone or u actually get into fourth?? Lol

yea, its about 3rd gear that i start passing. nah no plans for the box just yet. i think i gotta learn how to shift into 3rd a little slower and itll be ok,

=)

Create an account or sign in to comment

You need to be a member in order to leave a comment

Create an account

Sign up for a new account in our community. It's easy!

Register a new account

Sign in

Already have an account? Sign in here.

Sign In Now


  • Similar Content

  • Latest Posts

    • When I said "wiring diagram", I meant the car's wiring diagram. You need to understand how and when 12V appears on certain wires/terminals, when 0V is allowed to appear on certain wires/terminals (which is the difference between supply side switching, and earth side switching), for the way that the car is supposed to work without the immobiliser. Then you start looking for those voltages in the appropriate places at the appropriate times (ie, relay terminals, ECU terminals, fuel pump terminals, at different ignition switch positions, and at times such as "immediately after switching to ON" and "say, 5-10s after switching to ON". You will find that you are not getting what you need when and where you need it, and because you understand what you need and when, from working through the wiring diagram, you can then likely work out why you're not getting it. And that will lead you to the mess that has been made of the associated wires around the immobiliser. But seriously, there is no way that we will be able to find or lead you to the fault from here. You will have to do it at the car, because it will be something f**ked up, and there are a near infinite number of ways for it to be f**ked up. The wiring diagram will give you wire colours and pin numbers and so you can do continuity testing and voltage/time probing and start to work out what is right and what is wrong. I can only close my eyes and imagine a rat's nest of wiring under the dash. You can actually see and touch it.
    • So I found this: https://www.efihardware.com/temperature-sensor-voltage-calculator I didn't know what the pullup resistor is. So I thought if I used my table of known values I could estimate it by putting a value into the pullup resistor, and this should line up with the voltages I had measured. Eventually I got this table out of it by using 210ohms as the pullup resistor. 180C 0.232V - Predicted 175C 0.254V - Predicted 170C 0.278V - Predicted 165C 0.305V - Predicted 160C 0.336V - Predicted 155C 0.369V - Predicted 150C 0.407V - Predicted 145C 0.448V - Predicted 140C 0.494V - Predicted 135C 0.545V - Predicted 130C 0.603V - Predicted 125C 0.668V - Predicted 120C 0.740V - Predicted 115C 0.817V - Predicted 110C 0.914V - Predicted 105C 1.023V - Predicted 100C 1.15V 90C 1.42V - Predicted 85C 1.59V 80C 1.74V 75C 1.94V 70C 2.10V 65C 2.33V 60C 2.56V 58C 2.68V 57C 2.70V 56C 2.74V 55C 2.78V 54C 2.80V 50C 2.98V 49C 3.06V 47C 3.18V 45C 3.23V 43C 3.36V 40C 3.51V 37C 3.67V 35C 3.75V 30C 4.00V As before, the formula in HPTuners is here: https://www.hptuners.com/documentation/files/VCM-Scanner/Content/vcm_scanner/defining_a_transform.htm?Highlight=defining a transform Specifically: In my case I used 50C and 150C, given the sensor is supposedly for that. Input 1 = 2.98V Output 1 = 50C Input 2 = 0.407V Output 2 = 150C (0.407-2.98) / (150-50) -2.573/100 = -0.02573 2.98/-0.02573 + 47.045 = 50 So the corresponding formula should be: (Input / -0.02573) + 47.045 = Output.   If someone can confirm my math it'd be great. Supposedly you can pick any two pairs of the data to make this formula.
    • Well this shows me the fuel pump relay is inside the base of the drivers A Pillar, and goes into the main power wire, and it connects to the ignition. The alarm is.... in the base of the drivers A Pillar. The issue is that I'm not getting 12v to the pump at ignition which tells me that relay isn't being triggered. AVS told me the immobiliser should be open until the ignition is active. So once ignition is active, the immobiliser relay should be telling that fuel pump relay to close which completes the circuit. But I'm not getting voltage at the relay in the rear triggered by the ECU, which leaves me back at the same assumption that that relay was never connected into the immobiliser. This is what I'm trying to verify, that my assumption is the most likely scenario and I'll go back to the alarm tech yet again that he needs to fix his work.      Here is the alarms wiring diagram, so my assumption is IM3A, IM3B, or both, aren't connected or improper. But this is all sealed up, with black wiring, and loomed  
    • Ceste, jak se mas Marek...sorry I only have english keyboard. Are you a fan of Poland's greatest band ever?   
×
×
  • Create New...