Jump to content
SAU Community

Recommended Posts

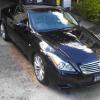
So i just bought a 2002 M35 Stagea and put it on my credit card.

I think i did pretty well on the price. Some will say way too cheap, there must be something wrong with it.

Truth is, it came from Plunket Rd car sales about a year ago and has been previously owned in Australia. I believe the former owner traded it in at a Holden Dealership and it ended up at Car City Ringwood.

I beat the guy down from $15K to $9.9K drive away and so im pretty happy that im not going to loose and money on it if i don't keep it too long.

Hopefully it will all work out. The car drove really nicely and the Turbo seems good.

A few points I'm looking for guidance on:

1. Transmittion has recently been serviced and the + and - are the wrong way around! push forward and it shifts down rather than up. is this simple to reverse the wires or something?

2. Aftermarket K&N air intake and filter. This is noisy as the cover plate on the filter box is removed. Can i get a cover for it?

Pictures here;

http://www.carsales.com.au/dealer/details/nissan-stagea-2002-11939566?vertical=Car&cr=1&eapi=2&__N=1216%201247%201252%201282%204294963846%204294960181%204294683075%20903&distance=25&silo=Stock&Range=Price:Min,Max~1|Mileage:Min,Max|Year:Min,Max|Seats:Min,Max|Power:Min,Max|TowingBrakes:Min,Max|EngineSize:Min,Max&sort=default

Thanks up front for any feedback.

Link to comment
https://www.sau.com.au/forums/topic/392928-5-spped-auto-and/
Share on other sites

  • Replies 93
  • Created
  • Last Reply

Top Posters In This Topic

A few points I'm looking for guidance on:

1. Transmittion has recently been serviced and the + and - are the wrong way around! push forward and it shifts down rather than up. is this simple to reverse the wires or something?

2. Aftermarket K&N air intake and filter. This is noisy as the cover plate on the filter box is removed. Can i get a cover for it?

Nice pick up. I reckon you're right about getting it for a good price - can't go wrong IMO.

re point 1. The previous owner did a very simple mod to CORRECT the way the gear box shifts in manual mode. Most on here will agree that it is more natural to push forward to shift down & pull back to change up (to do with G forces whilst braking/accelerating). This was the 1st mod I did on mine & I found it was so natural that I didn't have to look at the + / - markings, whereas before I was always looking because they are logically WRONG, lol.. If you really don't like it that way, it's easy to swap back. Just need to remove the centre console & you will see the switches with the wires.

re point 2. There maybe someone with one for sale. I have mine in a cupboard in case I want to put it back to stock. There is a small benefit in performance with it removed (especially if you put in the 'power duct' or homemade equivalent) but you will hear more induction noise. The thing is, if you intend to put a better exhaust on your car, you will find the induction noise will reduce heaps. On my car the induction noise (& over all noise) reduced to less than stock when I put an exhaust on.

Cheers, Leon.

I find the direction of the manual shift perfectly natural in standard form. Pulling the stick is like pulling down a gear and push forward for pushing up a gear. I wouldn't push forward to shift a gear down, doesn't seem right to move forward to go backwards a gear.

I find the direction of the manual shift perfectly natural in standard form. Pulling the stick is like pulling down a gear and push forward for pushing up a gear. I wouldn't push forward to shift a gear down, doesn't seem right to move forward to go backwards a gear.

Yeah, this subject is always polarised, but then I guess there's only 2 options, lol. There's plenty of manufacturers on either side of the camp.

Sequential g'boxes in rallying seem to be push forward to change down, & I feel much more comfortable doing the same. It's to do with the way braking forces act on your car/body (pushing you forward) as you slow down & change down thru the gears. Likewise, as you are forced back in your seat under acceleration, I find it more more natural to pull back to change up.

People can get used to doing it the opposite way (the way Nissan made it for our cars), but I (& many, many others) reckon the more natural way is the modded way. Try it, you may agree...:rolleyes:

Sequential g'boxes in rallying seem to be push forward to change down, & I feel much more comfortable doing the same. It's to do with the way braking forces act on your car/body (pushing you forward) as you slow down & change down thru the gears. Likewise, as you are forced back in your seat under acceleration, I find it more more natural to pull back to change up.

i think youre looking for the word 'inertia' :)

which agrees with the way we mostly have our cars setup, and not the way nissan (and skoda) says. i have paddles so i dont touch the selector now :P

I changed mine cause I always shifted the wrong way, because I'm so use to driving the 997 GT3 Cup car....ph34r.gif

tell the truth....you changed yours because you wanted to be awesome! Same reason you got that exhaust!

Great looking car, especially love the grille. Does the Nismo sticker mean anything?

Gear shift direction is definitely a personal thing. My sister has a HSV which is set up opposite to the Stag and one of the first things she commented to me was she wished it was the other way around. For those that have swapped the direction, can the + and - marks be swapped neatly or can they be removed? Otherwise this would be confusing to anyone else who may have to drive the car. I spose you could just ban anyone else from driving it biggrin.gif.

On a side note, gotta love accurate advertising. Looks more like an AR-X than a 250RS V, 139,000ks not 136,000, if it is rear drive type why does it have a snow button (OK, in the description it does say AWD), there's no dual climate button, the cruise, if it exists, must be aftermarket, and 4 speed.................why even bother writing anything.......... or am I being too picky? unsure.gif

You can't really remove the OEM Markings; as they're etched into the Stainless gate surround.

You could probably get a sticker maker to do some little round stickers, or maybe even get them to do something on vinyl and wrap the gate surround (C/F or Metal effect film?):whistling:

Edited by Daleo

Thanks for the comments and feedback guys.

QJQ, your spot on with the comments re the bad description.

I'm sure its an AR-X (for sure its all wheel drive) and the AX-R is the one that gets the plastic guards right?

Cruise control? I don't think so. Dual zone climate control? Certainly not!

Maybe I should threaten the dealer under the trade descriptions act :rolleyes: then he can fit aftermarket cruise control for me!!

As for the plus and minus on the shift, i might change it back to stock the way Nissan intended. My V36 Coupe is the standard way around and now I'm perfectly comfortable with that; best keep them both the same way.

Guys, i have another question.

The standard stereo is coming out and will be replaced with a unit that has bluetooth phone connection. I'm wondering if its possible to remove the boost pressure and battery gauge at the same time and put in a double din head unit instead. Why exactly would I need the boost gauge anyway, the needle never moves on the gauges anyway.

The middle gauge for the battery works fine but the other two do nothing, is this normal?

Cheers

Chris

:thanks:

The torque split gauge only moves when there's a loss of traction; in a stocker, you won't see much action. Give it a punt on some dirt or grass; it'll move.

The boost gauge has an issue with dry solder joint's and Scotty did a "how to fix" on that, it's quite easy.

Link; http://www.skylinesaustralia.com/forums/topic/297345-m35-factory-boost-gauge-repair/page__p__4951320__hl__boost+sensor+fix__fromsearch__1#entry4951320

There's no reason why you can't remove them though.:thumbsup:

You can get a holder for the boost gauge and put it somehwere else.

Also, in a M35 the 3 gauges are joined together by a printed circuit board - big effort required (impossible?) to separate. And as Dale said, the boost gauge is close to useless for discerning exactly what's happening.

Create an account or sign in to comment

You need to be a member in order to leave a comment

Create an account

Sign up for a new account in our community. It's easy!

Register a new account

Sign in

Already have an account? Sign in here.

Sign In Now


  • Similar Content

  • Latest Posts

    • Hi, is the HKS  Tower Bar still available ? negotiable ? 🤔
    • From there, it is really just test and assemble. Plug the adapter cables from the unit into the back of the screen, then the other side to the car harness. Don't forget all the other plugs too! Run the cables behind the unit and screw it back into place (4 screws) and you should now have 3 cables to run from the top screen to the android unit. I ran them along the DS of the other AV units in the gap between their backets and the console, and used some corrugated tubing on the sharp edges of the bracket so the wires were safe. Plug the centre console and lower screen in temporarily and turn the car to ACC, the AV should fire up as normal. Hold the back button for 3 sec and Android should appear on the top screen. You need to set the input to Aux for audio (more on that later). I put the unit under the AC duct in the centre console, with the wifi antenna on top of the AC duct near the shifter, the bluetooth antenna on the AC duct under the centre console The GPS unit on top of the DS to AC duct; they all seem to work OK there are are out of the way. Neat cable routing is a pain. For the drive recorder I mounted it near the rear view mirror and run the cable in the headlining, across the a pillar and then down the inside of the a pillar seal to the DS lower dash. From there it goes across and to one USB input for the unit. The second USB input is attached to the ECUtec OBD dongle and the 3rd goes to the USB bulkhead connected I added in the centre console. This is how the centre console looks "tidied" up Note I didn't install the provided speaker, didn't use the 2.5mm IPod in line or the piggyback loom for the Ipod or change any DIP switches; they seem to only be required if you need to use the Ipod input rather than the AUX input. That's it, install done, I'll follow up with a separate post on how the unit works, but in summary it retains all factory functions and inputs (so I still use my phone to the car for calls), reverse still works like factory etc.
    • Place the new daughterboard in the case and mount it using the 3 small black rivets provided, and reconnect the 3 factory ribbon cables to the new board Then, use the 3 piggyback cables from the daughterboard into the factory board on top (there are stand offs in the case to keep them apart. and remember to reconnect the antenna and rear cover fan wires. 1 screw to hold the motherboard in place. Before closing the case, make a hole in the sticker covering a hole in the case and run the cable for the android unit into the plug there. The video forgot this step, so did I, so will you probably. Then redo the 4 screws on back, 2 each top and bottom, 3 each side and put the 2 brackets back on.....all ready to go and not that tricky really.      
    • Onto the android unit. You need to remove the top screen because there is a daughterboard to put inside the case. Each side vent pops out from clips; start at the bottom and carefully remove upwards (use a trim remover tool to avoid breaking anything). Then the lower screen and controls come out, 4 screws, a couple of clips (including 3 flimsy ones at the top) and 3 plugs on the rear. Then the upper screen, 4 screws and a bunch of plugs and she is out. From there, remove the mounting brackets (2 screws each), 4 screws on the rear, 2 screws top and bottom and 3 screws holding in the small plates on each side. When you remove the back cover (tight fit), watch out for the power cable for the fan, I removed it so I could put the back aside. The mainboard is held in by 1 screw in the middle, 1 aerial at the top and 3 ribbon cables. If you've ever done any laptop stuff the ribbon cables are OK to work with, just pop up the retainer and they slide out. If you are not familiar just grab a 12 year old from an iphone factory, they will know how it works The case should now look like this:
    • Switching the console was tricky. First there were 6 screws to remove, and also the little adapter loom and its screws had to come out. Also don't forget to remove the 2 screws holding the central locking receiver. Then there are 4 clips on either side....these were very tight in this case and needed careful persuading with a long flat screw driver....some force required but not enough to break them...this was probably the fiddliest part of the whole job. In my case I needed both the wiring loom and the central locking receiver module to swap across to the new one. That was it for the console, so "assembly is the reverse of disassembly"
×
×
  • Create New...