Jump to content
SAU Community

Recommended Posts

Okay so first off hello.
I'd like to begin this Build buy giving you a little history, before this I owned a 99 Subaru Forester, which started fairly stock N/A manual.

img3430q.jpg

The motor blew In that so I bought a wrx sti halfcut and transplanted that, plus a whole lot more.

IMG_9177_zpsa997e2a2.jpg

66wl.jpg

I then Sold that an purchased myself a very rough N/A R32 RB20DE Neo
Had some nice extras (Genuine Nardi, Factory Cupholders)
I then got into my first car accident and destroyed it.

image_zpsb1d882b9.jpeg

image1_zps8e063f05.jpeg

image2_zpse1608b56.jpeg

The reason theres no "Before" shot of this beauty is because I did not have the time to take one before totalling the poor thing. :( But it wasn't all bad because I got a fairly generous insurance payout for it, and purchased my current vehicle.

A 1992 R32 Gts-t, This originally was one of the few automatic rb25de r32's to come out but has been converted since.
And so we begin the build.

image3_zpsd2e6029a.jpeg

image8_zpsae3197b5.jpeg

The day I got her (minus strut brace) - had some ugly sideskirts and wheels straight out of Need for Speed. But there were big plans ahead. First had to make a Pod box to hide the filter.

image5_zps194385d4.jpeg

image6_zpsc85880fa.jpeg

image7_zps9848740c.jpeg

image9_zpsc6f9116a.jpeg

Next up decided to remove the sound deadening from the backseats, and boot (as it already was missing boot interior why not go the whole 9 yards?)

image11_zps524bf9b8.jpeg

image29_zps594c4dbf.jpeg

image30_zps43117d3f.jpeg

Next up was interior, as it was already in pretty good shape I decided to try and keep it fairly simple.

Got myself a sparco steering wheel, sparco quick release, nrg short boss kit along with a sparco shifter.

I also change the ugly green and white dash cluster back to the original grey with purple led's

I did the aircon unit and rest of the din area while I was at it all in purple.

image13_zpsaa1619f5.jpeg

image15_zpse0406c9c.jpeg

image20_zps324592e6.jpeg

image28_zps28cef7a0.jpeg

Also picked up some gtr seats which needed some fixing for faily cheap so sewed them up and put them in, much better! :)

image33_zps4c63dd59.jpeg

Moving onto the exterior I had big plans, slowly starting to gather all of the bolt on bits and pieces I'd be adding.

This included the following:

n1 vents for the gtr front bar

gtr grill

gtr bonnet with n1 lip

n1 sideskirts

gtr overfenders

trust rear pods

dmax roof wing

dmax boot wing

Slowly but surely I got it all together and began trimming up the fibreglass pieces and text fitting them.

image19_zps5760ed79.jpeg

image17_zpsf5c843f5.jpeg

image18_zps7c34f065.jpeg

image22_zps9cffa27d.jpeg

image23_zpsb1e99856.jpeg

image24_zpsbe1da572.jpeg

image27_zps678fa1b5.jpeg

Got myself some new pipes made up and got rid of the cannon,

image31_zpsa16215da.jpeg

image32_zpsf30d78ea.jpeg

(To Be Continued)

Link to comment
https://www.sau.com.au/forums/topic/450093-justins-r32-gts-t/
Share on other sites

Part 2

Saw a few gtr's with this headlight/radiator ducting so decided to have a go making my own and they came out great :)

image34_zpsdf2edfbf.jpeg

image35_zps54b7cc19.jpeg

image36_zps7a7022ea.jpeg

image37_zpsd3b74534.jpeg

The oppertunity then came up to get a new set of wheels to help fill out the widebody that would be going on eventually.

Came across a set of work equip 05's 18x9.5 +38 front and 18x10.5 +38 rears with 25mm bolt on spacers all round

image38_zpsf5065a9d.jpeg

image39_zps1e062e0c.jpeg

image40_zps59e1381c.jpeg

Uni holidays came around and It was time to start prepping the car for paint along with the rest of the bits and pieces.

As this is a budget build and very much DIY I opted to paint it myself, I'd never done this before so it was going to be interesting.

image41_zps0752a561.jpeg

image42_zpsb5fb8c51.jpeg

image43_zps0eb0e492.jpeg

image44_zpsddf25803.jpeg

image45_zps5fbe4e7d.jpeg

image46_zps28cd88a9.jpeg

image47_zps2e025759.jpeg

image48_zpsd82740ca.jpeg

Dad got involved, he was a way better painter than I was so I was real glad.

image49_zps2d289b19.jpeg

it turned out "good from a far, far from good" type deal, and will need some serious cutting/polishing still but It was black and for that I was happy.

image50_zps64b21c0a.jpeg

I then began wetsanding with 2000grit paper then using some no name cut and polish compound, not really knowing too well what I was doing but it seemed to be working ok for the moment, plus I knew I had to sand back the orange peel anyways.

image51_zps4a622bd9.jpeg

Then to start adding on bits and pieces, N1 bonnet lip to start.

image52_zps9f1becd6.jpeg

Covered up that hack job I did on the bonnet well :)

image53_zps121dac15.jpeg

Trust rear pods were next along with the Boot and Roof spoiler and front sections of the N1 skirts and more strenuous sanding and polishing

image54_zpseaa19723.jpeg

image56_zpsa07dd684.jpeg

image57_zps3230d3b8.jpeg

By now end of semester is coming up and the car has been put on hold, I drive it daily so It's still in a reasonably presentable condition. But when uni finishes I will be able to get it finished. Thanks for reading!

P.s apologies for the mass info and picture dump. A lot has happened since I got her :)

Well I measured both front and rear when I bought em and the fronts were 10" and rears were 11" minusing off the beads on either side would make them a 9.5 and 10.5 wide, although I could easily be off with the offset, the inside of the rears were rubbing on the control arm.

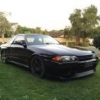
Quick update on this, I have started cutting back most of the paint, and have most of the bits and pieces on, Also have some gtr front fenders to be painted and fitted soon. Skirts and rear overfenders also yet to go on. But heres how the paints looking :)

10805130_10152516354368651_942539602_n.j

10799443_10152516354388651_408768464_n.j

Create an account or sign in to comment

You need to be a member in order to leave a comment

Create an account

Sign up for a new account in our community. It's easy!

Register a new account

Sign in

Already have an account? Sign in here.

Sign In Now


  • Similar Content

  • Latest Posts

    • You just need to remove the compressor housing, not the entire turbo. I would not be drilling and tapping anything with the housing still on anyways. 
    • So, I put my boat on a boat. First of all, I'm going to come out and say it. Why is Tasmania not considered a holy goal, an apex that all road-legal modified cars go to, to experience? This place is an absolute wonderland of titanic proportions. If people are already getting club runs for once in a lifetime 30 person cruises to Tassy then I've never seemed to see it. It is like someone replaced the entire place with an idyllic wonderland for cars, and all of the people living there with paid actors who are kind, humble, and friendly. Dear god. After doing a lap of almost all of the place I've found that it's a great way to find out all of the little things that the car isn't doing quite right and a great way to figure it all out. All in all, I drove for 4 hours a day for a week and nothing broke. I didn't even need to open the engine bay. This is by all means a great success, but it has left me with a list of things to potentially address. I also now have a 3D printed wheel fitment tool which annoyingly hasn't got any threads in it to actually assemble it. I might be able to tape it together to check the sizing I actually want to use, but it'll likely involving pulling the shocks out to properly measure travel at least at the front, and probably raise the car while I'm at it, at least in the rear. I scraped on quite a few things and I'm not sure how else to go about it. I was taking anything with a bump at what felt like 89 degree angles. And address those 10 other tasks. And wash the car. God damn it is dirty. And somehow, the weather was perfect the entire time - And because I was on the top of Mt Wellington it turns out it was very much about to freeze up there. I did something I typically never do and took some photos up there in what must have been -10 and the foggy felt like suspended ice, rather than mere fog. If you own a car in Australia, you owe it to yourself to do it.
    • Damn that was hilarious, and a bit embarrassing for skylines in general 😂 vintage car life ey. That R33 really stomped. Pretty entertaining stuff
    • Hi, I have a r32 gtr transmission. Does any of you guys have an idea how much power it will hold with the billet center plate and stock gearset? At what power level and use did yours brake with or without billet plate? Thanks, Oystein Lovik
    • Saw this replica police car based on a Mitsubishi Starion XX parked next to a 'police box' (it's literally a box) in Hirohata, Himeji City in Hyogo prefecture the other day. It's owned by Morii-san who is a local Mitsubishi Starion enthusiast. According to a local radio station blog post, he always wanted to make a police car himself based on ones he saw in his favourite Manga comics.  As it's illegal to modify a car to look like a police car and drive on the road, Morii-san tried many times to get permission from Aboshi police station headquarters nearby. They refused initially by after they got tired of that they granted him permission. However, the car can only be displayed on private property and obviously can't be registered as long as the police livery is present. The car was completed at a cost of 1.5 million yen (US$ 10,000) in addition to the car cost. A location was chosen outside Hirohata Police box where the car can easily been seen from the street. Morii-san has two other Starion road cars, both widebody GSR-VRs.
×
×
  • Create New...