Jump to content
SAU Community

Recommended Posts

6 hours ago, Milkmun said:

Hey man do you use the same fluid pump for diff and gear box oil? Also, where you getting the redline stuff from? 

I used the same pump for both, it didn't like the diff oil as it's so thick, so i had to warm it up a little on my ducted heater to make it flow better. The redline oil i got from the Rolan ebay store when they had a 20% off deal. Was $80 delivered for the gallon, normally $99 delivered. I wouldn't use it on a perfect condition gearbox though. If your gearbox has crunching issues, go right ahead. For me, it solved a 4th gear crunch problem but on cold morning starts the first few shifts from 1st to 2nd can be a little knotchy so i shift very carefully. Once its warmed a little it's all good.

For what it's worth my AR1s look terrible but are still producing lap times. 

They are a really odd tyre, like weird pressures, have weird heat cycle characteristics, "feel" weird when they get hot, but at the same time, the lap times keep falling despite the tyres getting more worn. 

We'll see what the can do at Logic in a weeks time as they are 3 events older since the last time I was there. 


Agree, they do keep producing times but my best time at Sandown was done when they where brand new, 2nd session out. The $ are burning a hole in my pocket. So want to buy new set but on the other hand dont want to scrap tyres with some life still left in them. Can't win. First world problems.

  • 2 weeks later...

Got out to PI yesterday. Was dry till about 3pm. I did a few laps in the wet and then packed it up. There was plenty of track time before the rain.

The tyres produced the goods in the dry  I was able to  improve my pb to a 1:50.63 in the second session. Was trying to break into the 49's but it was not to be. Tyres still look ok, so will run them at Sandown on the 29th.

Was a good fun day, had a bit of a go down the straight with a 2002 porsche 996TT. Got a draught on him out of t12 and then out braked him into t1, he played it pretty safe. The next time i tried it, i couldn't get close enough to pass down the straight but drove around him in t1. Had a big grin on my face.

 Also had a bit of a scrap with a very quick new civic type r. Had the measure on him around most corners surprisingly but couldn't pass as he was all over the place under brakes (my turn to play it safe). What really surprised me was i couldn't catch it down the straight, don't know what he had done to it but it was matching the 33's straight line speed. Quite impressive.

The photo guy from sd pics picked my car to do a montage of. Looked good but at $275 i passed. I did have a good look at all the pics he took, the car looked pretty settled in most but i did notice a bit of flex in the front splitter, its going to need some sort of support/bracing in the middle of it. 

Towards the end of the day, car developed an exhaust leak from somewhere, i did some investigating today and checked all the bolts around the turbo and manifold, there was a few not so tight ones, hopefully that was it or hot side will be coming off soon.

Some race chrono data. 

Screenshot_2018-09-10-19-25-23-01.thumb.png.8f6d0cd45b4d562735b46260121e3f58.png


Screenshot_2018-09-10-19-24-54-61.thumb.png.2fd7da303df084609197187a971631e3.png


And vid of best lap.


  • Like 1

I edited out the stuff ups to make myself look super smooth, seems to have payed off. There was still a bit of sideways action out of mg.

Footage is from a dash cam, not a fancy gopro. I dont think there is any way to overlay the data. If there is, im too lazy to work it out, lol[emoji12]

Thanks for that, ill check it out.

I would have to go through all the footage looking for the stuff ups, i'll see what i can do, no promises. There was only 1 incident, which saw 2 wheels on the grass. Nothing spectacular.

On 9/11/2018 at 8:34 AM, admS15 said:

I edited out the stuff ups to make myself look super smooth, seems to have payed off. There was still a bit of sideways action out of mg.

Footage is from a dash cam, not a fancy gopro. I dont think there is any way to overlay the data. If there is, im too lazy to work it out, lolemoji12.png

Racechrono Pro is suprisingly OK to do this, all you really have to do is get the raw video (from any source) and get it onto your phone for the app to see it. You can then overlay them on top of one another to sync them up.
 

Then Racechrono Pro will export the completed video to another file on your phone which you can then copy off and upload etc. Other than moving the file to/from your phone to actually merge them, it's quite intuitive to actually use 

As above, I've done this before I had a GoPro as I've had RC-Pro for a while. 

The syncing is a bit of a stuff around imo and having RC control the GoPro (or other supported camera) for you automatically is a nice bonus you miss out on also. 


  • 3 weeks later...

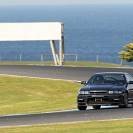
Another track day completed and another PB, this time at Sandown at the SAU track day, managed a 1:22.77. Still on the 1 year old, very used nangkangs.


Had some issues during the day with pushing coolant into the overflow. I did notice the rad cap was weeping earlier this week, so hope that is it. Not keen on ripping the head off. Car wasn't heating up, temps where still normal at 90° max. We ran some long sessions during the day and i did a double stint at one stage when i had missed my group after a fuel run, this obviously didn't help the situation. Will replace cap and re assess vat next track day.


Also had issues with the brake pedal going soft at the end of a session. Id go for the brake at the end of the cool down lap and there would be nothing there. Would come good by next session. The fluid isn't fresh so thought it might just be that. After i got home and was putting the street wheels on, there was dampness around the rr calliper. Pulled the pads out to have a look and the seal is fubarred. Not sure if this had anything to do with the soft pedal as i didn't lose any fluid during the day. By this morning, all the brake fluid leaked out, so i either need to replace the calliper or get a seal kit and rebuild.


Overall happy with the cars performance and although i had some issues, they didn't affect my day too much.

Some pics

IMG20180929160003.thumb.jpg.7045f4c49845116a4afc48a6acb36db3.jpg


IMG20180929160032.thumb.jpg.3ebb531085344abd80aa333fab2f853e.jpg

RC data.

Screenshot_2018-09-30-19-25-32-98.thumb.png.b403e8f620c9cb0d8f32a3dca5fe9288.png

Screenshot_2018-09-30-19-25-54-81.thumb.png.0c459058b36b1659a41b9997a18225af.png

Screenshot_2018-09-30-19-26-10-15.thumb.png.28c8faf95720993368cebb57ddeb0939.png

Video

@ActionDan i tried overlaying data on the video, didn't work out and i gave up. Will try again some other time.


Thanks for trying!

A seal kit is cheap and very simple to install, good time to paint/powder coat calipers etc if you're into that.

I've rebuilt all mine myself and none of them have leaked, there's no heaps to it. To be fair, none of them were leaking when I got them, I just thought it would be good idea to freshen up before thrashing them.

Only need basic tools, make sure everything is clean and smooth, that's about it. I also did my master etc, also fine. 
 

Well done on the PB!


Edited by ActionDan

Create an account or sign in to comment

You need to be a member in order to leave a comment

Create an account

Sign up for a new account in our community. It's easy!

Register a new account

Sign in

Already have an account? Sign in here.

Sign In Now


  • Similar Content

  • Latest Posts

    • Stock ECU (or more accurately stock tune) absolutely refuses to go over 10psi and behaves like you have seen. The Nistune is the same if it is the stock tune. If the Nistune chip has been tuned, the resulting tune could be literally anything for any combination of parts. The Nistune just makes the stock ECU Tunable.
    • So stock ECU does not like anything above 10 psi?  That Nistune one is just for "try" if it will be any different, I know it need to be tune for that. I know but YOU may know about these problem but i/we dont. They few little Skylines here let alone people who know anything about tham so that is why iam asking here  
    • So now we have a radiator with no attachments whatsoever. It lifts up with a particularly tight spot between the drivers side air box mount and the lower radiator outlet, but if you've got this far you will sort that too. This is the lower mounts with the rad out so you can see where the rubber bushes go, it is a straight shot upwards Done! Assembly is the reverse of disassembly, with blood less likely to be shed.
    • Right, onto the second last trick. The Air Con condenser is mounted to the front of the radiator and stays in the car when the radiator is removed. There are 2x 10mm headed self tappers holding the top of the condenser to the radiator, remove those The bottom of the condenser is attached to the radiator with clips. You need to lift the condenser out of those clips and clear (up, then forward). f**ked if  could work out how to do that last bit with the front bumper on. I hope you can, and you share the trick.  Bumper removal probably deserves its own thread one day once I've recovered the will to live, but basically you need to remove the wheels, front inner guard liners (clips and 10mm headed bolts), the self tapper between the guard and the bumper at the rearmost point of the bumper (same as an R32 that bit), any remaining clips at the top/front of the grill, an absolute bastard design with a plate that holds the top of the bumper above the headlight each side (only 1 bolt which is tricky to get to, but the plate catches 2 places on the bumper and must be removed....carefully!) and push clips between the bumper and guard under the headlight. If you've done all that you will be faced with wiring for the fog lights on both sides and in ADM Q50 RS at least, 4 nasty tight plugs on the driver's side for the ADAS stuff. So, the clips at the bottom look like this on drivers side (looking from the front) And on the passenger side (also from the front), you can see this one is already out Clearance on both of these are super tight; the condenser needs to move up but the upper rad support mount prevents that, and the radiator can't move down far because it is (rubber) mounted. Once you achieve the impossible and drop the condenser off those mounts so it does not stop the rad moving, you are good to go
    • OK, next the shroud needs to come off and there are a couple of tricks. Firstly, there is a loom from near the passenger side headlight to the fans, coolant temp sensor etc and there is no plug to undo.  In my case I was OK to leave the shroud on top of the engine so I just undid the passenger side fan plug and about 10 of the clips which gave enough free wire to put it aside. The fan plugs were super tight, the trick I used was a small falt screwdriver to push down on the release tab, then a larger flat screwdriver to lever the plug out of the fan unit....be careful with how much force you apply! If you need to remove the shroud altogether for some reason you will have to deal with all the plugs (tight) and clips (brittle)....good luck. I removed all of the clips and replaced them with cable ties that I will just cut next time. Also, in the Red Sport / 400R at least, the intake heat exchanger reservoir hose is bolted to the shroud in 2 places with 10mm headed bolts; so remove them (the hose stays in the car; no need to undo it at the t fittings down at the radiator lower mount. Once you've dealt with the HX hose and the wiring loom, there are 3x 10mm headed self tappers holding the top of the shroud to the radiator; remove those.   The shroud then lifts out of the bottom mounts where it sits on the radiator, up and onto the engine out of the way. Simples
×
×
  • Create New...