Jump to content
SAU Community

Recommended Posts

Okay so the first time it started to misfire and throw the error code 21 I swapped the OEM coils out with brand new yellow jackets coil packs and replaced the spark plugs with brand new NGK iridiums at approximately 80,000ks. The yellow jackets stayed in the car for around 10,000ks until the car started acting up again. I contacted the supplier and they had informed me that they must have had some kind of malfunction, I sent them back and had another brand new set sent out to me under warranty. Had the new set installed and the issue was fixed again.. until now...

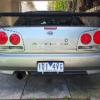
I have now done approximately another 10,000ks and the problem has arisen again. The car is a 1999 r34 25gt-v (rb25de neo).

I bought the car with 77,000ks on the clock and since then I've only driven around 30,000ks. It now sits on 113,000ks.

Is there anything that would be contributing to the coil packs failing? An underlying problem perhaps?

Anyone with similar issues?

Link to comment
https://www.sau.com.au/forums/topic/468341-help-coil-packs-keep-failing/
Share on other sites

Your problem is the coilpacks themselves. The yellow jackets are known to give trouble. You should contact the supplier again as he constantly tells people on this forum that his coilpacks are good and he has the best customer service, support and warranty. @performancewise

  • Like 1
Your problem is the coilpacks themselves. The yellow jackets are known to give trouble. You should contact the supplier again as he constantly tells people on this forum that his coilpacks are good and he has the best customer service, support and warranty. @performancewise


Actually the last time I dealt with @performancewise it was a really unpleasant experience. I found the supplier to be extremely rude, ill mannered and extremely difficult to talk too.. I'm sure at some point in time I was actually threatened.. on top of all of that the product doesn't even work as it should. We exchanged emails for a period of time until eventually he gave in and sent me out the replacement set that I desperately needed. Now that it has happened again I don't think that I want to go through the whole process and then keep repeating the process every 10,000ks because of a junk dodgy product. I would much rather stay clear of @performancewise and their dodgy scam. I would encourage anyone thinking of buying yellow jackets to definitely re-think their options!
  • Like 1
2 hours ago, er34gtv said:

I'd still like to explore this topic, so if anyone else has any thoughts on the subject please let me know.

What do you want to explore?  There are many cases of Yellow Jackets failing although presumably many have not.

Buy OEM coils or Splitfires or step up to LS2 Truck coils or something like AEM coils.

What do you want to explore?  There are many cases of Yellow Jackets failing although presumably many have not.
Buy OEM coils or Splitfires or step up to LS2 Truck coils or something like AEM coils.


Was just curious to explore the chance of something else setting the coil packs up for failure under the presumption that the new yellow jackets couldn't possibly of failed again after only 10,000ks. However I seem to be proven wrong as after more and more research its looking like the yellow jacket coil packs are the problem themselves. Will definitely be going with splitfires or ls2 coils the next time around.


They said yellow jackets never fail. That's there were no reported cases...

@performance-wise

Surely he will help you out.


That's what I heard too haha.. Im now thinking all the hype was driven by @performance-wise himself in an act to market his product and uphold some sort of reputation.

The only possible way @performance-wise could help me out is by fully refunding me the total costs of the coil packs. I would not dare go near another set of yellow jackets as I can't afford the added mechanic bill every 10,000ks and I certainly can't afford my car being off the road as its my sole form of transport.

I was being sarcastic lol.

There was a huge discussion a few months ago driven by @performace-wise. But alas he doesn't care about the negatives. Only the success stories.

You're better off going split fire coils. Drop in and don't worry.

  • Like 2
20 hours ago, er34gtv said:


Actually the last time I dealt with @performancewise it was a really unpleasant experience. I found the supplier to be extremely rude, ill mannered and extremely difficult to talk too.. I'm sure at some point in time I was actually threatened.. on top of all of that the product doesn't even work as it should. We exchanged emails for a period of time until eventually he gave in and sent me out the replacement set that I desperately needed. Now that it has happened again I don't think that I want to go through the whole process and then keep repeating the process every 10,000ks because of a junk dodgy product. I would much rather stay clear of @performancewise and their dodgy scam. I would encourage anyone thinking of buying yellow jackets to definitely re-think their options!


ohhh that is gold. I mean hey dude, sorry to hear of your issue, but another customer confirming the shiteness of the operation; I am glad people speak up about this, so good sellers succeed and bad ones GTFO>

  • 3 months later...

Thanks for everyone's recommendations. I went with the Splitfires in the end. Got them on an eBay auction for $400 including postage. Installed them myself. Definitely recommend going against the yellow jacket brand for anyone looking for new coilpacks. After countless hours of research and plenty of first hand experience they have proven to be straight poo.

  • Like 1

Somebody should set up a poll:

I have Yellow jackets that work

vs

I have yellow jackets that worked once.

I had my own intimate 'buying experience' with performance-wise some years ago - it wasn't coil packs though.


  • Like 1
On 01/04/2017 at 10:10 AM, GH05T said:

yeah, i dont mean to be "that guy" but i dont know why we still have them pushed commercially on these forums.

 Because we aren't allowed to post up negative experiences with any company or product on the forum, only positive 

Create an account or sign in to comment

You need to be a member in order to leave a comment

Create an account

Sign up for a new account in our community. It's easy!

Register a new account

Sign in

Already have an account? Sign in here.

Sign In Now


  • Similar Content

  • Latest Posts

    • Did this end up working? Did you take some pictures?
    • And finally, the front lower mount. It was doubly weird. Firstly, the lower mount is held in with a bracket that has 3 bolts (it also acts as the steering lock stop), and then a nut on the shock lower mount itself. So, remove the 3x 14mm head bolts , then the 17mm nut that holds the shock in. From there, you can't actually remove the shock from the lower mount bolt (took me a while to work that out....) Sadly I don't have a pic of the other side, but the swaybar mounts to the same bolt that holds the shock in. You need to push that swaybar mount/bolt back so the shock can be pulled out past the lower control arm.  In this pic you can see the bolt partly pushed back, but it had to go further than that to release the shock. Once the shock is out, putting the new one in is "reverse of disassembly". Put the top of the shock through at least one hole and put a nut on loosely to hold it in place. Put the lower end in place and push the swaybar mount / shock bolt back in place, then loosely attach the other 2 top nuts. Bolt the bracket back in place with the 14mm head bolts and finally put the nut onto the lower bolt. Done....you have new suspension on your v37!
    • And now to the front.  No pics of the 3 nuts holding the front struts on, they are easy to spot. Undo 2 and leave the closest one on loosely. Underneath we have to deal with the wiring again, but this time its worse because the plug is behind the guard liner. You'll have to decide how much of the guard liner to remove, I undid the lower liner's top, inside and lower clips, but didn't pull it full off the guard. Same issue undoing the plug as at the rear, you need to firmly push the release clip from below while equally firmly gripping the plug body and pulling it out of  the socket. I used my fancy electrical disconnect pliers to get in there There is also one clip for the wiring, unlike at the rear I could not get behind it so just had to lever it up and out.....not in great condition to re-use in future.
    • Onto the rear lower shock mount. It's worth starting with a decent degrease to remove 10+ years of road grime, and perhaps also spray a penetrating oil on the shock lower nut. Don't forget to include the shock wiring and plug in the clean.... Deal with the wiring first; you need to release 2 clips where the wiring goes into the bracket (use long nose pliers behind the bracket to compress the clip so you can reuse it), and the rubber mount slides out, then release the plug.  I found it very hard to unplug, from underneath you can compress the tab with a screwdriver or similar, and gently but firmly pull the plug out of the socket (regular pliers may help but don't put too much pressure on the plastic. The lower mount is straightforward, 17mm nut and you can pull the shock out. As I wasn't putting a standard shock back in, I gave the car side wiring socket a generous gob of dialectric grease to keep crap out in the future. Putting the new shock in is straightforward, feed it into at least 1 of the bolt holes at the top and reach around to put a nut on it to hold it up. Then put on the other 2 top nuts loosely and put the shock onto the lower mounting bolt (you may need to lift the hub a little if the new shock is shorter). Tighten the lower nut and 3 upper nuts and you are done. In my case the BC Racing shocks came assembled for the fronts, but the rears needed to re-use the factory strut tops. For that you need spring compressors to take the pressure off the top nut (they are compressed enough when the spring can move between the top and bottom spring seats. Then a 17mm ring spanner to undo the nut while using an 8mm open spanner to stop the shaft turning (or, if you are really lucky you might get it off with a rattle gun).
    • You will now be able to lift the parcel shelf trim enough to get to the shock cover bolts; if you need to full remove the parcel shelf trim for some reason you also remove the escutcheons around the rear seat release and you will have to unplug the high stop light wiring from the boot. Next up is removal of the bracket; 6 nuts and a bolt Good news, you've finally got to the strut top! Remove the dust cover and the 3 shock mount nuts (perhaps leave 1 on lightly for now....) Same on the other side, but easier now you've done it all before
×
×
  • Create New...