Jump to content
SAU Community

Recommended Posts

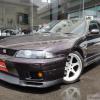
Hello everyone. I came across a set of rims that I really like. So I got just one rim to test fit.

First it's a r33 gtr. They are 18x11 and fits the rear perfectly, but I'll have to roll all the arches. The front looks to need a 1 inch spacer or pretty close to an inch.

This is with the car lifter off the wheels. I'm not planning on the stretch Tire look. I want a 285/30/18 on these wheels.


Now that you know the situation. Does anyone know of a brake upgrade that will free up caliper space. The rim has a concave pattern and the more I go out the faster I get more clearance space. But a flatter caliper and bigger rotor will work. Other wise I may do a brake down grade. I hate the thought.


Any ideas would be great. Wheels are cheap wheels and only have one offset.

20170224_185224.jpeg20170224_175801.jpeg20170224_175753.jpeg

Link to comment
https://www.sau.com.au/forums/topic/469220-brakes-causing-clearance-issues/
Share on other sites

Mate you're going to spend a lot more than 4 x $189 to 'get these to fit', unless you pick up the angle grinder. Not worth compromising your brakes just to save some money on wheels especially if you have a nice car like the GTR.

Also unless you're already got fully adjustable everything in the suspension (front and rear camber arms, tension arms, traction rods etc.) it's likely you'll have to install those too, to get your alignment anywhere near decent.

As you already know. 324mm rotors with the brembos won't fit, if you went with 350mm rotors they probably still won't fit, but you can try this by spacing the caliper out 25mm and see if it clears the spokes.

Otherwise its spacers time, but if you're like me and don't trust spacers with your life.

It's new wheel time, something genuine, something that will last more than a year and still stay round.

So offset wise the std front Brembos are hitting the spokes of the rim? If they are bloody big 18s I am guessing that radially there is loads of space?


If the wheels have a heavy curve to them and by the time the spoke hits the outer rim hub you may get away with running calipers for bigger brakes.  I know there is a big difference in sizes of calipers and IMO you should undo the two bolts that hold the caliper to the hub. With the pads still in wiggled them out so that the pads still bit on the caliper and just pull them out half the pad depth and then try to fit the wheel. If moving the caliper out radially 15-20mm gets you the clearance you need then you can quite easily find a 355-365mm brake setup that uses a caliper that has a slower profile and is more snug to the rotor than the std Brembos

  • Like 1

I see from their website that they are cheap wheels (presumably cast) and come in a range of offsets but maybe you have a second hand set at a cheaper price. Anyway if they had an offset that took them away from the calipers they would stick out more from the guards. Maybe they are not the right design for your car.

ok well they're barely gonna "fit" as it is, let alone spacing anything further. 

if you do get them under the guards with stretched tires excessive camber, no inner guards,  gards rolling, pumping, bashing ect, their gonna ride lie shit, look like ass and will not be worth a 1100 set of wheels.


not trying to rag on your car man but i would sell them on and get something thats gonna work.


  • Like 1
5 minutes ago, GH05T said:

ok well they're barely gonna "fit" as it is, let alone spacing anything further. 

if you do get them under the guards with stretched tires excessive camber, no inner guards,  gards rolling, pumping, bashing ect, their gonna ride lie shit, look like ass and will not be worth a 1100 set of wheels.


not trying to rag on your car man but i would sell them on and get something thats gonna work.


Work CR Kiwami, looks tough, is light, won't shatter like glass.

  • Like 1

I used 15mm spacers and worked great. Just got the last 3 rims and tires. Thanks for all the input guys. Spacing the caliper helped a bit, but wasn't enough. I used 15mm spacers and it works. The rear isn't a problem it was the front. These wheels only come in +8 in 18x11 the way i see it is I have 2 option both have spacers involved one a thinner spacer than the other. I have a r32 gtr with 10.5 meister and they did stick out alot but after lowering it and rolling the gaurds it was absolutely perfect. These seems like it's going in the same direction. When I space the caliper out I'll need like a 5mm spacer and that workable. When. The calipers in the original location. I need a 15mm spacer. I made a test spacer and took my coilovers out to jack the wheel up. It looks like my r32 very close but can clear if I roll the gaurds. I will do that soon. I fitted 285/30/18 on this rim today and will test fit this weekend. I'll post photos. As the car in the photo is a customers. I have to roll his gaurds to. Perfect timing.

I might be in for trouble. I'm not scard. Just nervous. Lol. May not work tho. I only have one wheel so far for testing. I see the bigger caliper and smaller spacer working. Inner gaurds I usually use a heat gun and reshape them to fit. Here is a photo of my r32 and at stock high the wheels stuck out 1 inch IMG-20160508-WA0008.jpeg

I'm getting these to work period.
Some guys over here put Cadillac cts calipers on 240sx. I rather that kind of problems. I have a set I bought some time back. And I can try them on this gtr. If it fits s14s then I should be able to fit them on this r33 gtr. There option I just have to work through them inner clears is plenty.

This sounds like the shitest idea ever. U buy a gtr but u want to put some really shit cheap wheels on just coz they r cheap[emoji53]
The amount of ghetto work you are doing to try and get them to fit sounds really unsafe.

  • Like 2

Create an account or sign in to comment

You need to be a member in order to leave a comment

Create an account

Sign up for a new account in our community. It's easy!

Register a new account

Sign in

Already have an account? Sign in here.

Sign In Now


  • Similar Content

  • Latest Posts

    • Hi, is the HKS  Tower Bar still available ? negotiable ? 🤔
    • From there, it is really just test and assemble. Plug the adapter cables from the unit into the back of the screen, then the other side to the car harness. Don't forget all the other plugs too! Run the cables behind the unit and screw it back into place (4 screws) and you should now have 3 cables to run from the top screen to the android unit. I ran them along the DS of the other AV units in the gap between their backets and the console, and used some corrugated tubing on the sharp edges of the bracket so the wires were safe. Plug the centre console and lower screen in temporarily and turn the car to ACC, the AV should fire up as normal. Hold the back button for 3 sec and Android should appear on the top screen. You need to set the input to Aux for audio (more on that later). I put the unit under the AC duct in the centre console, with the wifi antenna on top of the AC duct near the shifter, the bluetooth antenna on the AC duct under the centre console The GPS unit on top of the DS to AC duct; they all seem to work OK there are are out of the way. Neat cable routing is a pain. For the drive recorder I mounted it near the rear view mirror and run the cable in the headlining, across the a pillar and then down the inside of the a pillar seal to the DS lower dash. From there it goes across and to one USB input for the unit. The second USB input is attached to the ECUtec OBD dongle and the 3rd goes to the USB bulkhead connected I added in the centre console. This is how the centre console looks "tidied" up Note I didn't install the provided speaker, didn't use the 2.5mm IPod in line or the piggyback loom for the Ipod or change any DIP switches; they seem to only be required if you need to use the Ipod input rather than the AUX input. That's it, install done, I'll follow up with a separate post on how the unit works, but in summary it retains all factory functions and inputs (so I still use my phone to the car for calls), reverse still works like factory etc.
    • Place the new daughterboard in the case and mount it using the 3 small black rivets provided, and reconnect the 3 factory ribbon cables to the new board Then, use the 3 piggyback cables from the daughterboard into the factory board on top (there are stand offs in the case to keep them apart. and remember to reconnect the antenna and rear cover fan wires. 1 screw to hold the motherboard in place. Before closing the case, make a hole in the sticker covering a hole in the case and run the cable for the android unit into the plug there. The video forgot this step, so did I, so will you probably. Then redo the 4 screws on back, 2 each top and bottom, 3 each side and put the 2 brackets back on.....all ready to go and not that tricky really.      
    • Onto the android unit. You need to remove the top screen because there is a daughterboard to put inside the case. Each side vent pops out from clips; start at the bottom and carefully remove upwards (use a trim remover tool to avoid breaking anything). Then the lower screen and controls come out, 4 screws, a couple of clips (including 3 flimsy ones at the top) and 3 plugs on the rear. Then the upper screen, 4 screws and a bunch of plugs and she is out. From there, remove the mounting brackets (2 screws each), 4 screws on the rear, 2 screws top and bottom and 3 screws holding in the small plates on each side. When you remove the back cover (tight fit), watch out for the power cable for the fan, I removed it so I could put the back aside. The mainboard is held in by 1 screw in the middle, 1 aerial at the top and 3 ribbon cables. If you've ever done any laptop stuff the ribbon cables are OK to work with, just pop up the retainer and they slide out. If you are not familiar just grab a 12 year old from an iphone factory, they will know how it works The case should now look like this:
    • Switching the console was tricky. First there were 6 screws to remove, and also the little adapter loom and its screws had to come out. Also don't forget to remove the 2 screws holding the central locking receiver. Then there are 4 clips on either side....these were very tight in this case and needed careful persuading with a long flat screw driver....some force required but not enough to break them...this was probably the fiddliest part of the whole job. In my case I needed both the wiring loom and the central locking receiver module to swap across to the new one. That was it for the console, so "assembly is the reverse of disassembly"
×
×
  • Create New...