Jump to content
SAU Community

Recommended Posts

Hey Guys,

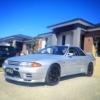
Just thought I would let you know that I left my car with Vu from DT Panels to do some paint work on my midnight purple R33 GTR, and I am a happy man.

My car has a badly cracked front bar, as well as numerous stone chips, chipped vented bonnet and poorly painted rear pods. The guys from DT Panels painted all items at 1/3 of the price of anyone else I asked and have done a great job!!! Great no fuss service, quality work at a fabulous price!!

I know most of you guys might have a few small items that need painting, but always hold off because of cost, as I did, but these guys were great.

Highly recommend them to anyone on the SAU forums:)

Edited by glaze
Link to comment
https://www.sau.com.au/forums/topic/313687-dt-panels/
Share on other sites

  • Replies 76
  • Created
  • Last Reply

Top Posters In This Topic

Yea they did my whole car. Am happy with the majority of it but there are a few things bothering me. Which they refuse to fix

thats the general consensus i hear and i found the same good for the price but not perfect, not that i had a whole car sprayed but yeh

Link to comment
https://www.sau.com.au/forums/topic/313687-dt-panels/#findComment-5151527
Share on other sites

I'm not 100% happy with my last job, yes they fixed the crack, but they sprayed over it, the paint has gone and I can see the crack that they were paid to fix now...I haven't been back there to ask them about this one.

Link to comment
https://www.sau.com.au/forums/topic/313687-dt-panels/#findComment-5151723
Share on other sites

I was parked in town today and unfortunately returned to my car with an ugly dent at the front of my bonnet, on

my gtt. Looks like a wanker with a tow ball reversed into it.

It's the size of a golf ball and has scratched off a bit of paint. Does anyone have any idea how much it should cost to fix?

Grr!

Link to comment
https://www.sau.com.au/forums/topic/313687-dt-panels/#findComment-5151757
Share on other sites

Yea they did my whole car. Am happy with the majority of it but there are a few things bothering me. Which they refuse to fix

Same boat. Everything I've ever had back has had something wrong with it. I've been told to f*ck off now so yeah... I need a new panel beater :thumbsup:

Don't ask me for details as I won't give them, I've learnt my lesson there before. Shame, I had considered Vu my friend and sent plenty of work his way.

Link to comment
https://www.sau.com.au/forums/topic/313687-dt-panels/#findComment-5151851
Share on other sites

I am glad other SAU members have posted there experiences, as I will continue to do the same with all the people I employ to work on my GTR. I will keep an eye on my panels to see if anything comes up and post the results, but for me so far so good.

Link to comment
https://www.sau.com.au/forums/topic/313687-dt-panels/#findComment-5152065
Share on other sites

was just down there today, and was having a chat about new processes and equipment, from what i could tell things have stepped up a couple of notches. And I had my whole car and kit resprayed there, and most people know what the condition/quality of my paint is like (nearly 4 years on now)

i guess there is always going to be good and bad experiences at every workshop (still never heard of one bad word about Race Pace though, hahah, exception that proves the rule perhaps) and i don't want to be the devils advocate but there are 2 sides to every story, and panel beating sometimes can just be about making the best of what's been given to you if budget is not a huge one. Hopefully the above concerns are not related to after market fibreglass kits etc, because like i said... you can only do so much with what's been presented sometimes. Just my 2 cents.

bit sad to hear Julz that it's come to what it's come to for you :) I tell a lot of people to head to Vu as well.

Kris, everything seemed ok when i was chatting to you about your car at RE the other night? something pop-up since? sorry to hear as well

got any pics 'glaze'? ;)

Link to comment
https://www.sau.com.au/forums/topic/313687-dt-panels/#findComment-5152067
Share on other sites

Sadly, that's not a probable course of action - yet...

Everyone knows the rules, at least for once people are following them, hence it's stayed open. I'm as surprised as the next person.

That said no doubt by the end of the w/e there will be someone that just can't help themselves and this thread won't be here come Monday.

Link to comment
https://www.sau.com.au/forums/topic/313687-dt-panels/#findComment-5152078
Share on other sites

vu has always been obliging, and some of the paint work he has done for me is good and his prices are awesome. however there are issues that i have spotted after the fact and now im cbf going back to him with them. i'll be taking my car somewhere else next time though

Link to comment
https://www.sau.com.au/forums/topic/313687-dt-panels/#findComment-5152189
Share on other sites

Get what you pay for guys...this never rings truer than when it comes to automotive services because the whole industry is built around break even and shitty cash flow.

Agreed, I think I'll drop back there and ask if they are willing to fix up the issue or not, if not would posting pics be against SAU rules?

I'm not quite sure if posting pics of what my current lower lip looks like is "slandering" or not...

Link to comment
https://www.sau.com.au/forums/topic/313687-dt-panels/#findComment-5152229
Share on other sites

^^ It would probably be better not to.

Glaze you got pics of your beast? At least show us the result and make this thread even more interesting!

Yes yes you do indeed get what you pay for...you cant expect the job to be perfect considering the money you pay and how quickly they move cars through there.

Now if you went to a place like say MP Smash in clayton you would pay alot more but they spend x10 more time prepping the car and all of their customers are x10 more happy with the end result.

But hey lets take it easy in here because it is in fact really good to read about peoples experiences with something as crucial as paintwork without the thread being closed.

Link to comment
https://www.sau.com.au/forums/topic/313687-dt-panels/#findComment-5152258
Share on other sites

Get what you pay for guys...this never rings truer than when it comes to automotive services because the whole industry is built around break even and shitty cash flow.

That's true. But my point to him was I that I never dictated the prices he charged me. I'd been going there for about 4 years.

I'm not here to badmouth anyone. So no I will not be posting pictures or giving details, but anyone is welcome to look at my car in person and make up their own mind.

Link to comment
https://www.sau.com.au/forums/topic/313687-dt-panels/#findComment-5152293
Share on other sites

Guest
This topic is now closed to further replies.


  • Similar Content

  • Latest Posts

    • Hi, is the HKS  Tower Bar still available ? negotiable ? 🤔
    • From there, it is really just test and assemble. Plug the adapter cables from the unit into the back of the screen, then the other side to the car harness. Don't forget all the other plugs too! Run the cables behind the unit and screw it back into place (4 screws) and you should now have 3 cables to run from the top screen to the android unit. I ran them along the DS of the other AV units in the gap between their backets and the console, and used some corrugated tubing on the sharp edges of the bracket so the wires were safe. Plug the centre console and lower screen in temporarily and turn the car to ACC, the AV should fire up as normal. Hold the back button for 3 sec and Android should appear on the top screen. You need to set the input to Aux for audio (more on that later). I put the unit under the AC duct in the centre console, with the wifi antenna on top of the AC duct near the shifter, the bluetooth antenna on the AC duct under the centre console The GPS unit on top of the DS to AC duct; they all seem to work OK there are are out of the way. Neat cable routing is a pain. For the drive recorder I mounted it near the rear view mirror and run the cable in the headlining, across the a pillar and then down the inside of the a pillar seal to the DS lower dash. From there it goes across and to one USB input for the unit. The second USB input is attached to the ECUtec OBD dongle and the 3rd goes to the USB bulkhead connected I added in the centre console. This is how the centre console looks "tidied" up Note I didn't install the provided speaker, didn't use the 2.5mm IPod in line or the piggyback loom for the Ipod or change any DIP switches; they seem to only be required if you need to use the Ipod input rather than the AUX input. That's it, install done, I'll follow up with a separate post on how the unit works, but in summary it retains all factory functions and inputs (so I still use my phone to the car for calls), reverse still works like factory etc.
    • Place the new daughterboard in the case and mount it using the 3 small black rivets provided, and reconnect the 3 factory ribbon cables to the new board Then, use the 3 piggyback cables from the daughterboard into the factory board on top (there are stand offs in the case to keep them apart. and remember to reconnect the antenna and rear cover fan wires. 1 screw to hold the motherboard in place. Before closing the case, make a hole in the sticker covering a hole in the case and run the cable for the android unit into the plug there. The video forgot this step, so did I, so will you probably. Then redo the 4 screws on back, 2 each top and bottom, 3 each side and put the 2 brackets back on.....all ready to go and not that tricky really.      
    • Onto the android unit. You need to remove the top screen because there is a daughterboard to put inside the case. Each side vent pops out from clips; start at the bottom and carefully remove upwards (use a trim remover tool to avoid breaking anything). Then the lower screen and controls come out, 4 screws, a couple of clips (including 3 flimsy ones at the top) and 3 plugs on the rear. Then the upper screen, 4 screws and a bunch of plugs and she is out. From there, remove the mounting brackets (2 screws each), 4 screws on the rear, 2 screws top and bottom and 3 screws holding in the small plates on each side. When you remove the back cover (tight fit), watch out for the power cable for the fan, I removed it so I could put the back aside. The mainboard is held in by 1 screw in the middle, 1 aerial at the top and 3 ribbon cables. If you've ever done any laptop stuff the ribbon cables are OK to work with, just pop up the retainer and they slide out. If you are not familiar just grab a 12 year old from an iphone factory, they will know how it works The case should now look like this:
    • Switching the console was tricky. First there were 6 screws to remove, and also the little adapter loom and its screws had to come out. Also don't forget to remove the 2 screws holding the central locking receiver. Then there are 4 clips on either side....these were very tight in this case and needed careful persuading with a long flat screw driver....some force required but not enough to break them...this was probably the fiddliest part of the whole job. In my case I needed both the wiring loom and the central locking receiver module to swap across to the new one. That was it for the console, so "assembly is the reverse of disassembly"
×
×
  • Create New...