Jump to content
SAU Community

Recommended Posts

Hey Guys,

Just thought I'd make a new thread for my GTS Build instead of flooding the other one.

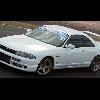
Here is the before shot

skyline1.jpg

One ugly, poorly maintained, unloved skyline. Set me back $3500.

It's a 1996 R33 Skyline GTS, that's been turboed; albeit poorly.

Previous mods included:

Stupid head unit that's totally unfathomable.

Apexi PowerFC with Commander.

Greddy electronic boost controller.

lots of B&M gauges mounted on the dash.

FMIC

Stock R33 turbo that didn't have the water lines connected to it.

17" Multi fit 5 spoke mags.

Inside the car it was all pretty good, a couple of cigarette burns but that was about it. Exterior was less than perfect, on the drivers side there was a deep scratch all the way along the door and the drivers side guard had some damage too, looked like someone backed into it. Paint needs a good cut and polish but should come up OK.

The car's engine was quite broken and had some noisy bearings so that had to come out first thing. Gearbox had also seen better days and a replacement is on the way.

Suspension\bushes\steering..... lets just not go there OK, it's quite broken.

As far as clapped out Skylines go I think I took the cake.

The original plan was to drift it the way I got it and see how I went from there, seeing as everything was broken and such activities would have been dangerous\insane I decided to bite the bullet and spend the big bucks up front to get something nice.

So now, the exciting bits...

the shopping list goes like this

Engine

Nissan N1 Oil & water Pumps

Nitto Crank collar to suit N1 oil pump

New Low temp Thermostat

Nitto 1.2mm head gasket

ACL Race bearings

Nitto Forged Pistons

Nitto forged H-beam rods

Machine Head & Block

Linish crank

Bore and Hone

Nismo 740cc injectors

Tomei Poncams

Management

Haltech Plug in Pro ECU

Turbo

Garret 3076R

Powertune high mount manifold

44m Tial Wastegate

Suspension

BC Adjustable Coilovers

Tune agent Adjustable Castor Rods

Whiteline blade adjustable Swaybars

Drivetrain

Stock RB25DET gearbox

Tomei Traxx 1.5way mechanical LSD

Roll cage

Built by AZ.

Brakes

Atm they're stock NA brakes.

Not sure what to get as yet

I've also changed the hubs to 5 stud ones.

We're aiming for about 300 plus KW

Nick and Ben over at GT garage are doing all the work for me and they're doing a wonderful job too! Couldn't be happier.

Here are some pics of the cage going in.

IMG_0456.jpg

IMG_0455.jpg

IMG_0454.jpg

Plenty more to come :D

Edited by zoidbergmerc
  • Like 1
Link to comment
https://www.sau.com.au/forums/topic/352798-zoids-gts-build/
Share on other sites

nice man.. as for brakes, try find some R34gtr brembos? or AP 6 pot fronts :P

gtr brembo's are so overpriced

you can get 34 gtt brakes for about $400 (310mm)

or the ksport ones from justjap are big for cheap (~350mm rotor and 8pot brakes, $2k)

but someone has started a group buy on willowood 6pot 332mm kit for $1.8k which would be pretty good (it uses 2 piece rotors so they are lighter)

Link to comment
https://www.sau.com.au/forums/topic/352798-zoids-gts-build/#findComment-5656552
Share on other sites

I saw this the other day when in GT, cage looks the goods.

As for brakes I'd go std R34 GTT with fresh 'rebuilt' callipers (new seals etc) with braided lines, plain (or slotted, but never drilled) fresh rotor with Ferodo DS3000 pads and some decent fluid like Motul RBF 600.

Pretty much exactly what I'll do on my R34 (cept maybe with a more streetable pad)

Oh, and a line locker may come in handy :P

Good build, can’t wait till it’s done!

Link to comment
https://www.sau.com.au/forums/topic/352798-zoids-gts-build/#findComment-5656569
Share on other sites

gtr brembo's are so overpriced

you can get 34 gtt brakes for about $400 (310mm)

or the ksport ones from justjap are big for cheap (~350mm rotor and 8pot brakes, $2k)

GT-T brakes are good, but aren't even close to GT-R Brembos. You get roughly what you pay for.

KSports are charlie chan china rubbish.

Can buy 330mm 240SX wilwood superlite kits out of the states for ~$1500 to your door.

Instead of GT-T brakes you could always just grab some stock GTS-T ones, dogbones and 330mm rotors.

Link to comment
https://www.sau.com.au/forums/topic/352798-zoids-gts-build/#findComment-5657281
Share on other sites

yeah I want to keep my 17s for cheaper skids so I reckon the R34 GTT Brakes are going to have to do, I'll just some nice fluid and pads.

Does anyone have R34 GTT Brakes they want to get rid of?

Link to comment
https://www.sau.com.au/forums/topic/352798-zoids-gts-build/#findComment-5658726
Share on other sites

  • 3 weeks later...

Almost finished now. Dummy fitted the engine, turbo and plenum so Az could work his magic on the front, dump, screamer. and IC piping. Did a fantastic job too :D

High Mount Manifold made by Az Custom, should look the goods once it's painted! Can see the screamer in there too.

IMG_20110304_172446.jpg

Big ol Sexy front pipe.

IMG_20110304_172436.jpg

Plazmaman Plenum and Throttle body ready to go.

IMG_20110304_172418.jpg

Link to comment
https://www.sau.com.au/forums/topic/352798-zoids-gts-build/#findComment-5702348
Share on other sites

Hey mate, looking good. Very interested in seeing the outcome :) Have you driven it much with the whiteline sway bars on? I'm looking at grabbing some of these myself but have been struggling to find any decent reviews for R33's. Also, what're you thinking of for front/rear strut brace?

Jay

Link to comment
https://www.sau.com.au/forums/topic/352798-zoids-gts-build/#findComment-5702988
Share on other sites

I've driven this car from the Docks in Hobart to Moonah and that was it; the engine integrity was too low to continue. Strut braces were already on the car when I go it so I guess I'll keep them, not sure what brand they are.

I've got whiteline non-adjustable sways on my WRX and they totally transformed the car, the difference is day and night, knocked the understeer on the head and enabled me to get some nice turn in oversteer if I require it.

Once this car is going I'll be sure to tell you all about it :)

Link to comment
https://www.sau.com.au/forums/topic/352798-zoids-gts-build/#findComment-5703049
Share on other sites

putting a bodykit on mate? painting it? wot wheels u thinking? looks like ur investing some decent dollars into it, how far away from completion is it? looking good! can't wait to hear the screamer ;)

I got a TypeM plastic front end for it the other day from another member on here. Looks nice with the rest of the standard kit. I might see if I can get some new front guards to replace the ones on it as the drivers side has some damage on it.

As for paint, white is OK for now, I'm trying to convince a mate of mine who is a very talented artist to airbrush it but he's rather nervous about it because he's not done a car before.

Wheels I've got a set of 17" Gmax Drifts in white for it, might make them black though. White wheels on a white car... not so sure. I've also got the 17" that came on it, they're a little on the cheap\heavy side though.

Yes it's a lot of money but it's also going to be a lot of fun :D Plus Nick at GT Garage is looking after me thumbsup.gif

Thought it would be best to do it now while I've got some money before other stuff like houses and children come up.

Link to comment
https://www.sau.com.au/forums/topic/352798-zoids-gts-build/#findComment-5704140
Share on other sites

Create an account or sign in to comment

You need to be a member in order to leave a comment

Create an account

Sign up for a new account in our community. It's easy!

Register a new account

Sign in

Already have an account? Sign in here.

Sign In Now


  • Similar Content

  • Latest Posts

    • Hi, is the HKS  Tower Bar still available ? negotiable ? 🤔
    • From there, it is really just test and assemble. Plug the adapter cables from the unit into the back of the screen, then the other side to the car harness. Don't forget all the other plugs too! Run the cables behind the unit and screw it back into place (4 screws) and you should now have 3 cables to run from the top screen to the android unit. I ran them along the DS of the other AV units in the gap between their backets and the console, and used some corrugated tubing on the sharp edges of the bracket so the wires were safe. Plug the centre console and lower screen in temporarily and turn the car to ACC, the AV should fire up as normal. Hold the back button for 3 sec and Android should appear on the top screen. You need to set the input to Aux for audio (more on that later). I put the unit under the AC duct in the centre console, with the wifi antenna on top of the AC duct near the shifter, the bluetooth antenna on the AC duct under the centre console The GPS unit on top of the DS to AC duct; they all seem to work OK there are are out of the way. Neat cable routing is a pain. For the drive recorder I mounted it near the rear view mirror and run the cable in the headlining, across the a pillar and then down the inside of the a pillar seal to the DS lower dash. From there it goes across and to one USB input for the unit. The second USB input is attached to the ECUtec OBD dongle and the 3rd goes to the USB bulkhead connected I added in the centre console. This is how the centre console looks "tidied" up Note I didn't install the provided speaker, didn't use the 2.5mm IPod in line or the piggyback loom for the Ipod or change any DIP switches; they seem to only be required if you need to use the Ipod input rather than the AUX input. That's it, install done, I'll follow up with a separate post on how the unit works, but in summary it retains all factory functions and inputs (so I still use my phone to the car for calls), reverse still works like factory etc.
    • Place the new daughterboard in the case and mount it using the 3 small black rivets provided, and reconnect the 3 factory ribbon cables to the new board Then, use the 3 piggyback cables from the daughterboard into the factory board on top (there are stand offs in the case to keep them apart. and remember to reconnect the antenna and rear cover fan wires. 1 screw to hold the motherboard in place. Before closing the case, make a hole in the sticker covering a hole in the case and run the cable for the android unit into the plug there. The video forgot this step, so did I, so will you probably. Then redo the 4 screws on back, 2 each top and bottom, 3 each side and put the 2 brackets back on.....all ready to go and not that tricky really.      
    • Onto the android unit. You need to remove the top screen because there is a daughterboard to put inside the case. Each side vent pops out from clips; start at the bottom and carefully remove upwards (use a trim remover tool to avoid breaking anything). Then the lower screen and controls come out, 4 screws, a couple of clips (including 3 flimsy ones at the top) and 3 plugs on the rear. Then the upper screen, 4 screws and a bunch of plugs and she is out. From there, remove the mounting brackets (2 screws each), 4 screws on the rear, 2 screws top and bottom and 3 screws holding in the small plates on each side. When you remove the back cover (tight fit), watch out for the power cable for the fan, I removed it so I could put the back aside. The mainboard is held in by 1 screw in the middle, 1 aerial at the top and 3 ribbon cables. If you've ever done any laptop stuff the ribbon cables are OK to work with, just pop up the retainer and they slide out. If you are not familiar just grab a 12 year old from an iphone factory, they will know how it works The case should now look like this:
    • Switching the console was tricky. First there were 6 screws to remove, and also the little adapter loom and its screws had to come out. Also don't forget to remove the 2 screws holding the central locking receiver. Then there are 4 clips on either side....these were very tight in this case and needed careful persuading with a long flat screw driver....some force required but not enough to break them...this was probably the fiddliest part of the whole job. In my case I needed both the wiring loom and the central locking receiver module to swap across to the new one. That was it for the console, so "assembly is the reverse of disassembly"
×
×
  • Create New...