Jump to content
SAU Community

Recommended Posts

Engine is finished now :D

Only a week to get it Tuned and run in.

Nick and Ben over at GT Garage are doing an amazing job and working their fingers to the bone in order to get it done before the weekend so I can go in the Tas Drift Festival.

Some engine pron for you

engine7.jpg

Super happy fun times await. Hopefully I can pull a decent slide in it; it'd be a little embarrassing if I couldn't pinch.gif

Holy jesus that's one sexy looking engine bay... I'll be dropping in to the drift festival for a few hours today, keep your bonnet open and I'll come and have a looksie. Good luck with the competition, hope to see it in action!

Jay

I'm pretty sure this cars day went something like this:

1. Off

2. Warm up lap

3. Limiter

4. Limiter

5. Limiter

6. Go home time

Sounded awesome and the engine definitely looks the part (thanks for leaving the bonnet wide open, had a good perve).

Interested to see exactly how you mounted your fire extinguisher, it's exactly where I was planning on putting mine :) Oh, and how'd those sway bars feel? Any adjustments on the day?

It was just an issue with fuel surging on spin out (as they didn't get time to fit the surge tank), was just playing it safe towing it off for a cool down and a check over.

Engine was run in on the dyno before the day.

Edited by SKiT_R31

Yeah I'm pretty sure it's the squishy fat thing in the middle that's letting the car down at the moment. But having never driven a RWD car with more than 60kw I think I'm going OK. Managed to link up the S's by the end of the day, got my hand out the window once too haha. Going to give her a go at the super sprints next week, hopefully I can get this car going with in a 10th of it's potential.

Here are some pics of my weekend :)

Loading up at GT

_1019316Medium.jpg

All loaded up :)

_1019321Medium.jpg

Quite intimidating :S

_1019322Medium.jpg

Pretty engine bay

_1019323Medium.jpg

Last minute touch ups with Dr. House...

_1019324Medium.jpg

First time giving it a boot full

_1019330Medium.jpg

-

_1019331Medium.jpg

Screamer pipe on full noise

_1019332Medium.jpg

Brown Trousers time

_1019333Medium.jpg

At this point I remembered my training... Kick the clutch 2m from the Apex....

_1019334Medium.jpg

Yeahhhhh!

_1019336Medium.jpg

Awwwwww

_1019337Medium.jpg

Just managed to hold on.

_1019339Medium.jpg

This hasn't gone to plan.

_1019340Medium.jpg

Yep...

_1019341Medium.jpg

Not gone well

_1019342Medium.jpg

No one saw that right...

_1019343Medium.jpg

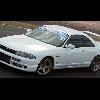
The white menace lining up for Qualifying.

_1019349Medium.jpg

Trying to regain some dignity after the Driftkahna by frying em...

_1019377Medium.jpg

Still Sexy

_1019404Medium.jpg

Such a great weekend, one I'll remember all my life. Went from overwhelming excitement, to nausea inducing nerves, to sky high excitement and overall satisfaction.

Can't thank Nick and Ben at GT Garage enough for the enormous amount of work they've done on the car getting it from a clapped out ricer to the monster it is now, all in only 2 months.

Thanks for posting that up Dan, must have been at the end of the day when I was getting the hang of it.

Interested to see exactly how you mounted your fire extinguisher, it's exactly where I was planning on putting mine :) Oh, and how'd those sway bars feel? Any adjustments on the day?

Sway bars were really nice, the whole suspension setup was really really good, couldn't fault it at all, zero understeer, the car just did exactly what I told it to do, which most of the time was the wrong thing haha, but I'll learn.

We didn't make any adjustments to anything and I reckon it'll stay that way for a long time until I'm actually pushing any form of limit of the car. At the moment the car is only limited by me. I just need some more time behind the wheel :)

Edited by zoidbergmerc
  • 4 weeks later...

This is the interior if anyone was interested.

This has to be the only build in the history of skylines where there are less gauges in the after photo :P

How much weight did you drop when you emptied out the carpets/seats etc?

yeah haha, I need those gauges back though, the ones in the car were all broken and the new ones haven't arrived yet.

The original seats were quite heavy and the replacement seat you can lift with your pinky quite comfortably so I think a fair bit was saved there. The air bags were also quite heavy as well as the seat belts; but the rest of the carpet didn't weigh that much, no more than a couple of beach towels really.

The next big weight saving needs to come from the driver though, cutting back to zero beers and no junk during the week really made a huge difference, I still eat\drink what ever I want over the weekend though so it's not all bad. So far I've gone down 2 holes in my belt and I can fit into my old overalls that didn't fit two weeks ago. Haven't actually weighed my self yet though.

yeah but where does one obtain this dry ice you speak so fondly of?

not sure about that

http://www.google.com.au/search?client=safari&rls=en&q=dry+ice+in+tasmania&ie=UTF-8&oe=UTF-8&redir_esc=&ei=XiGtTbSiMOTdiAKss4zDDA

a few places by the look of it

i've never done it but i've seen a few diy's for it, you can use normal ice but it makes everything wet

Create an account or sign in to comment

You need to be a member in order to leave a comment

Create an account

Sign up for a new account in our community. It's easy!

Register a new account

Sign in

Already have an account? Sign in here.

Sign In Now


  • Similar Content

  • Latest Posts

    • Can I suggest you try EBC directly again and link them to as many competitor catalogues as you can to show their listing is incorrect, eg https://dba.com.au/product/front-4000-series-hd-brake-rotor-dba42304/ If you have access to an R33 GTST VIN and your VIN, you could also use a Nissan Parts lookup like Amayama to show them the part number is different between 33 GTST and 34 GTT which may get their attention
    • So i got reply from EBC and they just this site where you can clearly see those 296mm fronts on R34 GTT. I send them photos and "quotes" that 296mm are not for 34 GTT and they are too small. But it will be very hard to return them cuz nobody here knows 100% and they just copy those EBC catalogue :-D https://ebcbrakesdirect.com/automotive/nissan/skyline-r34
    • Hi, is the HKS  Tower Bar still available ? negotiable ? 🤔
    • From there, it is really just test and assemble. Plug the adapter cables from the unit into the back of the screen, then the other side to the car harness. Don't forget all the other plugs too! Run the cables behind the unit and screw it back into place (4 screws) and you should now have 3 cables to run from the top screen to the android unit. I ran them along the DS of the other AV units in the gap between their backets and the console, and used some corrugated tubing on the sharp edges of the bracket so the wires were safe. Plug the centre console and lower screen in temporarily and turn the car to ACC, the AV should fire up as normal. Hold the back button for 3 sec and Android should appear on the top screen. You need to set the input to Aux for audio (more on that later). I put the unit under the AC duct in the centre console, with the wifi antenna on top of the AC duct near the shifter, the bluetooth antenna on the AC duct under the centre console The GPS unit on top of the DS to AC duct; they all seem to work OK there are are out of the way. Neat cable routing is a pain. For the drive recorder I mounted it near the rear view mirror and run the cable in the headlining, across the a pillar and then down the inside of the a pillar seal to the DS lower dash. From there it goes across and to one USB input for the unit. The second USB input is attached to the ECUtec OBD dongle and the 3rd goes to the USB bulkhead connected I added in the centre console. This is how the centre console looks "tidied" up Note I didn't install the provided speaker, didn't use the 2.5mm IPod in line or the piggyback loom for the Ipod or change any DIP switches; they seem to only be required if you need to use the Ipod input rather than the AUX input. That's it, install done, I'll follow up with a separate post on how the unit works, but in summary it retains all factory functions and inputs (so I still use my phone to the car for calls), reverse still works like factory etc.
    • Place the new daughterboard in the case and mount it using the 3 small black rivets provided, and reconnect the 3 factory ribbon cables to the new board Then, use the 3 piggyback cables from the daughterboard into the factory board on top (there are stand offs in the case to keep them apart. and remember to reconnect the antenna and rear cover fan wires. 1 screw to hold the motherboard in place. Before closing the case, make a hole in the sticker covering a hole in the case and run the cable for the android unit into the plug there. The video forgot this step, so did I, so will you probably. Then redo the 4 screws on back, 2 each top and bottom, 3 each side and put the 2 brackets back on.....all ready to go and not that tricky really.      
×
×
  • Create New...