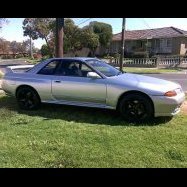
Suitable wheel sizes for R32 GTR
Announcements
-
Similar Content
-
Latest Posts
-
By Dose Pipe Sutututu · Posted
Wife wanted basket things in the wardrobe in our temporary house. Thought about ripping our the wardrobe and fitting the entire IKEA set, but it's a temporary house and we want to move in a few years. So IKEA advertises this as a 50cm unit, however the actually basket and rails measure 46cm wide. Only issue was depth, IKEA stuff is quite deep, where as the builder special junk is super shallow at less than 40cm. Send it, chopped the rails, then offset the mounting holes, job done, happy wife, less shit scattered all over the bedroom. Did the same to the other side too. Also drove the Skyline shit box today, dropped off oil at Supercheap Auto. I didn't realise they only now take max 2x bottles per visit. I visited 2x Supercheap Autos. -
I've seen similar actually in my situation. You never know what tables are attempted to be used when the car thinks it's -99C or +200C. The fail state is not usually that extreme but you know what I mean - it was in my case though! This is where being able to read all the sensors is useful cause you see this stuff really quickly.
-
The above is very important. However as long as you keep timing relatively low, it's plausible to make your own knock ears and plausible to learn to tune with a modern ECU that can do wideband O2 correction like a boost controller. I mean if you only have one viable road to even drive the car on, learning to tinker to this level may be worth doing given you can't do much else with the car...?
-
I find the fact that the rear plate has to be bent inwards at the rear not so bad: but the front is just awful: It's like come on. (these are my very old, now retired/turned in plates) TBH it is a lot of money to fix a minor issue, the fact I said "I'll never really spend the money on doing this" is why people ended up buying them as a gift for a 'car guy' who can be hard to shop for.. for car guy things.
-
I just bent the ends of my premo plates. It even went through Regency like that after the engine conversion and the inspector (a great bloke!) just squinted his eyes and said "I didn't see that". Plates, and how they look, are just something that have zero importance to me.
-


Recommended Posts
Create an account or sign in to comment
You need to be a member in order to leave a comment
Create an account
Sign up for a new account in our community. It's easy!
Register a new accountSign in
Already have an account? Sign in here.
Sign In Now