Jump to content
SAU Community

Recommended Posts

1 hour ago, trel said:

Absolutely would working with a friend on his car previous owner has really butchered this thing...

ok, I'll shoot grab some pics of it tomorrow morning! 

I have those, it's the lines from the bottom of the canister I'm trying to find in FAST as well. Thanks dudes. ? Sorry for hijacking your thread mate! The lines are re-routed they've put a canister under the driver side guard. Has anyone ever seen this? I don't understand the purpose of doing this.

20200813_135239.jpg

Edited by trel
On 8/14/2020 at 11:47 PM, trel said:

I have those, it's the lines from the bottom of the canister I'm trying to find in FAST as well. Thanks dudes. ? Sorry for hijacking your thread mate! The lines are re-routed they've put a canister under the driver side guard. Has anyone ever seen this? I don't understand the purpose of doing this.


Probably just because it's ugly. 

  • 2 weeks later...
On 7/27/2020 at 4:40 PM, PLYNX said:

That's an exceptional price for that front quarter cut ! 

Even here in Aus you couldn't get it for that price !


And that front bar will transform the front of the car.

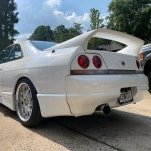
Took me a while but I did it all myself, and I've never done any sort of body work. It's not perfect. I'll definitely be redoing it when it gets a little cooler outside. But here it is! 

Also, going to have to trim the turn signal housings a bit, they won't fit in the bumper/bar because of my FMIC. That's a project for another week. 

20200902_190810.jpg

Well done on that front bar ! 

You'll have to eventually fill in the cut outs where that center cross bar used to be as it will a flex point when you hit those over sized speed humps and parking bollards local councils put in.

I to start practicing your plastic welding skills via YouTube on the interweb ! ! !


13 hours ago, trel said:

That looks great mate. Makes me miss my 95 I had years ago. Nice Shepherd in the background there. Great protection. ?

Thank! I actually have a German Shepherd and a Beligian Malinois, definitely a safe home!

9 hours ago, trel said:

Forgot to ask, did you repair and paint yourself?

Yes, I'd never done it before so it's not perfect but neither is the rest of the car so it kind of fits? lol. Need to wetsand it. Eventually I'll have the whole car repainted in QM1 again but that's after the go fast bits :)

11 hours ago, PLYNX said:

Well done on that front bar ! 

You'll have to eventually fill in the cut outs where that center cross bar used to be as it will a flex point when you hit those over sized speed humps and parking bollards local councils put in.

I to start practicing your plastic welding skills via YouTube on the interweb ! ! !

I was actually going to do that but I ran out of time, big care show this weekend that I needed to have the bumper finished for. Thanks! 

  • 3 months later...

Got the Haltech setup (platinum pro, wideband, boost solenoid), 750cc injectors, AEM 340lph fuel pump all installed. Started tuning and at around 4000RPM the clutch started slipping badly. Was making around 275HP when it started slipping. The OSGiken twin that came with the car probably took a lot of abuse in Japan, which explains why it was so hard for me to get use to. I've driven twin and triple plates before and never had an issue.

https://photos.app.goo.gl/1GrhDr6ffKpDRMW7A

New XClutch twin plate rated for 850ft/lbs is being put in tomorrow, and we will resume tuning on Tuesday. Should be plenty for my plans with the car. Will update with tuning results. Probably 290-310?

Plan for early March 2021 or so is to go with a Precision 6062, 4inch stainless from turbo back. Hopefully live around 400-425HP for a bit and then late 2021 do metal head gasket and arp head studs.

Edited by MindlessR33
dyno video link
  • 1 year later...

Been a while since I've updated, made some changes recently and have some new parts on the way!

New wheels: SSR GTX04 in 18x9.5 +22 all around w/ Continental Extreme Contact in 255/35.

Also installed the Nismo shaded side winkers, Nismo door handle protectors, Nismo old logo carbon fiber shift knob. Tinted the car as well, CPX 18% on sides and back and 40% on front.

Full turbo back 3 inch stainless straight pipe, with screamer. 

NEW PARTS COMING:
Pulsar GTX3076R Gen 2
CXRacing thick wall top mount manifold
Tial 38mm wastegate

20220211_170534 (1).jpg

  • 5 weeks later...
On 4/12/2022 at 8:59 AM, Milkmun said:

Looks the goods mate, is the turbo hitting the valve cover? 

It's about 2-3mm off, so VERY close. Can't clock the turbo anymore without the bolts touching. 

  • 2 weeks later...

Lots of delays and incorrect parts shipped. But now she has a Radium fuel rail and 750cc Bosch injectors, so it's almost time to tune. Getting the downpipe fabricated the first weekend or May. 

20220421_205148.jpg

  • 9 months later...

A LOT has happened since my last update.

Got the car back together in May of 22. Took it to get tuned, one of the injectors got stuck open at some point during a pull. Rather than see what may have happened for the tune to suddenly become rich between pulls, the tuner starts cutting fuel until he leans out the other 5 cylinders. Went ahead and did another pull and went to 22 psi on pump gas, cracked ringlands in 4 of 6 pistons and all of them except for the one with the stuck injector had detonation marks all over them. I found all this out after the fact. Tuner shut his shop down soon after, and blew a few other motors that same month.


SO... tore it down in June. Ordered new CP 9:1 pistons, Manley H beam rods, ID1050x injectors. Sent the crank off to Countersteer to have it polished, balanced and have a crank collar put on. Upgraded to PRP crank collar and PRP oil pump gears. Had the head decked and refreshed. Repaired/Replaced strut towers, and painted the bay. Now we're just waiting for the block to get back from being honed, decked and cleaned, and then we can start putting her back together. I'm curious of what it will make now though...

PSR GTX3076R Gen2 w/ 0.82 hot side
CxRacing thick wall manifold
CP 9:1 Pistons
Manley H beam rods
HPI FMIC
Cut and shut manifold
ID1050x Injectors
AEM 340LPH pump
GM flex fuel sensor
Haltech Platinum pro

  • Like 1

Create an account or sign in to comment

You need to be a member in order to leave a comment

Create an account

Sign up for a new account in our community. It's easy!

Register a new account

Sign in

Already have an account? Sign in here.

Sign In Now


  • Similar Content

  • Latest Posts

    • Can I suggest you try EBC directly again and link them to as many competitor catalogues as you can to show their listing is incorrect, eg https://dba.com.au/product/front-4000-series-hd-brake-rotor-dba42304/ If you have access to an R33 GTST VIN and your VIN, you could also use a Nissan Parts lookup like Amayama to show them the part number is different between 33 GTST and 34 GTT which may get their attention
    • So i got reply from EBC and they just this site where you can clearly see those 296mm fronts on R34 GTT. I send them photos and "quotes" that 296mm are not for 34 GTT and they are too small. But it will be very hard to return them cuz nobody here knows 100% and they just copy those EBC catalogue :-D https://ebcbrakesdirect.com/automotive/nissan/skyline-r34
    • Hi, is the HKS  Tower Bar still available ? negotiable ? 🤔
    • From there, it is really just test and assemble. Plug the adapter cables from the unit into the back of the screen, then the other side to the car harness. Don't forget all the other plugs too! Run the cables behind the unit and screw it back into place (4 screws) and you should now have 3 cables to run from the top screen to the android unit. I ran them along the DS of the other AV units in the gap between their backets and the console, and used some corrugated tubing on the sharp edges of the bracket so the wires were safe. Plug the centre console and lower screen in temporarily and turn the car to ACC, the AV should fire up as normal. Hold the back button for 3 sec and Android should appear on the top screen. You need to set the input to Aux for audio (more on that later). I put the unit under the AC duct in the centre console, with the wifi antenna on top of the AC duct near the shifter, the bluetooth antenna on the AC duct under the centre console The GPS unit on top of the DS to AC duct; they all seem to work OK there are are out of the way. Neat cable routing is a pain. For the drive recorder I mounted it near the rear view mirror and run the cable in the headlining, across the a pillar and then down the inside of the a pillar seal to the DS lower dash. From there it goes across and to one USB input for the unit. The second USB input is attached to the ECUtec OBD dongle and the 3rd goes to the USB bulkhead connected I added in the centre console. This is how the centre console looks "tidied" up Note I didn't install the provided speaker, didn't use the 2.5mm IPod in line or the piggyback loom for the Ipod or change any DIP switches; they seem to only be required if you need to use the Ipod input rather than the AUX input. That's it, install done, I'll follow up with a separate post on how the unit works, but in summary it retains all factory functions and inputs (so I still use my phone to the car for calls), reverse still works like factory etc.
    • Place the new daughterboard in the case and mount it using the 3 small black rivets provided, and reconnect the 3 factory ribbon cables to the new board Then, use the 3 piggyback cables from the daughterboard into the factory board on top (there are stand offs in the case to keep them apart. and remember to reconnect the antenna and rear cover fan wires. 1 screw to hold the motherboard in place. Before closing the case, make a hole in the sticker covering a hole in the case and run the cable for the android unit into the plug there. The video forgot this step, so did I, so will you probably. Then redo the 4 screws on back, 2 each top and bottom, 3 each side and put the 2 brackets back on.....all ready to go and not that tricky really.      
×
×
  • Create New...