Jump to content
SAU Community

Recommended Posts

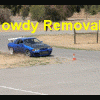
I just stacked my 32 gtr and need the following for the L/H side:

Headlight

Indicator

Guard

Door

Rear quarter panel

Rear tail light

Also need a R/H door

If you know of any wreckers with these parts could you please let me know. I don't really want my car sitting around. Need to get it fixed so I can most likely stack it again. Its true what people say about 32 gtr's "If you fight them they will bite you back". I just learnt the hard way.

Gareth

0417370869

Link to comment
https://www.sau.com.au/forums/topic/76681-parts-needed-stacked-my-car-good/
Share on other sites

  • Replies 42
  • Created
  • Last Reply

Top Posters In This Topic

Performance jap specialists in campbellfield - there my close freinds and my good mate is the main mechanic there - they do excellent stuff, probably one of the only importers that dont "rip" people off and they do have a few panels - I will ask them for u Garreth.

Otherwise, in that area in campbellfield, I go and see all the wreckers around there (part of my job)and they have a LOT of GTR panels - campbellfield is like a Jap import parts heaven, u can find almost ANYTHING there, but you gotta be careful cos most of them will try to go to town on you and rip you off - best thing to do is tell them what u wanna spend, go a bit lower than that -and they shud give u the price.

But you would almost defeintly find panels - ive seen PLENTY of rear GTR cuts and fronts and 1000s of doors. Getting it in red tho? Dont like ur chances so youd have to get it sprayed. When im there during the week, I can ask around, so just PM me ur mobile or somethin so I can tell you.

Regards

Kim

Gareth I got to see you in the wall and was shattered for you mate. I'm just super glad your ok. Thats a fast spot and could have been a whole lot worse.

And honestly after seeing you burried in there I was never able to go flat out through there for the rest of the day.

Hope you get it all sorted as painless as possible mate.

:thumbsup:

Damn, That's an awesome photo!

Sorry to see the accident Rowdy... You had just passed me on the back straight when I saw the rear end lose traction at the left hand kink with lots of smoke and spin around then slide laterally/backwards helplessly into the tyrewall at about 100km/h throwing a few tyres in the air! I was like holy shit!!#@ gear down to 4th, continued around to the front straight until they got on the radio and called the red flag. Nasty to see it all happen right in front of me... the in car video footage would have been spectacular if i had a camera setup on the day.

All the best with the rebuild dude, good to see u put on a brave face when looking at all the damage.

:thumbsup:

Sorry to hear about the car G...

T&H in campbellfield have heaps of Nissan parts (GTRgeoffs excellent suggestion)

78 Horne St Campbellfield 3061 (03) 9357 1435

Probably get the headlight there at the very least.

Oh and btw we almost always haggle a heaps better price with them.

If you manage to find headlights and can't split a pair, let us know caus 46n2 is after a drivers side h/light & we'll go halves with you :D

Performance jap specialists in campbellfield - there my close freinds and my good mate is the main mechanic there - they do excellent stuff, probably one of the only importers that dont "rip" people off  and  they do have a few panels - I will ask them for u Garreth.  

Otherwise, in that area in campbellfield, I go and see all the wreckers around there (part of my job)and they have a LOT of GTR panels - campbellfield is like a Jap import parts heaven, u can find almost ANYTHING there, but you gotta be careful cos most of them will try to go to town on you and rip you off - best thing to do is tell them what u wanna spend, go a bit lower than that -and they shud give u the price.

But you would almost defeintly find panels - ive seen PLENTY of rear GTR cuts and fronts and 1000s of doors. Getting it in red tho? Dont like ur chances so youd have to get it sprayed. When im there during the week, I can ask around, so just PM me ur mobile or somethin so I can tell you.

Regards

Kim

speakin of panel damage n such, sum lady hit my 33 gts-t when i was turnin the other night, so i need parts for it, obviously easy to find as 33's are all to common in melb.

my question is, if i went 2 that place ( performance jap specialists ), what price you reckon i'd be able to score a new passenger door, new passenger seat, and mb a rear passenger panel ( not sure yet, that might jst need sum panel beating )???

also can you recommend some good panel beaters in that sort of area ( campbellfield etc ) coz i live about.. 90kms from melb but the panel beaters round here aren't to used of working on imports and i dont want a dodgy job done.

thanks in advance :D

Here are some picture of my car. I have tracked down all the parts except a front gaurd. Just for parts including a new rear quarter panel but not including a front guard it is only up to $1400. Also I spoke to a mate after work and I should be able to get into a heated spray booth for free. Hopefully I can pay the owner in beer to spray it or if not my mate will spray it. He does a good job on helicopters so a car should be easy.

Also what power is mats car making?

Troy whats the go with the wrx meeting and where is it.

http://img83.echo.cx/img83/6190/sky19of.jpg

http://img152.echo.cx/img152/9643/sky23ya.jpg

http://img296.echo.cx/img296/3530/sky38dx.jpg

How do you make pics show on the screen?

Create an account or sign in to comment

You need to be a member in order to leave a comment

Create an account

Sign up for a new account in our community. It's easy!

Register a new account

Sign in

Already have an account? Sign in here.

Sign In Now


  • Similar Content

  • Latest Posts

    • Hi, is the HKS  Tower Bar still available ? negotiable ? 🤔
    • From there, it is really just test and assemble. Plug the adapter cables from the unit into the back of the screen, then the other side to the car harness. Don't forget all the other plugs too! Run the cables behind the unit and screw it back into place (4 screws) and you should now have 3 cables to run from the top screen to the android unit. I ran them along the DS of the other AV units in the gap between their backets and the console, and used some corrugated tubing on the sharp edges of the bracket so the wires were safe. Plug the centre console and lower screen in temporarily and turn the car to ACC, the AV should fire up as normal. Hold the back button for 3 sec and Android should appear on the top screen. You need to set the input to Aux for audio (more on that later). I put the unit under the AC duct in the centre console, with the wifi antenna on top of the AC duct near the shifter, the bluetooth antenna on the AC duct under the centre console The GPS unit on top of the DS to AC duct; they all seem to work OK there are are out of the way. Neat cable routing is a pain. For the drive recorder I mounted it near the rear view mirror and run the cable in the headlining, across the a pillar and then down the inside of the a pillar seal to the DS lower dash. From there it goes across and to one USB input for the unit. The second USB input is attached to the ECUtec OBD dongle and the 3rd goes to the USB bulkhead connected I added in the centre console. This is how the centre console looks "tidied" up Note I didn't install the provided speaker, didn't use the 2.5mm IPod in line or the piggyback loom for the Ipod or change any DIP switches; they seem to only be required if you need to use the Ipod input rather than the AUX input. That's it, install done, I'll follow up with a separate post on how the unit works, but in summary it retains all factory functions and inputs (so I still use my phone to the car for calls), reverse still works like factory etc.
    • Place the new daughterboard in the case and mount it using the 3 small black rivets provided, and reconnect the 3 factory ribbon cables to the new board Then, use the 3 piggyback cables from the daughterboard into the factory board on top (there are stand offs in the case to keep them apart. and remember to reconnect the antenna and rear cover fan wires. 1 screw to hold the motherboard in place. Before closing the case, make a hole in the sticker covering a hole in the case and run the cable for the android unit into the plug there. The video forgot this step, so did I, so will you probably. Then redo the 4 screws on back, 2 each top and bottom, 3 each side and put the 2 brackets back on.....all ready to go and not that tricky really.      
    • Onto the android unit. You need to remove the top screen because there is a daughterboard to put inside the case. Each side vent pops out from clips; start at the bottom and carefully remove upwards (use a trim remover tool to avoid breaking anything). Then the lower screen and controls come out, 4 screws, a couple of clips (including 3 flimsy ones at the top) and 3 plugs on the rear. Then the upper screen, 4 screws and a bunch of plugs and she is out. From there, remove the mounting brackets (2 screws each), 4 screws on the rear, 2 screws top and bottom and 3 screws holding in the small plates on each side. When you remove the back cover (tight fit), watch out for the power cable for the fan, I removed it so I could put the back aside. The mainboard is held in by 1 screw in the middle, 1 aerial at the top and 3 ribbon cables. If you've ever done any laptop stuff the ribbon cables are OK to work with, just pop up the retainer and they slide out. If you are not familiar just grab a 12 year old from an iphone factory, they will know how it works The case should now look like this:
    • Switching the console was tricky. First there were 6 screws to remove, and also the little adapter loom and its screws had to come out. Also don't forget to remove the 2 screws holding the central locking receiver. Then there are 4 clips on either side....these were very tight in this case and needed careful persuading with a long flat screw driver....some force required but not enough to break them...this was probably the fiddliest part of the whole job. In my case I needed both the wiring loom and the central locking receiver module to swap across to the new one. That was it for the console, so "assembly is the reverse of disassembly"
×
×
  • Create New...