Jump to content
SAU Community

Recommended Posts

well as some of you know, i did end up selling my beloved GTT - my first Skyline and certainly provided many years of enjoyment since 2006 (technically owned since 2004), from DECA to GOR to the Spur/Reefton, Sandown etc - the car received a fantastic response over the years and really was good to me. Never any major mechanical issues, just coilpacks was the only thing replaced- car was bulletproof and looking back at these brought the sadness of saying goodbye back...

The car is now in Canberra, and i met the new owner at Macca's at melb airport a few months ago for the handover...

P1000966.jpg

going...

P1000967.jpg

going...

P1000968.jpg

gone :(

as the new owner hit rev limiter exiting Macca's :(, that was last i saw of her... maybe one day i'll have her back in the garage

a thoroughly disheartening experience, was so sad to see her go :( tears were indeed shed, i will not lie

i know some of you have wondered if i had lost the plot by selling my GTT, or were curious about what i would replace such a beautiful car with? in my mind, i drew a line in the sand about spending anymore money on the GTT when there was a car i still really want to own...

i looked locally, whilst there was a lot of choice, there wasn't anything that really stood out or was perfect in one way but too compromised in another. So just like my GTT, i went looking back in the spiritual home of most our cars, Japan.

I still at this stage had not 100% decided i was going to get anything (the search began earlier this year) but something ended up catching my eye and the more i looked into it, the more i realised i needed to get this car. I am FAR from an impulse buyer, and usually like to research everything to the small hours of the morning but i saw her and said, that's the one. After an initial scare with other interested parties, the car was secured and on her way to our fair shores.

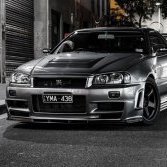
Some know of this car already, some don't, so without further-a-do, i present the new member to the family, my new R34.

gtr1.jpg

gtr2.jpg

gtr3.jpg

gtr4.jpg

gtr5.jpg

gtr6.jpg

gtr7.jpg

gtr8.jpg

gtr9.jpg

DSC_0357.jpg

(i suck at photography, hopefully get some good ones taken soon)

There really was only one way i could go after the GT-T and i decided to take the plunge. And as you can see, this 34 is a touch more serious than the previous one :D

2002 V-Spec II Nur

Built by Midori, one of Japan's top GTR workshops and one of a select few to be approved R34 GTR specialists by Nissan

Single owner in Japan from new :laugh:

That's the basics, now for the bits i guess most people are interested.... modifications, we received most the receipts for the car, not everything, but have managed to decipher this from the documentation received.

MIDORI Fine Tune engine maintenance – Overhauled and balanced

Engine blocked cleaned

”WPC processing” - (this is very cool, google it)

Fitted N1 pistons

Balanced connecting rods and pistons

Midori Intake and Exhaust Camshafts (256 degree duration and 9.15mm lift both sides)

Cleaning of Cylinder Head

PBB Replacement Valve Guides

Valve clearances set

Measuring valve spring replacement

Measuring valve spring adjustment

New Valve seats cut

New Valve seat rings

Valve face polishing (removes Nissan logo and smoothes valve surface)

Combustion chambers CC balanced and porting modification

0.8m Cylinder head re-surfaced/decked

HKS 1.2mm Metal Head Gasket fitted

Camshaft Oil seal replaced

N1 oil pump replaced

Valve stem oil seal replaced

MIDORI original development Oil Pan Baffle kit

MIDORI original development Oil Catch Tank kit

NISMO Inlet Piping kit

NISMO Air Flow Meter x2

OKADA PROJECT Plasma Booster Direct Ignition system

NISMO reinforced engine mount kit

SAMCO silicone heater hose kit

HKS GT2530 turbine kit x2

HKS upgraded adjustable wastegate actuators X 2

MIDORI original development Turbine Dump Pipes

TOMEI EXPREME exhaust manifold kit

NISMO intake manifold/Plenum

HKS Inlet manifold metal gaskets

MIDORI original exhaust front pipes

MIDORI original High Flow metal catalytic converter

MIDORI original development Silent High Power Full Titanium Exhaust System - (silent?? hahahah.... yeah.... very silent :P)

HKS Power Air Flow “Reloaded” Version

SAMCO Silicone Suction Piping/Turbo intake piping

ARC intercooler model M079 (hand fluted intake side, premium ARC core)

SAMCO Silicone upper intake piping (black)

HKS Oil Cooler kit Type S, with duct and 15 row core

CALSONIC Aluminum radiator

CALSONIC radiator cap

SAMCO Silicone radiator hose kit

NISMO 600cc Fuel Injectors X 6

TRUST Fuel Injector Rail kit

SARD adjustable Fuel Pressure Regulator

NISMO 248 L/h High Volume Fuel Pump

MIDORI development ARAGOSTA ERS custom modified suspension (damping force adjustable)

EIBACH springs

BCNR33 Front Lower Control Arms

MIDORI Development Pillow ball tension rods (castor rods – rose jointed)

NISMO reinforced Upper link/Upper Control Arm Bushes

MIDORI development Rear Pillow Ball Upper Links bush replacement (rose joint bushes in upper control arms)

MIDORI Lower Arm Pillow ball bush replacement

MIDORI rear sub-frame collars

NISMO upgraded rear sub-frame bushes

MIDORI development Front Tower Bar with integrated Master Cylinder Brace (custom made)

MIDORI Development Front Lower Brace Bar

ATS Carbon Fibre Twin Plate Clutch

MIDORI development ALCON MONO6 355mm (front)

Monobloc calipers-ALCON 6POT

J hook-ALCON 355mm 3 piece brake rotors

MIDORI development ALCON MONO4 355mm Rear Brake kit

Monobloc calipers-ALCON 4POT

355mm 2 piece Alcon Brake Rotors

FERODO DS2500 brake pads front and rear

APP Stainless Braided Teflon Brake Lines

MIDORI original development Clutch Slave Cylinder

NISMO upgraded gearbox mount

NISMO LIMITED BLACK GT500 LM-GT4 18 x 9.5 +12

ADVAN NEOVA 265/35-18 Tyres

MIDORI original custom tuned ECU

NISMO MFD expansion kit

HKS EVC 5 Boost Controller

NISMO 320km Full Scale Meter Kit

NISMO Side skirts

NISMO Rear side pods

MIDORI Development Carbon Fibre rear Wing Mounts (raised)

Front lip Spoiler painted body colour

NISMO Duracon Shift Knob (changed to GT500 Titanium)

Nissan TV option kit fitted

SONY navigation system

There has been a lot of suspension work done on this car, it's a very serious setup and perhaps not the best street setup :D but besides the springs being around 12/13kg, the shocks actually do a very job of providing a pretty decent ride i must say.

A few things need to be sorted before the track work can begin, but can't wait to get it out there and see what she can really do. So far, the grip that can be generated from the little play time i've had is fairly freaky, team cheater indeed :D

Thanks for those who respected my wishes to keep the car on the quiet side for the time being, much appreciated :)

sorry for the essay!

cheers,

chinny

Link to comment
https://www.sau.com.au/forums/topic/344597-goodbye-my-gtt-and-welcome/
Share on other sites

  • Replies 109
  • Created
  • Last Reply

Top Posters In This Topic

P1000968.jpg

gone :D

as the new owner hit rev limiter exiting Macca's :D, that was last i saw of her... maybe one day i'll have her back in the garage

:laugh::D err that's not the way to canberra.

he's goin southbound on the tulla which takes him back to the city.

Oh and yeah, congrats on the new beast chinny! :P

saw this at the show and shine and would like to see that it is very sexy

+ 11ty.

Daniel,

The underside looked serious than it appears.

I have one criticism though, the black wheels doesn't really suit the dark silver/grey (what is the colour called by the way?), I'd say bronze would look better but it's just my 2c.

Aside that, beautiful car mate, it has certainly make my 33 GTR look boring as Audi!

Hope you'll enjoy it for many years to come.

Cheers

Grant

Is that the same GTR that was at the show n shine on the weekend?

very sexy car I must say.

If cars must be brought in stock to Aust how exactly were you able to bring that in and comply it when it is so modded? or have the mods been done since its arrival?

If cars must be brought in stock to Aust how exactly were you able to bring that in and comply it when it is so modded? or have the mods been done since its arrival?

mods were done after compliance. :laugh:

Basti, you mean about detailing it? already has been, attacked it before the S'n'S, but silver doesn't really yield the same results as black does unfortunately. I've got some metallic/flake shots somewhere to show the paint correction though :laugh: I was secretly hoping it was going to rain on Sunday, would have been fun to see the water slide off the car

Hey you were at trent's a couple weeks ago werent you? I was the guy with the white gtt waiting to go on the dyno.

I didnt know who you were on the forums forgot to ask your name :laugh:

Awesome gtt and now this insane gtr, it looks fantastic man congrats.

Mad GTR!

Looks awesome Dan!

Z-Tune front guards are next... Right..?

:laugh:

nope, for sale - was going to put a bunch of JSAI stuff on but i was happy with how the car looked when it arrived, so they're up for sale :D

Create an account or sign in to comment

You need to be a member in order to leave a comment

Create an account

Sign up for a new account in our community. It's easy!

Register a new account

Sign in

Already have an account? Sign in here.

Sign In Now


  • Similar Content

  • Latest Posts

    • From there, it is really just test and assemble. Plug the adapter cables from the unit into the back of the screen, then the other side to the car harness. Don't forget all the other plugs too! Run the cables behind the unit and screw it back into place (4 screws) and you should now have 3 cables to run from the top screen to the android unit. I ran them along the DS of the other AV units in the gap between their backets and the console, and used some corrugated tubing on the sharp edges of the bracket so the wires were safe. Plug the centre console and lower screen in temporarily and turn the car to ACC, the AV should fire up as normal. Hold the back button for 3 sec and Android should appear on the top screen. You need to set the input to Aux for audio (more on that later). I put the unit under the AC duct in the centre console, with the wifi antenna on top of the AC duct near the shifter, the bluetooth antenna on the AC duct under the centre console The GPS unit on top of the DS to AC duct; they all seem to work OK there are are out of the way. Neat cable routing is a pain. For the drive recorder I mounted it near the rear view mirror and run the cable in the headlining, across the a pillar and then down the inside of the a pillar seal to the DS lower dash. From there it goes across and to one USB input for the unit. The second USB input is attached to the ECUtec OBD dongle and the 3rd goes to the USB bulkhead connected I added in the centre console. This is how the centre console looks "tidied" up Note I didn't install the provided speaker, didn't use the 2.5mm IPod in line or the piggyback loom for the Ipod or change any DIP switches; they seem to only be required if you need to use the Ipod input rather than the AUX input. That's it, install done, I'll follow up with a separate post on how the unit works, but in summary it retains all factory functions and inputs (so I still use my phone to the car for calls), reverse still works like factory etc.
    • Place the new daughterboard in the case and mount it using the 3 small black rivets provided, and reconnect the 3 factory ribbon cables to the new board Then, use the 3 piggyback cables from the daughterboard into the factory board on top (there are stand offs in the case to keep them apart. and remember to reconnect the antenna and rear cover fan wires. 1 screw to hold the motherboard in place. Before closing the case, make a hole in the sticker covering a hole in the case and run the cable for the android unit into the plug there. The video forgot this step, so did I, so will you probably. Then redo the 4 screws on back, 2 each top and bottom, 3 each side and put the 2 brackets back on.....all ready to go and not that tricky really.      
    • Onto the android unit. You need to remove the top screen because there is a daughterboard to put inside the case. Each side vent pops out from clips; start at the bottom and carefully remove upwards (use a trim remover tool to avoid breaking anything). Then the lower screen and controls come out, 4 screws, a couple of clips (including 3 flimsy ones at the top) and 3 plugs on the rear. Then the upper screen, 4 screws and a bunch of plugs and she is out. From there, remove the mounting brackets (2 screws each), 4 screws on the rear, 2 screws top and bottom and 3 screws holding in the small plates on each side. When you remove the back cover (tight fit), watch out for the power cable for the fan, I removed it so I could put the back aside. The mainboard is held in by 1 screw in the middle, 1 aerial at the top and 3 ribbon cables. If you've ever done any laptop stuff the ribbon cables are OK to work with, just pop up the retainer and they slide out. If you are not familiar just grab a 12 year old from an iphone factory, they will know how it works The case should now look like this:
    • Switching the console was tricky. First there were 6 screws to remove, and also the little adapter loom and its screws had to come out. Also don't forget to remove the 2 screws holding the central locking receiver. Then there are 4 clips on either side....these were very tight in this case and needed careful persuading with a long flat screw driver....some force required but not enough to break them...this was probably the fiddliest part of the whole job. In my case I needed both the wiring loom and the central locking receiver module to swap across to the new one. That was it for the console, so "assembly is the reverse of disassembly"
    • But first....while I was there, I also swapped across the centre console box for the other style where the AV inputs don't intrude into the (very limited !) space.  Part# was 96926-4GA0A, 284H3-4GA0B, 284H3-4GA0A. (I've already swapped the top 12v socket for a USB bulkhead in this pic, it fit the hole without modification:) Comparison of the 2: Basically to do the console you need to remove the DS and PS side console trim (they slide up and back, held in by clips only) Then remove the back half of the console top trim with the cupholders, pops up, all clips again but be careful at the front as it is pretty flimsy. Then slide the shifter boot down, remove the spring clip, loose it forever somewhere in the car the pull the shift knob off. Remove the tiny plastic piece on DS near "P" and use something thin and long (most screwdrivers won't fit) to push down the interlock and put the shifter down in D for space. There is one screw at the front, then the shifter surround and ashtray lift up. There are 3 or 4 plugs underneath and it is off. Next is the rear cover of the centre console; you need to open the console lid, pop off the trim covering the lid hinge and undo the 2rd screw from the driver's side (the rest all need to come out later so you can do them all now and remove the lid) Then the rear cover unclips (6 clips), start at the top with a trim tool pulling backwards. Once it is off there are 2 screws facing rearwards to remove (need a short phillips for these) and you are done with the rear of the console. There are 4 plugs at the A/V box to unclip Then there are 2 screws at the front of the console, and 2 clips (pull up and back) and the console will come out.
×
×
  • Create New...