
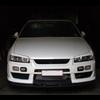
What Have You Done To Your Stagea Lately?

Announcements
-
Similar Content
-
-
Latest Posts
-
 Go back and watch the video again...
 -

By funkymonkey · Posted
Are you meant to double fist them? -
 Ok thanks..that was my second question if i can somehow bypass this even with Nistune(that is all i have right now...aparat from stock ECU. So with some aftemarket it can by "bypassed" or make it work? I know there is Link or Haltech (mainly used). We have ECUmaster here so i will gather some info about it.
 -
 Yes. You will need to get the original boost sensor and wire it in. That is.... if you plan to use a stock ECU - even a Nistuned ECU. The Nissan ECU will not operate correctly without it connected. And yes, it will do annoying stuff like you are experiencing. You will almost certainly be better off with some aftermarket ECU, than trying to hunt down rare sensors.
 -
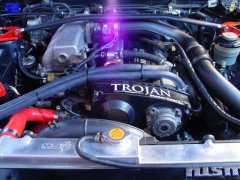
Ok so ABS/TCS is "not" the problem. Yeah i know now about the ABS with Nistune(i told that to the Nistune guy) but iam not 100% why or why i dont have ABS. ABS cube is in the engine (always has been) but i had braked couple of times rly hard and brakes just locked and scream. Does all Skylines have ABS cube? That boost sensor https://www.sau.com.au/forums/topic/367633-wtb-r34-gtt-turbo-pressure-sensor-pics-inside/ Is this it? I need to ask but i have a picture of engine bay and i do not see that (100% is not in that place) If i do not have this the car can do what mine is?(cutting around 4000 rpm) Here is the pic of my engine bay(only one i have) BUT i think i dont have that cuz loom was used from my RB20DE NEO and i know (obviously) that it does not have boost control or any wire to that...) so maybe that is the problem? (i dont know for 100% if that car where the engine is from had that)...but i dont have the loom from that
-


Recommended Posts
Create an account or sign in to comment
You need to be a member in order to leave a comment
Create an account
Sign up for a new account in our community. It's easy!
Register a new accountSign in
Already have an account? Sign in here.
Sign In Now