Jump to content
SAU Community

Recommended Posts

Yeah was a good day for it. My mate Andrew ended up doing a 12.9 in the grey 33 and lifted 3/4 track because the drivers inner guard came out. So would have been 12.5/12.6ish full noise all the way. Seems plenty of practice with the starts would make a world of difference.

  • 2 weeks later...

yeah I saw that run, I was like wtf?!

I found this interesting thread on aero which I wanted for later so I'll leave it here http://www.timeattackforums.com/forums/aero-dynamics/1177-front-splitter-design-properties-2.html

hahaha... yeah, No. lol. about half came from that, other half I shanghaied off Brads car.

I may not of read that thread well enough, didnt seem to go much into dive fins/canards and fin area and attack angles etc, so again will just mess around with those. will mount them so they can come on and off easily

  • 2 weeks later...

Alright, bit of an update with my car.

- I've got some new Just Jap Camber arms,

- got my LCAs modded so they're adjustable and rose jointed now,

- oil restrictors in

- new sump on the way

- installed Haltech IQ3 GPS logger dash as well as a few more sensors here and there.

- shed is fully stocked with tyres ready for Super Sprints on the 30th oct and the Round 5 of Tas Drift series on the 5th Nov.

I've got a new front bar too that I'm going to attempt to make a splitter for but will most likely be terribad.

Shooting for a 59 second lap around basky on the 30th assuming the weather is awesome :)

Saving up for some 18" wheels too, not really sure what to get though, I'm thinking D1R Lensos still because they're really cheap, but there is something about them that makes me not want to buy them...

Setup for sprints will be maybe soften up the rear end a little to stop me sliding around like an asshole

-4.5 degrees camber on the front, -1.2 on the rear (not adjustable yet); Hoping more camber on the front will help the mid corner understeer I've been getting.

Aiming high now and going for a 59 second lap around basky on my drift tyres. (still saving up for some semis)

Goals for drift include doing a whole run without spinning out :) haha. Just qualifying would be awesome.

Anyway, wish me luck and I hope too see you out there on the track with me :)

Edit: Shitty phone video of dash

Edited by zoidbergmerc
  • 3 weeks later...

I had a great weekend drifting.

Car went well, I drove pretty well too. Best drift ever on my 2nd Qualifying run. Actually Qualified but then I lost my first battle, oh well, who wins their first one! Still had a blast.

Here is a

of the battle.

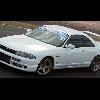
Here are some pics

337307_10150443982875412_167896090411_10732859_261739764_o1.jpg

340361_10150442163466779_608006778_10027919_1888403893_o.jpg

335578_10150443981475412_167896090411_10732831_1959866039_o1.jpg

322087_10150442159436779_608006778_10027900_1678205451_o.jpg

332995_10150443972840412_167896090411_10732642_1456843040_o.jpg

I had a little trouble with the ECU forgetting all of it's outputs though which was a bit of a troll. Turned off the Rev limiter, Turned off VCT and Turned off boost control so it was just running gate pressure, Lucky I had my laptop there so I setup the Limiter and Boost again but I didn't want to touch the VCT because it was a little scary, so mid range power suffered.

Didn't have any problems with oil control at all, got maybe 10mls in the catch can. Oil pressure stayed steady all day, only dipped when I spun out and let the revs drop below 1500rpm.

Added a baffle to the catch can too which worked very well. Also got my new rocker covers on now too, paint on them looks shit though because I'm an asshole and didn't do a very good job prepping them.

So yeah, all in all, a good day was had.

Finally made the time to make the logging\dash software my bitch, I thought a few of you here would enjoy this

Logger2.png

That's a screeny from my first qualifying lap at sprints the other day. The Blue line is Oil pressure and the Magenta line is Speed according to the GPS. You'll notice the oil pressure drops when I brake; the dash also logs G forces too and it said my Max pulled 2gs under brakes and 1.6gs around a corner.

Fun times playing with this software, it's a little clunky but I've got it pretty worked out now. Next video I make I should be able to have the on screen speed and RPM stuff displayed

Good to see your oil issues are sorted. The software is pretty clunky, but it can do some very smart things with math channels (calculate fuel burn rates etc), just takes time to learn it.

Your car looked a bit of a handfull. Seemed to be very snappy, how did it feel?

car was feeling great, had heeeeeeaps of traction and really good hookup maybe a bit too much, but no power really made me sad, i've got it all back to normal now though i hope.

I just need to drive it more.

Create an account or sign in to comment

You need to be a member in order to leave a comment

Create an account

Sign up for a new account in our community. It's easy!

Register a new account

Sign in

Already have an account? Sign in here.

Sign In Now


  • Similar Content

  • Latest Posts

    • Can I suggest you try EBC directly again and link them to as many competitor catalogues as you can to show their listing is incorrect, eg https://dba.com.au/product/front-4000-series-hd-brake-rotor-dba42304/ If you have access to an R33 GTST VIN and your VIN, you could also use a Nissan Parts lookup like Amayama to show them the part number is different between 33 GTST and 34 GTT which may get their attention
    • So i got reply from EBC and they just this site where you can clearly see those 296mm fronts on R34 GTT. I send them photos and "quotes" that 296mm are not for 34 GTT and they are too small. But it will be very hard to return them cuz nobody here knows 100% and they just copy those EBC catalogue :-D https://ebcbrakesdirect.com/automotive/nissan/skyline-r34
    • Hi, is the HKS  Tower Bar still available ? negotiable ? 🤔
    • From there, it is really just test and assemble. Plug the adapter cables from the unit into the back of the screen, then the other side to the car harness. Don't forget all the other plugs too! Run the cables behind the unit and screw it back into place (4 screws) and you should now have 3 cables to run from the top screen to the android unit. I ran them along the DS of the other AV units in the gap between their backets and the console, and used some corrugated tubing on the sharp edges of the bracket so the wires were safe. Plug the centre console and lower screen in temporarily and turn the car to ACC, the AV should fire up as normal. Hold the back button for 3 sec and Android should appear on the top screen. You need to set the input to Aux for audio (more on that later). I put the unit under the AC duct in the centre console, with the wifi antenna on top of the AC duct near the shifter, the bluetooth antenna on the AC duct under the centre console The GPS unit on top of the DS to AC duct; they all seem to work OK there are are out of the way. Neat cable routing is a pain. For the drive recorder I mounted it near the rear view mirror and run the cable in the headlining, across the a pillar and then down the inside of the a pillar seal to the DS lower dash. From there it goes across and to one USB input for the unit. The second USB input is attached to the ECUtec OBD dongle and the 3rd goes to the USB bulkhead connected I added in the centre console. This is how the centre console looks "tidied" up Note I didn't install the provided speaker, didn't use the 2.5mm IPod in line or the piggyback loom for the Ipod or change any DIP switches; they seem to only be required if you need to use the Ipod input rather than the AUX input. That's it, install done, I'll follow up with a separate post on how the unit works, but in summary it retains all factory functions and inputs (so I still use my phone to the car for calls), reverse still works like factory etc.
    • Place the new daughterboard in the case and mount it using the 3 small black rivets provided, and reconnect the 3 factory ribbon cables to the new board Then, use the 3 piggyback cables from the daughterboard into the factory board on top (there are stand offs in the case to keep them apart. and remember to reconnect the antenna and rear cover fan wires. 1 screw to hold the motherboard in place. Before closing the case, make a hole in the sticker covering a hole in the case and run the cable for the android unit into the plug there. The video forgot this step, so did I, so will you probably. Then redo the 4 screws on back, 2 each top and bottom, 3 each side and put the 2 brackets back on.....all ready to go and not that tricky really.      
×
×
  • Create New...