Jump to content
SAU Community

Recommended Posts

  • 4 months later...
  • 2 weeks later...

Hey Guys.

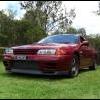
I would like to introduce myself. I am Ben and I have a Red Pearl Metallic ADM car. #62

Just wanted to confirm that from factory the positive battery terminal is on the right hand side?

Also any advice or suggestions on a stock/factory looking replacement battery?

Thanks in advance.

Edited by ADM-GTR-062

Hi there ! By factory positive location you mean the drivers side rear outside looking from the front of the car, then yes. It is actually termed a left hand positive, as in if the battery is in front of you and terminals are closest to you, positive is on the right.(I know that sounds backwards). I guess if you wanted the factory look you would want a battery that is completely black. Battery discussed here below recently:

Post photos of car mate ! Everyone always likes looking ADM 32s.

  • Like 1

Starting at $235k ?! Someone needs to back away from the crack pipe....

Sure it is the only KH2 ADM car, but seriously ? Keep us updated on if anyone finds out what it eventually sells for.

1 hour ago, Marko R1 said:

You'd think they'd include a few more detailed photos for that asking price... I don't understand why sellers include history lessons in their sale ads either...

8 minutes ago, jmknights93 said:

 I don't understand why sellers include history lessons in their sale ads either...

I know right ? Like they are trying to educate and entice someone who knows nothing about the history of these cars into an extravagant appreciating investment purchase.

The only people buying ADM 32s at these astronomical and quite frankly ridiculous prices, are buying into the nostalgia of the group A racing history - which they clearly already know about.

  • Like 1

Even that is insane, but seems to be the ADM price realm at the moment. It's a fair wack below the $235000 one mentioned, which is just comical.

Step back a moment, these are still just a standard R32 GTR no matter which way people try to spin it. Don't get me wrong, I can see the appeal of owning an Aussie delivered one for sure (my main like is the factory transfer case cooler, then the factory 260km Speedo and roof aerial), but the perceived value of these ADM cars is turning into pure propaganda. Only owners of ADM cars already would say otherwise....but hey the market decides what things are worth.

I'd suggest one of these for a close to OEM fit for any 90's Nissan, just pick the right size, terminal type and terminal orientation:

N-60B24L/JE : Panasonic 12V Car Battery

https://www.everybattery.com.au/products.php?cat=Panasonic+Automotive+Batteries

  • Like 1

it's one of the 9 silver ones with a Nissan Australia compliance plate - big difference than produced.

And I quote myself...

5 hours ago, BK said:

still just a standard R32 GTR no matter which way people try to spin it. the perceived value of these ADM cars is turning into pure propaganda. Only owners of ADM cars already would say otherwise...

You guys and your ADMs are just proving my point really

19 minutes ago, BK said:

it's one of the 9 silver ones with a Nissan Australia compliance plate - big difference than produced.

And I quote myself...

You guys and your ADMs are just proving my point really

I’d have to troll thru this thread to find the exact number, however, from memory there are 26 jet silver and the remaining red & black was an equal split amongst the total 100 ADM’s...the above advertised is grey and a one off colour - what do u mean by 1 of 9 silver?

Marko R1 I was replying directly to the previous post by John Murray - he claimed it is one of 9 silver cars with an ADM compliance plate. Actually GTR registry claims 25 ADM KG1 Jet silver metallic so I don't know where he got 1 of 9 from. End of the day, it is still just an R32 GTR in KG1 PRODUCED from Nissan and there are 1620 in that colour.

That is my point that I'm making - there is this ADM elitist attitude going on that somehow they are like a completely different built car and are a better car than they really are. A v spec 32 for example is mechanically a better car.

As for the gun metal grey ADM, who really gives a shit that it is the only ADM one in that colour. It is still the most common R32 GTR colour KH2 is it not ? Certainly doesn't deserve to command a massive price like that, and I will piss myself if it actually does go for it's asking price.

Look I like all the GTR models, and find the ADM ones intriguing, but anyone with any common sense sees right through this ADM perceived value. ADM 32 GTR is a cool thing, but there are a lot of other GTR models I would buy before an ADM one. And have. I passed on an ADM 32 in 2004 for my 33, don't regret it for a second.

Create an account or sign in to comment

You need to be a member in order to leave a comment

Create an account

Sign up for a new account in our community. It's easy!

Register a new account

Sign in

Already have an account? Sign in here.

Sign In Now


  • Similar Content

  • Latest Posts

    • Hi, is the HKS  Tower Bar still available ? negotiable ? 🤔
    • From there, it is really just test and assemble. Plug the adapter cables from the unit into the back of the screen, then the other side to the car harness. Don't forget all the other plugs too! Run the cables behind the unit and screw it back into place (4 screws) and you should now have 3 cables to run from the top screen to the android unit. I ran them along the DS of the other AV units in the gap between their backets and the console, and used some corrugated tubing on the sharp edges of the bracket so the wires were safe. Plug the centre console and lower screen in temporarily and turn the car to ACC, the AV should fire up as normal. Hold the back button for 3 sec and Android should appear on the top screen. You need to set the input to Aux for audio (more on that later). I put the unit under the AC duct in the centre console, with the wifi antenna on top of the AC duct near the shifter, the bluetooth antenna on the AC duct under the centre console The GPS unit on top of the DS to AC duct; they all seem to work OK there are are out of the way. Neat cable routing is a pain. For the drive recorder I mounted it near the rear view mirror and run the cable in the headlining, across the a pillar and then down the inside of the a pillar seal to the DS lower dash. From there it goes across and to one USB input for the unit. The second USB input is attached to the ECUtec OBD dongle and the 3rd goes to the USB bulkhead connected I added in the centre console. This is how the centre console looks "tidied" up Note I didn't install the provided speaker, didn't use the 2.5mm IPod in line or the piggyback loom for the Ipod or change any DIP switches; they seem to only be required if you need to use the Ipod input rather than the AUX input. That's it, install done, I'll follow up with a separate post on how the unit works, but in summary it retains all factory functions and inputs (so I still use my phone to the car for calls), reverse still works like factory etc.
    • Place the new daughterboard in the case and mount it using the 3 small black rivets provided, and reconnect the 3 factory ribbon cables to the new board Then, use the 3 piggyback cables from the daughterboard into the factory board on top (there are stand offs in the case to keep them apart. and remember to reconnect the antenna and rear cover fan wires. 1 screw to hold the motherboard in place. Before closing the case, make a hole in the sticker covering a hole in the case and run the cable for the android unit into the plug there. The video forgot this step, so did I, so will you probably. Then redo the 4 screws on back, 2 each top and bottom, 3 each side and put the 2 brackets back on.....all ready to go and not that tricky really.      
    • Onto the android unit. You need to remove the top screen because there is a daughterboard to put inside the case. Each side vent pops out from clips; start at the bottom and carefully remove upwards (use a trim remover tool to avoid breaking anything). Then the lower screen and controls come out, 4 screws, a couple of clips (including 3 flimsy ones at the top) and 3 plugs on the rear. Then the upper screen, 4 screws and a bunch of plugs and she is out. From there, remove the mounting brackets (2 screws each), 4 screws on the rear, 2 screws top and bottom and 3 screws holding in the small plates on each side. When you remove the back cover (tight fit), watch out for the power cable for the fan, I removed it so I could put the back aside. The mainboard is held in by 1 screw in the middle, 1 aerial at the top and 3 ribbon cables. If you've ever done any laptop stuff the ribbon cables are OK to work with, just pop up the retainer and they slide out. If you are not familiar just grab a 12 year old from an iphone factory, they will know how it works The case should now look like this:
    • Switching the console was tricky. First there were 6 screws to remove, and also the little adapter loom and its screws had to come out. Also don't forget to remove the 2 screws holding the central locking receiver. Then there are 4 clips on either side....these were very tight in this case and needed careful persuading with a long flat screw driver....some force required but not enough to break them...this was probably the fiddliest part of the whole job. In my case I needed both the wiring loom and the central locking receiver module to swap across to the new one. That was it for the console, so "assembly is the reverse of disassembly"
×
×
  • Create New...