Jump to content
SAU Community

Recommended Posts

Hey Daniel, Ben here, i'm the big bloke that was at chequered when you first brought down the drum of powerplus stuff. seen the screen name a hundred times, interesting who you come across down there lol

glad to see it all came together mate, you've got a great all rounder there that should be perfectly liveable on the street

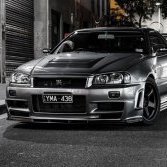
Wait to you see this car guys, it is possibly the sexiest R34 i have EVER seen....

Heaps of power, super torquey and happy to trundle around @ 5kph in bumper to bumper traffic.... a true divers car and credit to Daniel and his vision for the car.

A daily drivable supercar eater.

Nice results dan.

So you made 387kw on the 56% ethanol?

Did trent or racepace comment on how much the single nismo should make on e85?

Im doing a e85 tune next week and have 2 nismo's intank just hoping iv got enough fuel supply...

:cheers:

should be laughing, we made 400-420 on a single tomei pump which is the same as the nismo. we ran out of injector before pump.

nice one mate. :) very good idea and execution. don't think it's the first GTR though. JEM have one running the same zeitronix sensor (they are a dealer of that stuff) and set up in a 32 which is putting out 500odd kw with the flex fuel capability too. :)

still certainly 'one of the first' for sure. I want to see how it drives. thinking I will do the same with my bunky old 32. it's currently got sard 1000s, nismo intank, motec ecu, 2530s etc. Seems like I'd only need the zeitronix sensor and some plumbing done. hell I may even do a road trip to melb and get trent to tune it. what do you say trent? you keen to have a stab at an old banger with a jun 2.7 in it?

Fantastic job Dan and Trent!!!

I can attest to the quality and sheer beauty of Dan's R34, absolutely amazing.

Could be a silly question but is this possible with a nistune? :)

Unfortunately not, same with pfc. For those two ecu's i recommend getting the software so you can load 98 or e85 maps in. I think the FC-hako interface cable is bug free now and only $175. The Nistune software and license is also reasonable.

To use this system the ecu needs a digital input to read the frequency, we run a pullup resistor from the signal input to 5v to make it all work.... so any haltech, link, vipec, etc i think i can get it working with emanage but it will require the zetronix ethanol content meter aswell.

This is indeed great to see. Well done boys.

There has been at least one other such a project here in Oz but I believe that was with an Evo 9 and the ViPec V88 version of those Link Computers .

Its actually an exciting time in this area because many would like to have the opportunity to remove the fuel blend hassles and have the hardward handle it all like OE flex fueled cars do .

I hope this is something all the aftermarket management mobs will cater for and that some data gets published on how the compensations are made for the varying ethanol content .

When I spoke to Scott at Insight about this he said its not a linea thing where you can start with E85 and do an E0 tune and expect to have linea compensations . I didn't like to ask if you have to say tune for every 10% increase in ethanol content and get the computer to extrapolate from there as its not my intellectual propety - read development dollar - to know .

I have to give 10 points to people taking on these projects because its something that will benefit many/most eventually so its a win for all .

For my part thanks , cheers A .

Agreed, in the end it's a compromise (a very good one at that), so it's never going to be as perfect as tuning for that exact mix...but when you're putting out that much power in a street car, I don't think the few extra kw or spot on timing are going to matter much. I would certainly put up with it for the non-hassle of being able to fill up wherever and let the computer do its thing.

any good link tuners in sydney??

im beginning to think e85 and its availability issues will be the end of the good old pfc

Nar! Nothing stopping you from monitoring the E content yourself and adjusting the mix with jerry cans of E85 and 98. It's just a pain in the ass :)

This is indeed great to see. Well done boys.

Agreed, in the end it's a compromise (a very good one at that), so it's never going to be as perfect as tuning for that exact mix...but when you're putting out that much power in a street car, I don't think the few extra kw or spot on timing are going to matter much. I would certainly put up with it for the non-hassle of being able to fill up wherever and let the computer do its thing.

Nar! Nothing stopping you from monitoring the E content yourself and adjusting the mix with jerry cans of E85 and 98. It's just a pain in the ass :)

NO compromise at all really the afr and timing when fully setup is optimised for very fine adjustments so it will make peak safe power at any ethanol mix with optimal afr's.

Great work!

I was wondering why the ecu could not adjust the mixture based on the percentage ethanol, its not straightforward but its possible :)

I'd like to do this eventually...one day

should be laughing, we made 400-420 on a single tomei pump which is the same as the nismo. we ran out of injector before pump.

Trent whats your take on the standard GTR pump looking at the following test the stock pump does pretty good..

http://www.stealth316.com/2-fuelpumpguide.htm#j8

Stock have you found a limit at all? maybe we've been getting gibed on the tomei/nismo pumps!

dooooo eeeeeet Ham! (after selling the PFC first, then throw it in the bin :D, then get a G4.... you know, like a G6, like a G6.... but 4)

Don't quote me on this, but i think Racepace may have even used a standard GTR pump on tangomatt's 2.8 Vcam build, which ended up around 420rwkw on 98 - it could be a nismo, but certainly only a single drop in - i know it's not E85, but if they managed that on a standard pump, then a tomei/nismo being bigger again surely should be good for most of us wanting to go E85 on upgraded turbo Rb26's

We'll know soon how we go with a single intank nismo on a true blue E85 (Powerplus) but as Trent has already said, he's had a Tomei up around the 400-420rwkw mark on a uprgaded turbo 26 without an issue, you're going to have no issues with 2 of them! :D

Hi Trent

Is it still possible to setup the car to run closed loop wbO2 with a tune that incorporates the ethanol content sensor? or is this a function you need to sacrifice, considering stoich afr for e85 and e0 will be different.

Cheers

Pat

Edited by linkems

NO compromise at all really the afr and timing when fully setup is optimised for very fine adjustments so it will make peak safe power at any ethanol mix with optimal afr's.

So you're saying it will adjust accordingly for the mix with maps that will be as good as if you were to tune manually for that mix? How does it overcome the non-linear nature of varying ethanol contents? Sorry for the intrusive question/s, just want to take in all the advantages and disadvantages of an E-flex setup.

I suppose you are never guaranteed a perfect mix of ethanol at a service station, so in a way, filling up with a static tune (ala prior to Dan's setup) is going to be a big tuning compromise anyway...unless you are buying your E85 by the drum from a specialist supplier who can guarantee the blend.

This is not an answer to your question birds but more just thinking out loud:

98 tune: min fuel, min timing

E70 tune: ~20 more fuel, X-2 degrees more timing

E85 tune: ~25% more fuel, X degrees more timing

So wouldnt the ecu draw a linear line between the two endpoints for each % of ethanol content?

First off, I love it - nice work :)

98 tune: min fuel' date=' min timing

E70 tune: ~20 more fuel, X-2 degrees more timing

E85 tune: ~25% more fuel, X degrees more timing

So wouldnt the ecu draw a linear line between the two endpoints for each % of ethanol content? [/quote']

Imo not that simple, and definitely not the kind of rule I'd want to apply to an entire ignition/fuel map.

I'd not expect the timing adjustments to be linear for eth content (for an optimal tune), especially as a car may be octane limited on straight 98 but not so much at eth %age increases. At lighter loads/rpm mbt may not even change.

I am sure there are a few ways of going about it and I'm not sure how one would reliably state it to be an optimal tune for each situation without having maps for even just every 10% ethanol content. Straight off the top of my head the first hair brained solution I can think of would be to something along the lines of having a 4d table (load versus eth content) for fuel and ignition and a 5d table (rpm versus eth content) - set up the base tune on straight 98 and start intensifying the eth content and enjoy the extra timing at higher load and rpm you can do with eth.

... or have link actually released a patch for creating an eth content adjustment map?

So you're saying it will adjust accordingly for the mix with maps that will be as good as if you were to tune manually for that mix? How does it overcome the non-linear nature of varying ethanol contents? Sorry for the intrusive question/s, just want to take in all the advantages and disadvantages of an E-flex setup.

I suppose you are never guaranteed a perfect mix of ethanol at a service station, so in a way, filling up with a static tune (ala prior to Dan's setup) is going to be a big tuning compromise anyway...unless you are buying your E85 by the drum from a specialist supplier who can guarantee the blend.

yes.

We dont need to have linear adjustments or in one plane (multiple planes) either (remember there are corrections for load too as well as fine % ethanol adjustments), but like any ecu the scale is where the magic is not just the number in the table.

Once we do the final tune on Daniels i would be happy for it to lap on any mix of fuel and ethanol and be optimised for that mix.

Create an account or sign in to comment

You need to be a member in order to leave a comment

Create an account

Sign up for a new account in our community. It's easy!

Register a new account

Sign in

Already have an account? Sign in here.

Sign In Now


  • Similar Content

  • Latest Posts

    • Yea that’s why I said ima test them with multimeter and see the reads.
    • Only at idle. Isn’t a problem when rev it seems.
    • @Haggerty This seems silly to ask, but are you confident in your ability to tune the Haltech?  
    • Next on the to-do list was an oil and filter change. Nothing exciting to add here except the oil filter is in a really stupid place (facing the engine mount/subframe/steering rack). GReddy do a relocation kit which puts it towards the gearbox, I would have preferred towards the front but there's obviously a lot more stuff there. Something I'll have to look at for the next service perhaps. First time using Valvoline oil, although I can't see it being any different to most other brands Nice... The oil filter location... At least the subframe wont rust any time soon I picked up a genuine fuel filter, this is part of the fuel pump assembly inside the fuel tank. Access can be found underneath the rear seat, you'll see this triangular cover Remove the 3x plastic 10mm nuts and lift the cover up, pushing the rubber grommet through The yellow fuel line clips push out in opposite directions, remove these completely. The two moulded fuel lines can now pull upwards to disconnect, along with the wire electrical plug. There's 8x 8mm bolts that secure the black retaining ring. The fuel pump assembly is now ready to lift out. Be mindful of the fuel hose on the side, the hose clamp on mine was catching the hose preventing it from lifting up The fuel pump/filter has an upper and lower section held on by 4 pressure clips. These did take a little bit of force, it sounded like the plastic tabs were going to break but they didn't (don't worry!) The lower section helps mount the fuel pump, there's a circular rubber gasket/grommet/seal thing on the bottom where the sock is. Undo the hose clip on the short fuel hose on the side to disconnect it from the 3 way distribution pipe to be able to lift the upper half away. Don't forget to unplug the fuel pump too! There's a few rubber O rings that will need transferring to the new filter housing, I show these in the video at the bottom of this write up. Reassembly is the reverse Here's a photo of the new filter installed, you'll be able to see where the tabs are more clearing against the yellow OEM plastic Once the assembly is re-installed, I turned the engine over a few times to help build up fuel pressure. I did panic when the car stopped turning over but I could hear the fuel pump making a noise. It eventually started and has been fine since. Found my 'lucky' coin underneath the rear seat too The Youtube video can be seen here: https://www.youtube.com/watch?v=uLJ65pmQt44&t=6s
    • It was picked up on the MOT/Inspection that the offside front wheel bearing had excessive play along with the ball joint. It made sense to do both sides so I sourced a pair of spare IS200 hubs to do the swap. Unfortunately I don't have any photos of the strip down but here's a quick run down. On the back of the hub is a large circular dust cover, using a flat head screw driver and a mallet I prised it off. Underneath will reveal a 32mm hub nut (impact gun recommended). With the hub nut removed the ABS ring can be removed (I ended up using a magnetic pick up tool to help). Next up is to remove the stub axle, this was a little trickier due to limited tools. I tried a 3 leg puller but the gap between the hub and stub axle wasn't enough for the legs to get in and under. Next option was a lump hammer and someone pulling the stub axle at the same time. After a few heavy hits it released. The lower bearing race had seized itself onto the stub axle, which was fine because I was replacing them anyway. With the upper bearing race removed and the grease cleaned off they looked like this The left one looked pristine inside but gave us the most trouble. The right one had some surface rust but came apart in a single hit, figure that out?! I got a local garage to press the new wheel bearings in, reassemble was the opposite and didn't take long at all. Removing the hub itself was simple. Starting with removing the brake caliper, 2x 14mm bolts for the caliper slider and 2x 19mm? for the carrier > hub bolts. I used a cable tie to secure the caliper to the upper arm so it was out of the way, there's a 10mm bolt securing the ABS sensor on. With the brake disc removed from the hub next are the three castle nuts for the upper and lower ball joints and track rod end. Two of these had their own R clip and one split pin. A few hits with the hammer and they're released (I left the castle nuts on by a couple of turns), the track rod ends gave me the most grief and I may have nipped the boots (oops). Fitting is the reversal and is very quick and easy to do. The lower ball joints are held onto the hub by 2x 17mm bolts. The castle nut did increase in socket size to 22mm from memory (this may vary from supplier) The two front tyres weren't in great condition, so I had those replaced with some budget tyres for the time being. I'll be replacing the wheels and tyres in the future, this was to get me on the road without the worry of the police hassling me.
×
×
  • Create New...