Jump to content
SAU Community

Recommended Posts

I am trying to club register my highly modified

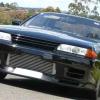
R32 gts-t

But I'm being told I need a road worthy certificate

Does anyone know someone that can

Do me a certificate on a car like this

I happy to pay $$ for the inconvenience

Please contact me on 0421 060 029

If you can help

Regards Anthony

  • Like 1

Club reg ain't an easy way around modifications - as you've found you still need a RWC and these are very hard to get for modified cars - not many leniant people these days because they are very tough on licence holders for passing cars that shouldn't. Best bet would be return to roadworthy state for RWC.

honestly the new modified car scene is all about stealth now. Even if you pass a dodgy roady, down the track you would most likely get defected, and if it involves epa then probably your best bet would be to make it a track only car assuming you have done a lot of engine work.

I think they recently changed the club reg rule, so people need a rwc every year right? someone confirm ?

I would just try to make everything look as stock as possible, hide everything and paint them black. make the car quiet and put standard rims and wait the hight. then go to some roady place in the bush that doesn't know anything about these cars and hope for the best

so for club reg.

it's basically same as normal reg now.

Full RWC on rego. Enginners certs for any modifications.

if there are modifications you will be issued with a M plate stating you ahve modifications (cop bait in itself)

The club in question must photograph the car when it is regoed.

If the club at any point thinks modifications have been made to the car they are to report that to vic roads who will ask you to get it checked.

you can still be EPA'ed and defected on the new club rego,

basically people were abusing the system and regoing unsafe cars on club rego as some clubs would take $$ for a club rego and ruined it for every-one.

I've recently read up on this and from what I can tell, it's easier to engineer a cage, can run wider wheels and talker tires than regular reg, fuel system upgrades fine as long as no in cabin components, brakes upgrades allowable, engine swaps from same manufacturer ok (without a vass I believe but might be wrong), power increase of 30% allowed unsure how a cop can tell how much power over standard it has :s.

I read this a but over a month ago so don't take it as gospel .

All the VSI documents are online and you'll find you end up with 3/4 open as they refer back to each other and certain sections.

See here https://www.vicroads.vic.gov.au/safety-and-road-rules/vehicle-safety/vehicle-standards-information

See mainly 33 ,26, and 8

Edited by anon32
  • Like 1

I've recently read up on this and from what I can tell, it's easier to engineer a cage, can run wider wheels and talker tires than regular reg, fuel system upgrades fine as long as no in cabin components, brakes upgrades allowable, engine swaps from same manufacturer ok (without a vass I believe but might be wrong), power increase of 30% allowed unsure how a cop can tell how much power over standard it has :s.

I read this a but over a month ago so don't take it as gospel .

All the VSI documents are online and you'll find you end up with 3/4 open as they refer back to each other and certain sections.

See here https://www.vicroads.vic.gov.au/safety-and-road-rules/vehicle-safety/vehicle-standards-information

See mainly 33 ,26, and 8

half cage can be egnineers not a full cage they changed that a few years ago.

tyres 2 inches bigger(wider or higher) ok.

fuel system is ok I think

brakes have to be engineered

engine swap for a engine that was avalbiel in that car.

eg no RB25 in a S-Chassis

no ECU mods unless you do full EPA tests.

Apparently you don't need an engineers for a full cage if it meets VSI28.

Check page 3 of it top right corner

VSI28 is no longer valid, thus is in the superseded section of the site.

Edit:

new regs:

http://www.infrastructure.gov.au/roads/vehicle_regulation/bulletin/pdf/NCOP7_Section_LK_Seating_and_Occupant_Protection_1Jan2011_v2.pdf

so rear is ok.

Full not so much unless manufacturer supplied.

actually VSI8 article 9.5 refers to roll cages:

https://www.vicroads.vic.gov.au/~/media/files/documents/safety-and-road-rules/vsinumber8guidetomodificationsformotorvehicles.ashx?la=en

9.5 Internal Rollcages

internal Rollcages must be certified by a VASS signatory as complying with either VSB14 Modifications Code LK8 or with Codes LK9 and LK10

VSB LK section:

http://www.infrastructure.gov.au/roads/vehicle_regulation/bulletin/pdf/NCOP7_Section_LK_Seating_and_Occupant_Protection_1Jan2011_v2.pdf

LK8 deals with half cages,

LK9/10 deal with full cage.

not that I have read all this at far too great length.

Thus why deregistering car shortly.

  • 2 weeks later...

I am also looking into club registration for my '90 R32 GTR. I noticed they have started changing the rules for 'Club Registration Plates'. I haven't got a problem getting the roadworthy for my car. As I have only used after market 'Garrett GT 2860R's. And use a '3.5" Cannon, X-force/Varex 3-stage electric controlled muffler, which limits it down to to close to the 90db mark. My mechanic is going to sign off on it for me.

My thought is with this though. What are the other restrictions that they have pushed upon us? I want to set this car up for casual street driving, and as much track options as possible. Is it still worth getting the club plates still?

I actually logged in, to to see what other members from 'SAU' might be using for club registration/plates in the Victoria Northern Country area. I'm in Bendigo. What 'Car Club', should register to for club plates with? I was thinking 'Ballarat Car Club.

Anyone help me with this?

Any other links/threads about?

Thank you in advance.

WHITEBEAST.

FYI Varex isn't EPA legal

My mechanic is going to sign off on it for me. "I put it on after that." (2 cops that didn't notice it, have let it go so far). Wonder if VICROADS do!

Found links to sauvic.com.au. Be joining. - For club registration information.

Thanks guys.

what people do is run it on the street till defected then dedicated track car....

This is the question. How long will my club plates last. Hopefully I can get it all sorted with engineer certificates and compliances.

What happened to peoples rights to drive high powered cars on the street safely? Even if the aged restricted it, or even better yet. Make bigger fines for club car drivers that fail to do the right thing by driving dangerously on the streets.

to be honest club rego will last less time than regular.

if you have modifications to your car your get special modification Club rego plates...and thus makes you cop bait.

Club rego for modified cars is a dad thing these days...only good for standard cars.

My mechanic is going to sign off on it for me. "I put it on after that." (2 cops that didn't notice it, have let it go so far). Wonder if VICROADS do!

Found links to sauvic.com.au. Be joining. - For club registration information.

Thanks guys.

Yeah most cops won't notice it. I've never had trouble with mine but there are cops who know what they are and can recognise em. Just sayin don't be surprised if it's part of a defect - noise testers (when clearing an EPA) also do their test with it on open mode from my experiences.

Last time I dropped in to spectate a matsuri they had hwp sitting on the entrance road to Winton, casually picking off cars... I must say, I felt very safe in the skyline, compared to the majority of the drift kids and their "daily's"

Create an account or sign in to comment

You need to be a member in order to leave a comment

Create an account

Sign up for a new account in our community. It's easy!

Register a new account

Sign in

Already have an account? Sign in here.

Sign In Now


  • Similar Content

  • Latest Posts

    • From there, it is really just test and assemble. Plug the adapter cables from the unit into the back of the screen, then the other side to the car harness. Don't forget all the other plugs too! Run the cables behind the unit and screw it back into place (4 screws) and you should now have 3 cables to run from the top screen to the android unit. I ran them along the DS of the other AV units in the gap between their backets and the console, and used some corrugated tubing on the sharp edges of the bracket so the wires were safe. Plug the centre console and lower screen in temporarily and turn the car to ACC, the AV should fire up as normal. Hold the back button for 3 sec and Android should appear on the top screen. You need to set the input to Aux for audio (more on that later). I put the unit under the AC duct in the centre console, with the wifi antenna on top of the AC duct near the shifter, the bluetooth antenna on the AC duct under the centre console The GPS unit on top of the DS to AC duct; they all seem to work OK there are are out of the way. Neat cable routing is a pain. For the drive recorder I mounted it near the rear view mirror and run the cable in the headlining, across the a pillar and then down the inside of the a pillar seal to the DS lower dash. From there it goes across and to one USB input for the unit. The second USB input is attached to the ECUtec OBD dongle and the 3rd goes to the USB bulkhead connected I added in the centre console. This is how the centre console looks "tidied" up Note I didn't install the provided speaker, didn't use the 2.5mm IPod in line or the piggyback loom for the Ipod or change any DIP switches; they seem to only be required if you need to use the Ipod input rather than the AUX input. That's it, install done, I'll follow up with a separate post on how the unit works, but in summary it retains all factory functions and inputs (so I still use my phone to the car for calls), reverse still works like factory etc.
    • Place the new daughterboard in the case and mount it using the 3 small black rivets provided, and reconnect the 3 factory ribbon cables to the new board Then, use the 3 piggyback cables from the daughterboard into the factory board on top (there are stand offs in the case to keep them apart. and remember to reconnect the antenna and rear cover fan wires. 1 screw to hold the motherboard in place. Before closing the case, make a hole in the sticker covering a hole in the case and run the cable for the android unit into the plug there. The video forgot this step, so did I, so will you probably. Then redo the 4 screws on back, 2 each top and bottom, 3 each side and put the 2 brackets back on.....all ready to go and not that tricky really.      
    • Onto the android unit. You need to remove the top screen because there is a daughterboard to put inside the case. Each side vent pops out from clips; start at the bottom and carefully remove upwards (use a trim remover tool to avoid breaking anything). Then the lower screen and controls come out, 4 screws, a couple of clips (including 3 flimsy ones at the top) and 3 plugs on the rear. Then the upper screen, 4 screws and a bunch of plugs and she is out. From there, remove the mounting brackets (2 screws each), 4 screws on the rear, 2 screws top and bottom and 3 screws holding in the small plates on each side. When you remove the back cover (tight fit), watch out for the power cable for the fan, I removed it so I could put the back aside. The mainboard is held in by 1 screw in the middle, 1 aerial at the top and 3 ribbon cables. If you've ever done any laptop stuff the ribbon cables are OK to work with, just pop up the retainer and they slide out. If you are not familiar just grab a 12 year old from an iphone factory, they will know how it works The case should now look like this:
    • Switching the console was tricky. First there were 6 screws to remove, and also the little adapter loom and its screws had to come out. Also don't forget to remove the 2 screws holding the central locking receiver. Then there are 4 clips on either side....these were very tight in this case and needed careful persuading with a long flat screw driver....some force required but not enough to break them...this was probably the fiddliest part of the whole job. In my case I needed both the wiring loom and the central locking receiver module to swap across to the new one. That was it for the console, so "assembly is the reverse of disassembly"
    • But first....while I was there, I also swapped across the centre console box for the other style where the AV inputs don't intrude into the (very limited !) space.  Part# was 96926-4GA0A, 284H3-4GA0B, 284H3-4GA0A. (I've already swapped the top 12v socket for a USB bulkhead in this pic, it fit the hole without modification:) Comparison of the 2: Basically to do the console you need to remove the DS and PS side console trim (they slide up and back, held in by clips only) Then remove the back half of the console top trim with the cupholders, pops up, all clips again but be careful at the front as it is pretty flimsy. Then slide the shifter boot down, remove the spring clip, loose it forever somewhere in the car the pull the shift knob off. Remove the tiny plastic piece on DS near "P" and use something thin and long (most screwdrivers won't fit) to push down the interlock and put the shifter down in D for space. There is one screw at the front, then the shifter surround and ashtray lift up. There are 3 or 4 plugs underneath and it is off. Next is the rear cover of the centre console; you need to open the console lid, pop off the trim covering the lid hinge and undo the 2rd screw from the driver's side (the rest all need to come out later so you can do them all now and remove the lid) Then the rear cover unclips (6 clips), start at the top with a trim tool pulling backwards. Once it is off there are 2 screws facing rearwards to remove (need a short phillips for these) and you are done with the rear of the console. There are 4 plugs at the A/V box to unclip Then there are 2 screws at the front of the console, and 2 clips (pull up and back) and the console will come out.
×
×
  • Create New...