
Leaderboard


Popular Content
Showing content with the highest reputation since 29/08/25 in all areas
-
By popular demand.. it was a coil. Got my hands on 1 new OEM coil, replaced with the one that made the less noise difference when I unplugged it while the car was running and started the car up. No stutter and the engine light was gone. I guess I’ll buy the other 5 they have lol4 points
-
I wanted to try and preserve the front bumper as long as possible, they're not cheap and are made to order in Japan. Taking inspiration from my previous K11 Micra build where I made an undertray for the Impul bumper, I did the same for this BN Sports bumper but a little slimmed down. This time round I only made a 'skid plate' (if that's the correct wording/term) for just the bumper surface area, the Micra version covered the gap like an undertray. Starting off with a sheet of mild steel approx. 0.9mm thick 4ft x 2ft in size. I traced around the bumper, cut it out and cleaned the edges. Luckily I was able to get two halves from one piece of metal In the video I installed it as is, but I've since then I've removed it to spray and add a rubber edging trim. The rubber trim is suitable for 1-2mm and it's a really nice tight fit. The bolts had to be loosened due to the plates being too tight against the bumper, the trim wouldn't push on I used some stainless M6 flat headed bolts for a flusher finish (rather than hex heads poking down), I believe this style fastener is used for furniture too incase you struggle to source some. The corner's are a little wider, but this may be an advantage incase I get close to bumping it The front grill got some attention, finally getting round to repairing it. Upon removal one fixing pulled itself out of the plastic frame, one side is M8 that fixes inside of the frame, where as the other side is M5. Not knowing I could get replacements, I cut down an M8 bolt, threaded it inside the frame along with a decent amount of JB Weld. The mesh was replaced to match the bumper. One hole on the bonnet/hood had to be drilled out to 8mm to accommodate the new stud, once the glue had set it could be refitted. I think the reason the grill was double meshed was to hide the horn/bonnet latch (which makes sense) but I much prefer it matching the bumper Bumper refitted and it's looking much better IMO The Youtube video can be seen here: https://www.youtube.com/watch?v=bVZP35io9MA3 points
-
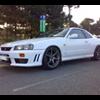
I got back to Japan in January and was keen to get back on track as quickly as possible. Europe is god-awful for track accessibility (by comparison), so I picked up a first-gen GT86 in December just to have something I could jump into right away. The Skyline came over in a container this time and landed in early January. It was a bit battered after Europe, though—I refused to do anything beyond essential upkeep while it was over there. The clutch master cylinder gave out, and so did the power steering. I didn’t even bother changing the oil; it was the same stuff that went in just before I left Japan the first time. Naughty. Power steering parts would’ve cost double with shipping and taxes, so knowing I’d be heading back to Japan, I just postponed it and powered through the arm workout. It took a solid three months to get the car back on the road. Registration was a nightmare this time around. There were a bunch of BS fees to navigate, and sourcing parts was a headache. I needed stock seats for shaken, mistakenly blew 34k JPY on some ENR34 seats—which, of course, didn’t fit—then ended up having the car’s technical sheet amended to register it as a two-seater with the Brides. Then there’s the GT86. Amazing car. Does everything I want it to do. Parts are cheap, easy to find, and I don’t care what anyone says—it’s super rewarding to drive. I’ve done a few basic mods: diff ratio, coilovers, discs, pads, seat, etc. It already had a new exhaust manifold and the 180kph limiter removed, so I assume it’s running some kind of map. I’ve just been thrashing it at the track non-stop—mostly Fuji Speedway now, since I need something with higher speed after all that autobahn time. The wheels on the R34 always pissed me off—too big, and it was a nightmare getting tires to fit properly under the arches. So I threw in the towel and bought something that fits better. Looks way cleaner too (at least to me)—less hotboy, less attention-seeking. Still an R34, though. Now for future plans. There are a few things still outstanding with the car. First up, the rear subframe needs an overhaul—that’s priority one. Next, I need to figure out an engine rebuild plan. No timeline yet, but I want to keep it economical—not cutting corners, just not throwing tens of thousands at a mechanic I can barely communicate with. And finally, paint. Plus a bit of tidying up here and there.3 points
-
Nope, needed to clearance under the bar a little with a heat gun, a 1/2" extension as the "clearancer", and big hammer, I was aware of this from the onset, they fit a 2.0 with this intake no problems, but, the 2.5 is around 15mm taller than a 2.0, so "clearancing" was required It "just" touched when test fitting, now, I have about 10mm of clearance You cannot see where it was done, and so far, there's no contact when giving it the beans Happy days3 points
-
It's been a while since I've updated this thread. The last year (and some) has been very hectic. In the second-half of 2024 I took the R34 on a trip through Germany, Italy, France and Switzerland - it was f*cking great. I got a little annoyed with the attention the car was getting around Europe and really didn't drive it that much. I could barely work on the car since I was living in an inner-city apartment (with underground parking). During the trip, the car lost power steering in France - split hose - and I ended up driving around 4,000kms with no power steering. There were a few Nurburgring trips here and there, but in total the R34 amassed just shy of 7,000kms on European roads. Long story short, I broke up with the reason I was transferred to Europe for and requested to be moved back to Japan. The E90, loved it. It was a sunk cost of around EUR 10,000 and I sold it to a friend for EUR 1,500 just to get rid of it quickly. Trust me, moving countries f*cking sucks and I could not be bothered to be as methodical as I was the first time around.3 points
-
Actually, the equivalent skyline part is both cheaper and simpler, maybe you should come back from the dark side?2 points
-
The final part arrived today to un-clampify and simplify the intake Who would have though a 1/2" hose stainless bulkhead fitting designed for below waterline bilge pumps would be what I needed Test fit on a 3" offcut I had laying around to see if it would work, and it worked a treat All going well the intake will be on its "final version" tomorrow2 points
-
Good luck on the weekend mate2 points
-
Cats are called Bella, and Donna... Like that poisonous plant And I remember your 2 monsters, I remember making a little bit of wee when you let them out... LOL I have already installed cat doors into the laundry where their kitty litter is, and the sun room, apart from the cat doors there's not going to be any permanent mounted stuff on the interior walls (interior doors are cheap and easy to replace) I will get a outdoor cat cage thingie once I finish the landscaping out back... https://catnip.com.au/ The only off limit areas are the main bedroom and the gym room....but, currently the cats are curled up in bed, in the main bedroom with the Mrs.....LOL, the off limits for the kittens to the main bedroom lasted about 5 minutes with Jackie I currently only have 1 free standing huge cat tree multiple level scratching post thingie in the lounge room, but, I will be getting another one soon now that I'm happy with the furniture layout in the back room and have a perfect spot for it2 points
-
I don't get in here much anymore but I can help you with this. The hole is a vent (air relief) for the brake proportioning valve, which is built into the master cylinder. The bad news is that if brake fluid is leaking from that hole then it's getting past the proportioning valve seals. The really bad news is that no spare parts are available for the proportioning valve either from Nissan or after market. It's a bit of a PITA getting the proportioning valve out of the master cylinder body anyway but, fortunately, leaks from that area are rare in my experience. BTW, if those are copper (as such) brake lines you should get rid of them. Bundy (steel) tube is a far better choice (and legal in Australia - if that's where you are).2 points
-
Oooh, you mean the people sending knockoff products aren't even trying anymore. I thought you meant companies 🤦♂️1 point
-
I really dig that skid plate / undertray. Looks like the bumper has a little bit of overhang, so this will be very handy I reckon.1 point
-
So this fella danbelkita is clearly connected to total engines. This is getting quite entertaining though. It's worth losing the $50 sale, thats for sure!!1 point
-
Ah! I actually managed to snag a lightly used set.... that aren't so suitable for me right now. They don't work on a GTT without some cutting or creative heat moulding. I thought about reselling them myself cause I didn't want to murder them, but it looks like I'm probably going to attempt to murder them/melt them because I may as well. @GTSBoy @PranK can somebody close this thread?1 point
-
I couldn't wait But, the black constant tension hose clamps were too thick and there wasn't enough clearance at the T/B and I couldn't get it to seat properly, so I had use a silver one there I also added some 3" silicone over the alloy bit that goes through to hole on the radiator support as it looked like it was sitting on the edge of the hole in the radiator support, I never noticed a rattle or anything, but there was a witness mark It is basicly done, and I can live with the silver hose clamp at the T/B, I will get a black clamp for the head vent though where it is attached to the bulkhead fitting It never stops...LOL, only issue now with the shock tower brace is it slightly touches the under bonnet liner now, if I leave it it will either wear some paint off the brace where it touches, or damage the liner, so I removed the liner to see what I have to work with, with the liner removed I have about 20mm of clearance, but sadly the middle part of the underside of the bonnet is only dusted with paint and looks crap, so I cannot have that, but.... as I have a roll of Carbuilders premium under bonnet insulation in the garage laying around that is only 5.5mm thick (we were going to use it on the boys Patrol, but he crashed the front of it a few months and it was written off, hence why he now drives my old Honda Accord Euro), I'll use the OEM liner as a template and get the Carbuilders stuff fitted up to cover that dusted paint up1 point
-
LOL.... you are correct there.1 point
-
The video for the servicing and fuel filter change can be seen here: https://www.youtube.com/watch?v=uLJ65pmQt44 One of the main jobs I wanted to do before the car officially went on the road, was to remove the awful looking blue silicone hoses. There's nothing wrong with having coloured silicone hoses, but I realise as I'm getting older I prefer monotone engine bays with a splash of colour on the engine cover(s). I cover this in a lot more detail in the Youtube video, so unfortunately there's limited photos of the process. The intercooler, upper radiator, boost vacuum and upper breather hoses were all changed to black silicone with mikalor clamps. The only blue left is a blanking cap at the back of the inlet manifold and the GReddy pulleys (which will be replaced for stock when the cambelt gets replaced) While the intercooler pipes were off I gave them a quick clean/polish too A before photo I do have a replacement air filter on its way. Fuse box covers were painted blue, they're now satin black Another job on the list while the bumper was off, is to add some mesh https://live.staticflickr.com/65535/54737966256_99b28bfa30_c.jpg[/img] I was hoping to use some thin wire to secure it, but it seems I've misplaced it and the wire I had was too thick to twist easily. I ended up using cable ties for the time being https://live.staticflickr.com/65535/54737131882_c2b7989dcc_c.jpg[/img] Was pleasant to see this https://live.staticflickr.com/65535/54737131627_8b2aab13b3_c.jpg[/img] The last thing to do was to fix the front grill and re-mesh that to match but I ran out of time The Youtube video can be seen here: https://www.youtube.com/watch?v=R4FsF6tgizE&t=23s1 point
-
I think Greg just needs to wrap himself in bubble wrap and stay inside...1 point
-
All of this is making it seem clear that running the Coppermix twin was definitely the way to go, especially in hindsight with how insane tariffs have gotten and the strength of the USD vs yen at the time.1 point
-
Yep, it was only an option on the Q50 Hybrid. Same in Japan as far as I know. And doesn't use a centre diff like the Suby's do, so not the same as the WRX. But it also isn't a reactive AWD like other Nissan AWD vehicles are, eg. Murano/Xtrail/etc.1 point
-
You should have got a Maine Coone then. Only thing is they're big. But so cool, and just like a dog. Or, just get yourself a high performance dog. That'll teach you for wanting Parkour indoors 😛1 point
-
Are you thinking of Bens R32? I don't remember if his went through the bonnet itself, but it went through the chassis rail. Brad (RISKIN) bought it, and turned it into a track car. It's funny how anti people are of Jim Berry now. I remember when I pulled mine out (during an engine change) and inspected it and found it cracking badly. At that point in time so many people were even on SAU, were so pro Jim Berry, and that was after Bens GTR exploded his quite publically.1 point
-
It always seems the uglier an animal is the more is costs1 point
-
That is horrid. Reminds me of the time that R32 send the clutch through the bonnet, then the guy tried to sell his car using those pictures.1 point
-
At least yours have parkour down pat. One of mine will still trip over his own shadow and fall over... He's a special type of cat... Ha ha ha1 point
-
1 point
-
Your chihuahuas look weird!1 point
-
Call me the "Crazy Cat Man"...., maybe that should be my new forum name....LOL....., but seriously.....someone change it please, thanks Just grabbed the two black Oriental kittens that I ordered a few months ago to guard the house, I am assuming that because they are Orientals they know KungFu, Karate, or are Ninjas, or some other lethal fighting skill, even at only 3 months old they already have Parkour down pat Introducing...Bella & Donna1 point
-
Hi, SteveL Thank you very much for your reply, you seem to be the only person on the net who has come up with a definitive answer for which I am grateful. The "Leak" was more by way of wet bubbles when the pedal was depressed hard by a buddy while trying to gey a decent pedal when bleeding the system having fitted the rebuilt BM50 back in the car, which now makes perfect sense. A bit of a shame having just rebuilt my BM50, I did not touch the proportioning valve side of things, the BM50 was leaking from the primary piston seal and fluid was running down the the Brake booster hence the need to rebuild, I had never noticed any fluid leaking from that hole previously it only started when I refitted it to the car. The brake lines in the photo are "Kunifer" which is a Copper/Nickel alloy brake pipe, but are only the ones I use to bench bleed Master cylinders, they are perfectly legal to use on vehicles here in the UK, however the lines on the car are PVF coated steel. Thanks again for clearing this up for me, a purchase of a new BMC appears to be on the cards, I have been looking at various options in case my BM50 was not repairable and have looked at the HFM BM57 which I understand is manufactured in Australia.1 point
-
PXL_20250828_063541093.TS.mp41 point
-
Well the install is officially done. Filled with fluid and bled it today, but didn't get a chance to take it on a test drive. I'll throw some final pics of the lines and whatnot but you can definitely install a DMAX rack in an R33 with pretty minor mods. I think the only other thing I had to do that isn't documented here is grind a bit of the larger banjo fitting to get it to clear since the banjos are grouped much tighter on the DMAX rack. Also the dust boots from a R33 do not fit either fyi, so if you end up doing this install for whatever reason you'll need to grab those too. One caveat with buying the S15 dust boots however is that the clamps are too small to fit on the R33 inner tie rod since they're much thicker so keep the old clamps around. The boots also twist a bit when adjusting toe but it's not a big deal. No issues or leaks so far, steering feels good and it looks like there's a bit more lock now than I had before. Getting an alignment on Saturday so I'll see how it feels then but seems like it'll be good to go1 point
-
There was posted some where on here recently, about how to change resistors/open some connections/close other connections, and it can alter the speed output, if the gearbox is sending the signal to dash, and then dash to ecu.1 point
-
And this guy, classic:1 point
-
I'm not normally one for posting random videos, but I thought we'd all appreciate the honesty about how broken our cars tend to be lol. Genuine skyline life here.1 point
-
People said the same thing when the R35 going into development was announced.1 point
-
Well as expected the ECU wasn't getting proper manifold pressure reading. Once I switched to a 3rd vacuum line directly off the back of the manifold the car runs amazing. Still slightly lean on full throttle but only like 15 AFR, probably fixable with some tuning.1 point
-
I work at a car detailing and tinting shop called Quark which gets all manner of German cars in usually (mainly due to a contract with Mercedes Benz Kita Osaka, BMW Nishinomiya and others) but every once in a while something special comes in, like a fully restored 1972 HS30 Nissan Fairlady 240ZG... The shop owner had immediately started applying film to the windows as soon as it was in the shop so the interior was completely covered in towels and plastic sheets. But I could get a few photos of the engine bay which was restored like new. Such an amazing car to see in pristine condition in Japan these days.1 point
-
See if you can thermal epoxy a heatsink or two onto it?1 point
-
Next on the to-do list was an oil and filter change. Nothing exciting to add here except the oil filter is in a really stupid place (facing the engine mount/subframe/steering rack). GReddy do a relocation kit which puts it towards the gearbox, I would have preferred towards the front but there's obviously a lot more stuff there. Something I'll have to look at for the next service perhaps. First time using Valvoline oil, although I can't see it being any different to most other brands Nice... The oil filter location... At least the subframe wont rust any time soon I picked up a genuine fuel filter, this is part of the fuel pump assembly inside the fuel tank. Access can be found underneath the rear seat, you'll see this triangular cover Remove the 3x plastic 10mm nuts and lift the cover up, pushing the rubber grommet through The yellow fuel line clips push out in opposite directions, remove these completely. The two moulded fuel lines can now pull upwards to disconnect, along with the wire electrical plug. There's 8x 8mm bolts that secure the black retaining ring. The fuel pump assembly is now ready to lift out. Be mindful of the fuel hose on the side, the hose clamp on mine was catching the hose preventing it from lifting up The fuel pump/filter has an upper and lower section held on by 4 pressure clips. These did take a little bit of force, it sounded like the plastic tabs were going to break but they didn't (don't worry!) The lower section helps mount the fuel pump, there's a circular rubber gasket/grommet/seal thing on the bottom where the sock is. Undo the hose clip on the short fuel hose on the side to disconnect it from the 3 way distribution pipe to be able to lift the upper half away. Don't forget to unplug the fuel pump too! There's a few rubber O rings that will need transferring to the new filter housing, I show these in the video at the bottom of this write up. Reassembly is the reverse Here's a photo of the new filter installed, you'll be able to see where the tabs are more clearing against the yellow OEM plastic Once the assembly is re-installed, I turned the engine over a few times to help build up fuel pressure. I did panic when the car stopped turning over but I could hear the fuel pump making a noise. It eventually started and has been fine since. Found my 'lucky' coin underneath the rear seat too The Youtube video can be seen here: https://www.youtube.com/watch?v=uLJ65pmQt44&t=6s1 point
-
It was picked up on the MOT/Inspection that the offside front wheel bearing had excessive play along with the ball joint. It made sense to do both sides so I sourced a pair of spare IS200 hubs to do the swap. Unfortunately I don't have any photos of the strip down but here's a quick run down. On the back of the hub is a large circular dust cover, using a flat head screw driver and a mallet I prised it off. Underneath will reveal a 32mm hub nut (impact gun recommended). With the hub nut removed the ABS ring can be removed (I ended up using a magnetic pick up tool to help). Next up is to remove the stub axle, this was a little trickier due to limited tools. I tried a 3 leg puller but the gap between the hub and stub axle wasn't enough for the legs to get in and under. Next option was a lump hammer and someone pulling the stub axle at the same time. After a few heavy hits it released. The lower bearing race had seized itself onto the stub axle, which was fine because I was replacing them anyway. With the upper bearing race removed and the grease cleaned off they looked like this The left one looked pristine inside but gave us the most trouble. The right one had some surface rust but came apart in a single hit, figure that out?! I got a local garage to press the new wheel bearings in, reassemble was the opposite and didn't take long at all. Removing the hub itself was simple. Starting with removing the brake caliper, 2x 14mm bolts for the caliper slider and 2x 19mm? for the carrier > hub bolts. I used a cable tie to secure the caliper to the upper arm so it was out of the way, there's a 10mm bolt securing the ABS sensor on. With the brake disc removed from the hub next are the three castle nuts for the upper and lower ball joints and track rod end. Two of these had their own R clip and one split pin. A few hits with the hammer and they're released (I left the castle nuts on by a couple of turns), the track rod ends gave me the most grief and I may have nipped the boots (oops). Fitting is the reversal and is very quick and easy to do. The lower ball joints are held onto the hub by 2x 17mm bolts. The castle nut did increase in socket size to 22mm from memory (this may vary from supplier) The two front tyres weren't in great condition, so I had those replaced with some budget tyres for the time being. I'll be replacing the wheels and tyres in the future, this was to get me on the road without the worry of the police hassling me.1 point
-
To be fair it's the other way around. 300kw is boring in a modern Golf or BMW. They are so competent / well-engineered / devoid of emotion that you have to go stupid fast to feel anything. Whereas the <300kw RB still makes all the right noises and it feels good to drive. Can pull off at the lights with the turbo whooshing and the blow-off pssshing and feel like the coolest kid on the block. Just don't look to the side where you'll see the bored housewifes in their shitbox Yaris/Corolla/Camry that kept up because you didn't go fast at all1 point
-
300kW is so boring in a Skyline, you'll get spanked by someone's mum's Golf with Alibaba pipes, and an email tune.1 point
-
If only Brock had forked out the extra $10k for an SS at the time, then this car would be worth something1 point
-
Trying to find a rich collector I see. I love their comment "it's cheap if you compare it to the price of Carol Shelby's personal cars at $23mill"1 point
-
I like they don't raise their hands into the air when they shift their sequential boxes, seems to be a thing here in Australia lol...1 point
-
Thanks mate It's all coming together finally. It's just a better racecar now and also yeop I've pulled my thumb out and committed and the combo seems to be gelling Depends what you mean by not much more haha There's at least a 1.19 in this My fastest lap posted lost 3.5 tenths in T10 and this was on 80% power and 5 heat cycle old tyres The next session/ lap we did we were up 4 tenths with the car out of the final turn T12 accelerate straight and going with 1 or 2 tenths to come from the power to the finish line and the shifter/gbox combo stopped selecting So we wouldve had it. The whole thing.. Also repeated this the very next lap up 3 tenths out of T10 and same issue Add some news tyres and we good Looking forward to a break then yeop WTAC and see if we can actually have a decent run1 point
-
Went to a drift practice day at a local circuit (held on the reserve parking area behind the grandstand) for the first time in about 15 years. Some kei cars were drifting as well, a not so surprising Suzuki Carry truck, and two 1st gen Daihatsu Copens that were converted to rear wheel drive(!) using Daihatsu Boon X4 transfer case, prop shaft and rear diff, obviously omitting the front driveshafts. They looked really fun to slide. I heard that they cost "about half" as much as a Nissan Silvia etc to run. On the track 'Tech M' a local BMW tuning garage had a customer track day. Mainly recent models but there was one E36 which looked ancient among all the current models. It was cool watching the drifting and then turning around and seeing random people thrashing their M3/4s central-circuit-drift-practice-2025-05-18-long-yt.mp41 point
-
it takes so long to get things done but ... they are nearly there and we hitting the track soon again So - at Perth Festival of Speed the car unfortunately had a decent off, wasnt me driving, wasnt the person drivings fault. Long story short car got sent very fast towards the wall without the control on throttle from the driver input and a disaster was averted but there was damage that needed to be fixed - carbon busted and alot of bent bits The splitter got munched and had to go back to get fixed - took a bit to get it there, fixed and back but got a surprise package when a new double element higher DF splitter came back - nice surprise ! and first person to have one At a car show I took the car too some punks stole one of my carbon indicator blanks and stomped on the other so had to get a new set of headlight / indicator combo from tops stage so got front fender vents as well to put in the order While all this was happening the new MCA golds turned up and did some fiddling around with those Put in the flappy paddle system and clutch lockout wiring/ system We have also put shorter gearing in top top it out at 300 kmph in 6th gear where previously I held 5th to 282 at SMP and 277 in Perth Looking for better control and faster acceleration I wasnt intending on doing pedal box I was managing with the brake master replacement system I had going on and adjusted std pedals but on applying the clutch switch to the old system we found the *insert technical word here * bar that goes from the pedal to the master was bent about 40 deg and about to snap = lucky find otherwise be a bad bad time - discussion was had about getting a custom bar built to withstand the load but in reality it was time making any suspension, wheel or anything adjustments to date has been a nightmare - aero off, adjust, check and repeat - time consuming and hard - short of going full airjack system we fashioned some external manual car lifts this will make life a million times easier All the bent framing, some intercooler pipes and other has been fixed and replaced and after 6 months I finally have the car back at home in my control so its get to work on it, set ride heights, wheel align and will start track testing again soon So ultimately other than a few flashy bits nothing actually looks likes its been done but in reality alot has. Typical We'll see how all this goes1 point
-
I know this is an old thread but I have a particular attachment to the ENR34, so I don't think additional content hurts. For starters, I agree with everyone here in that the performance of a stock R34 GTR is a pretty low bar and one that you're going to spend a lot of money "matching". Now if you're willing to deviate from that template as your goal, you'll be much better off and enjoy the car much more. The engine in the NA R34s is a real kick in the nuts in terms of upgradability compared to previous generation NA cars. The NA heads on the RB2X NEOs have MUCH smaller intake port cross sections and are not compatible with any of the aftermarket forward-facing manifolds available for the RB25DET. This can be remedied with a RB25DET NEO head, but those are expensive relative to what they are. A full long-block from a turbo AWD Stagea is generally a better value and will run you about $4000 USD to get it to you. This will get you the stronger RB26DETT rods, as well. That would give you a base to build off of to be safe in the 400whp range. Not shooting for the moon, but if the stock R34 was your bar, this engine would buy you enough to be just North of stock GTR power. A forward facing manifold would allow for the easiest method toward using Bosch EV14 format injectors such as those from Injector Dynamics and FIC, to name a couple. People hate them because they're copies, but Greddy fakes can be had for around $300 USD. With what the fuel rail, regulator, injectors, and the rail adds, figure $2000 USD for the whole setup including the manifold. With the OEM brackets and a bit of trimming to the ends of the lower frame rails, the OEM intercooler mounting brackets can be used to mount an OEM GTR intercooler, or an aftermarket one made for a GTR. Those are handy vs a universale due to the angles that the end tanks have on them. Then your plumbing become super straightforward at that point despite having to cut a hole where the battery is an a matching one on the other side for the pipes. Battery can go to the trunk. I'd round up to a healthy $2000 USD here too (maybe even a tiny more) to allow for a nice aftermarket unit and some pipe fabrication. Or if you can find someone that's upgrading to something larger, the used market comes in clutch here for a decent savings. I won't even get into turbo sizing as that's something that would be for yourself to determine. HOWEVER, for the purposes of your stated goals, a Borg Warner 7064 with an internal wastegate would be a perfect spooler and would make stock GTR power easily. It would also bolt up to your OEM manifold (that would come with the DET you purchased a couple steps above) if it were ordered with a T3 flange. More with adequate fuel. If you can stick with the OEM exhaust manifold then expect to be in the whole about $6000 USD for decent turbo like the one suggested, a down pipe, new O2, and full exhaust to mate up, and upgrades to the integrated BOV in an EFR or a standalone BOV for a different turbo, as well as an aftermarket IWG (internal waste gate). Those last two are definitely optional and unnecessary. All of this stuff above does you no good without any way of tuning and or monitoring the engine. Bite the bullet on a standalone engine management solution. If your experience with wiring is limited, you're going to have to hand it off to someone else, though. Unfortunately, the adapter/patch harnesses available are typically made around the GTT which does not include AWD, and the GTR, which integrates into a lot of chassis features that aren't present in your wiring interface. So the ENR34 is the oddball. So you'll want to expand a bit on your selection and find an ECU that's capable of running the ATTESA pump also. I have a Link Thunder, but you don't need quite that much ECU to accommodate that. You WILL need someone with the know-how to tune it and code those features into whatever software it uses. And to wire it up. This will be your most significant expense. Call it $6000 USD with an ECU, an okay wiring job (no motorsport grade at this price), aftermarket triggers and R35 coils, and the time it takes to tune the ECU with added features (electronic boost control solenoid, MAP, IAT, the new triggers, and ATTESA) and don't be surprised if it's more if you want better work done. Grab a clutch made for any RB pull transmission R32/R33GTR made for the power handling capacity you're looking for. Budget $1500 USD for a new good one. That's about $20,000 USD for an engine you've upgraded yourself and had wired and tuned by someone else. That's no brakes (ENR34 brakes are pathetic), suspension (again, pathetic), or wheels and tires. So you're pretty spot on in terms of spending $30,000 USD extra on the car just to get it to perform a little better than a stock R34 GTR while looking like a bone stock ENR34 with some wheels and suspension mods. That doesn't include fluids, maintenance items, gaskets/seals, repairs needed or anything else discovered along the way. But you'll have a car you can take to the track and have fun without worrying as much about nicks and dings.1 point
-
I have a 2 door, manual r34 gt-four (had it about 2months now) and not many people really know the facts about their set-up, and this is only what i have found after reading up but mostly just driving the car. 1. Yes it uses the same atessa system as the gtr (which is only the computer side of things) 2. No its not a gtr gearbox, its definately not the r34 gtr box cause thats 6 spd, and the gt-four just doesnt "feel" strong like a gtr box, i would say its more along the lines internally of a rb25de box (same as a rb20det) or maybe a rb25det with the obvious casing changes to attach a transfer box. 3. No you cannot pull a fuse and turn it into rwd, that ONLY works for the r32's. Like previously said the car will go into a limp mode. Driving around like this will damage the front diffs clutches. Apparently you can disconnect the front shafts and it will go to rwd but the amont of effort to do it, just by a gtst. 4. HKS torque splitters can be fitted to adjust how much power is distributed to the front and rear. There is NO way to turn all the power to the rear, even with maximum power set to the rear, there will still be about 5% of the power still being sent to the front diff, which means no sitting on the brakes doing a big trev skid. Although, with about 95% of the power going to the rear, that should be enough to step out around corners. 5. At the stock power level, the car just feels safe to drive in the dry around any corner. I can boot first gear take a 90 degree bend while smashing second and the ass end will attempt to come out but then the front just grips and puts you straight ahead, the car will understeer before it oversteers into a corner. The wet is another story, since it is mainly rwd it will go VERY sideways if pushed but its a very easily controlled sideways since you can always feel the front helping you stay in control. So pretty much what i'm saying is if you want to go "drifting" like intial D in this car wait till its wet, go to somewhere quite, and have all the fun then, otherwise get a gtst. 6. The rb26 can bolt straight up and id say that once that was done, even in the dry the awd system will be smoking all fours around corners. A more budjet friendly solution is to get a stegea neo rb25det, change the front diff over with the stock gtfour one and your have a 206kw motor in your car cheap. Another good reason to go the stegea motor is that you stock gtfour harness will bolt up and the r34 ecu is flashable so you can get it retuned without spending dollars on a new ecu or piggy back. Im planning to put a stagea motor in my car, and the more i learn about the gt-four i will post up cause its a bit of a mystery...1 point


This leaderboard is set to Sydney/GMT+10:00