Jump to content
SAU Community

Recommended Posts

Haha thanks Matt!

Yeah that's crazy fast. Very happy for him that it's all working! I would say a 40 at PI would mean about a 37 at EC so definitely in the ball park when the conditions weren't ideal. Hoping for a dry day next Saturday so I can get into the low 40's!

I've been trying to think of advantages my setup and I may have over Mr Newton but to be honest there aren't many! I think I'll need to be content with being the understudy for a while :)

2.8ltr with up near 400kw's will do that! So jelous! I want that power haha. 260kph nearly. Madness. I'm thinking I might get up near 250. Will post up the data after saturday.

Hopefully like you say the weather is good for this weekend for you and you can give it a good crack Russ, it is a good track to practice on for WTA if you can't get to EC.

260klm/h well that's about 25klm's greater then what i can manage (235),

I'm interested to see what my top speed is now as well. It was up 5-10kmh at sandown in the wet.

Last PI with same power + aero i was pushing 230kmh. So 245-250, should be where ur at Russ.

Newton is pushing 200+ through turn 1 though!!

Anyway. Enough about the big red car. This fred is about me and my car! haha.

I'm very proud to announce a new sponsor.

Snap On Tools Clayton.

They are helping out with tools and bits and pieces for the team.

post-10715-0-00434300-1340707965_thumb.jpg

Car now has a new sticker theme with new sponsors. I love the Advan stripes!

post-10715-0-61646400-1340708132_thumb.jpg

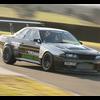
Here are some more photos from Winton.

post-10715-0-51797800-1340708319_thumb.jpg

post-10715-0-13331500-1340708454_thumb.jpg

post-10715-0-82377000-1340708597_thumb.jpg

post-10715-0-23616700-1340708552_thumb.jpg

post-10715-0-07674100-1340709335_thumb.jpg

We also corner weighed the car and it's pretty even, and kinda light. I'd still like to get it closer to 1200 but not sure how close I'll get. Still gotta strip the doors and get the lexan windows in. Will probably get down to 1230 or so.

No driver:

post-10715-0-20891400-1340710249_thumb.jpg

With driver:

post-10715-0-30391900-1340710262_thumb.jpg

My bus is 1325kg with 10L of fuel. I was hoping your car was more than 45kgs lighter than mine as the only thing I have really removed is the rear wiper and the AC compressor...So to go to all that trouble for only 45kgs...i think I will keep mine as is and have it semi usable on the street

And good work on the sponsors! Import Monster still helping you out? You are going to have to get the air compressor out and give it a lick of paint of some vinyl wrap to pretty it up :)

It's weird but I can't bring myself to paint the guards and bumper haha. I like the whole underdog / budget racer look. If there's time I will get it painted but to be honest its a low priority.

Yep Import monster are still on board. Now also Advan and as always Ace Workshop.

With the weight don't forget I have a lot more bars in mine than yours. With only the half cage it would be more like 1250 or so.

great to see more support coming on board, good on those businesses.

re the corner weights, the overall weight but also the good split will really be helping. My GTR comes in at 1450, but it is about 950 front and 500 rear....so the outside front tyre is working damn hard on mine. Yours should feel much nicer into corners, and be kinder on the tyre as well.

Hey Russman

Have you sorted a sump? regardless what you buy you will need gates not just baffles and extra capacity. My tuner builds them. modified pick-up gated and winged. they arent cheap but non of them will be. i think $1200 bolt up no mods.

you also have an rb25 gearbox dont you russ? thats another 15 odd kg over a 20 box.

im guessing you have an unstripped loom? do you have factory intrusion bars in the doors? its been proven time and time again that stripping door frames has little advantage. viva garage used to do very cheap fiberglass doors that cost around 400-500$ most of the weight in standard doors is in the hinge and latch areas. not easy to remove them.

if you take a look under the back of the car and the subframe there is a lot of small weight to be gained. We were able to get bens targa car to 1230 in rally trim without any expensive light weight parts.

if you want to cut weight you have to look at everything as weight. and work out if you need it or not and how you can make it lighter. every little bit counts. and remember removing weight is free power and free brakes.

Good luck for WTA

Create an account or sign in to comment

You need to be a member in order to leave a comment

Create an account

Sign up for a new account in our community. It's easy!

Register a new account

Sign in

Already have an account? Sign in here.

Sign In Now


  • Similar Content

  • Latest Posts

    • Can I suggest you try EBC directly again and link them to as many competitor catalogues as you can to show their listing is incorrect, eg https://dba.com.au/product/front-4000-series-hd-brake-rotor-dba42304/ If you have access to an R33 GTST VIN and your VIN, you could also use a Nissan Parts lookup like Amayama to show them the part number is different between 33 GTST and 34 GTT which may get their attention
    • So i got reply from EBC and they just this site where you can clearly see those 296mm fronts on R34 GTT. I send them photos and "quotes" that 296mm are not for 34 GTT and they are too small. But it will be very hard to return them cuz nobody here knows 100% and they just copy those EBC catalogue :-D https://ebcbrakesdirect.com/automotive/nissan/skyline-r34
    • Hi, is the HKS  Tower Bar still available ? negotiable ? 🤔
    • From there, it is really just test and assemble. Plug the adapter cables from the unit into the back of the screen, then the other side to the car harness. Don't forget all the other plugs too! Run the cables behind the unit and screw it back into place (4 screws) and you should now have 3 cables to run from the top screen to the android unit. I ran them along the DS of the other AV units in the gap between their backets and the console, and used some corrugated tubing on the sharp edges of the bracket so the wires were safe. Plug the centre console and lower screen in temporarily and turn the car to ACC, the AV should fire up as normal. Hold the back button for 3 sec and Android should appear on the top screen. You need to set the input to Aux for audio (more on that later). I put the unit under the AC duct in the centre console, with the wifi antenna on top of the AC duct near the shifter, the bluetooth antenna on the AC duct under the centre console The GPS unit on top of the DS to AC duct; they all seem to work OK there are are out of the way. Neat cable routing is a pain. For the drive recorder I mounted it near the rear view mirror and run the cable in the headlining, across the a pillar and then down the inside of the a pillar seal to the DS lower dash. From there it goes across and to one USB input for the unit. The second USB input is attached to the ECUtec OBD dongle and the 3rd goes to the USB bulkhead connected I added in the centre console. This is how the centre console looks "tidied" up Note I didn't install the provided speaker, didn't use the 2.5mm IPod in line or the piggyback loom for the Ipod or change any DIP switches; they seem to only be required if you need to use the Ipod input rather than the AUX input. That's it, install done, I'll follow up with a separate post on how the unit works, but in summary it retains all factory functions and inputs (so I still use my phone to the car for calls), reverse still works like factory etc.
    • Place the new daughterboard in the case and mount it using the 3 small black rivets provided, and reconnect the 3 factory ribbon cables to the new board Then, use the 3 piggyback cables from the daughterboard into the factory board on top (there are stand offs in the case to keep them apart. and remember to reconnect the antenna and rear cover fan wires. 1 screw to hold the motherboard in place. Before closing the case, make a hole in the sticker covering a hole in the case and run the cable for the android unit into the plug there. The video forgot this step, so did I, so will you probably. Then redo the 4 screws on back, 2 each top and bottom, 3 each side and put the 2 brackets back on.....all ready to go and not that tricky really.      
×
×
  • Create New...