Jump to content
SAU Community

Recommended Posts

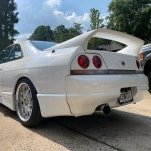
When I imported my R33 it had some turbo flutter. I always loved that sound and associated it with Skylines. I took the car to a shop, they looked it over, and one of their biggest recommendations was to take the block off the blow off and stop it from making the noise. We did so, car feels "better" but I think that's because the car was also just running on wastegate pressure and now it isn't. I'm just trying to get a consensus of how bad this is for the turbo? Seems like every video I watch has opposing opinions. Can't get a solid answer. Motive says one thing, TRC says another, MCM says something else, MCM2 says another. If it's not going to kill the turbo I'm going to bring back the dose. If it is then I'll stick with the pshhh instead. I'm just totally new to turbo cars. I'm happy either direction, but somewhere deep in my soul I'm itching for that sweet stututu.

Video is the day I brought the car home, and how it sounded then. 

Link to comment
https://www.sau.com.au/forums/topic/481047-dosestutuflutter/
Share on other sites

I mean it doesn't necessarily instantly kill the turbo.

But there is a reason the people who made the turbo even made a blow off/recirculation valve. There is a reason all? turbos in any performance car have these valves.

6 minutes ago, Kinkstaah said:

I mean it doesn't necessarily instantly kill the turbo.

But there is a reason the people who made the turbo even made a blow off/recirculation valve. There is a reason all? turbos in any performance car have these valves.

Ultimate turbo performance car doesn't have one. (vl turbo)

  • Like 1
  • Haha 3

Run big FMIC, long pipe work, delete the AFM and install an intake pipe that's long to increase dose.

Delete the BOV, 100%.

Not mandatory for cars running low boost, you're not going to blow off any cooler pipes when thr throttle closes or bend ang throttle plates.

48 minutes ago, Shoota_77 said:

You bin workin' out?

We can see your cleavage.

That was 7+ years ago, rocking the wannabe dad body now.. also I'm married and no more music festivals to walk around shirtless & flex to the bishes :D

  • Like 1
  • Haha 3
57 minutes ago, mosquitocoils said:

I've never known nor do I claim to know. However I am building my Stagea specifically so it can dose and be as loud and obnoxious as possible...

???

Your doing it wrong then need to get a harley to be loud and obnoxious like @mlr ?

  • Haha 2
2 hours ago, robbo_rb180 said:

Your doing it wrong then need to get a harley to be loud and obnoxious like @mlr ?

Oh man that's quite ironic, I actually swapped my straight piped de-restricted Kawasaki ER6N for my Stagea... My ears definitely thanked me for that trade!!

I highly doubt every automotive manufacturer is designing and adding parts (Recirculation Valves) which cost them extra money and complexity just for the fun of it. Same applies for Turbo manufacturers recommending them when they don't even sell them (Garrett, etc.)


Of course they have their purpose, they aid in transient response, help with driveability (OEM BOV has a bleed port), reduce noise, etc.

However, most turbo owners live for whoosh and sutututu noises.

Disclosure: I'm planning to install a BOV to my car to reduce the likelihood of cooler pipes being blown off as I'm running 2bar of boost.


1 hour ago, TurboTapin said:

I highly doubt every automotive manufacturer is designing and adding parts (Recirculation Valves) which cost them extra money and complexity just for the fun of it. Same applies for Turbo manufacturers recommending them when they don't even sell them (Garrett, etc.) 

Compressor bypass valves (to give them their correct name) are mostly intended to allow air to go around the compressor in the forward direction, whilst under vacuum, to reduce (frictional pressure) losses and increase the breathing ability of the engine and hence gain boost a tiny bit earlier.

  • Like 1

I have heard in very exceptional cases some turbos need BPV/BOVs because the shaft holding the compressor wheel was undersized and couldn't take the loading from going in/out of surge and would snap it clean off. But that was a band-aid fix for a mistake in the design phase.

58 minutes ago, GTSBoy said:

Compressor bypass valves (to give them their correct name) are mostly intended to allow air to go around the compressor in the forward direction, whilst under vacuum, to reduce (frictional pressure) losses and increase the breathing ability of the engine and hence gain boost a tiny bit earlier.

Nissan calls them recirculation valves, and this being a Nissan forum I'll stick with that but their patents have a variety of different names. Speaking of patents, they also describe their purpose. Here's a portion of text of one of hundreds of different patents. 

Cheers. 
 

Patent US10077709 

FIELD OF THE INVENTION

The present invention relates to diverter valve systems used with turbocharged or supercharged motor vehicles.

BACKGROUND OF THE INVENTION

Most modern turbocharged vehicle engines include some form of factory-fitted blow-off or bypass valve in the intake tract, the purpose of which is to open during throttle closure to provide a relief path from a diversion aperture or pressurised air that would otherwise cause significant pressure spikes, resulting in damage or reduced life-span of the turbocharger, and also an unpleasant fluttering noise that is deemed unacceptable in a road-going passenger car.

There is also a potential performance improvement, in that without a relief path, rapid throttle closure and the resulting pressure spike can rapidly slow the turbo compressor, leading to a longer delay in returning to peak boost when the throttle is re-opened (i.e. increased turbo lag). Similarly, allowing the bypass valve to relieve too much pressure can also have an adverse effect on turbo lag—evacuating the entire volume of the intake tract means that despite maintaining a higher compressor speed over the short term, when the throttle is re-opened the intake tract must be re-pressurised which causes an increase in lag.


Edited by TurboTapin

Create an account or sign in to comment

You need to be a member in order to leave a comment

Create an account

Sign up for a new account in our community. It's easy!

Register a new account

Sign in

Already have an account? Sign in here.

Sign In Now


  • Similar Content

  • Latest Posts

    • From there, it is really just test and assemble. Plug the adapter cables from the unit into the back of the screen, then the other side to the car harness. Don't forget all the other plugs too! Run the cables behind the unit and screw it back into place (4 screws) and you should now have 3 cables to run from the top screen to the android unit. I ran them along the DS of the other AV units in the gap between their backets and the console, and used some corrugated tubing on the sharp edges of the bracket so the wires were safe. Plug the centre console and lower screen in temporarily and turn the car to ACC, the AV should fire up as normal. Hold the back button for 3 sec and Android should appear on the top screen. You need to set the input to Aux for audio (more on that later). I put the unit under the AC duct in the centre console, with the wifi antenna on top of the AC duct near the shifter, the bluetooth antenna on the AC duct under the centre console The GPS unit on top of the DS to AC duct; they all seem to work OK there are are out of the way. Neat cable routing is a pain. For the drive recorder I mounted it near the rear view mirror and run the cable in the headlining, across the a pillar and then down the inside of the a pillar seal to the DS lower dash. From there it goes across and to one USB input for the unit. The second USB input is attached to the ECUtec OBD dongle and the 3rd goes to the USB bulkhead connected I added in the centre console. This is how the centre console looks "tidied" up Note I didn't install the provided speaker, didn't use the 2.5mm IPod in line or the piggyback loom for the Ipod or change any DIP switches; they seem to only be required if you need to use the Ipod input rather than the AUX input. That's it, install done, I'll follow up with a separate post on how the unit works, but in summary it retains all factory functions and inputs (so I still use my phone to the car for calls), reverse still works like factory etc.
    • Place the new daughterboard in the case and mount it using the 3 small black rivets provided, and reconnect the 3 factory ribbon cables to the new board Then, use the 3 piggyback cables from the daughterboard into the factory board on top (there are stand offs in the case to keep them apart. and remember to reconnect the antenna and rear cover fan wires. 1 screw to hold the motherboard in place. Before closing the case, make a hole in the sticker covering a hole in the case and run the cable for the android unit into the plug there. The video forgot this step, so did I, so will you probably. Then redo the 4 screws on back, 2 each top and bottom, 3 each side and put the 2 brackets back on.....all ready to go and not that tricky really.      
    • Onto the android unit. You need to remove the top screen because there is a daughterboard to put inside the case. Each side vent pops out from clips; start at the bottom and carefully remove upwards (use a trim remover tool to avoid breaking anything). Then the lower screen and controls come out, 4 screws, a couple of clips (including 3 flimsy ones at the top) and 3 plugs on the rear. Then the upper screen, 4 screws and a bunch of plugs and she is out. From there, remove the mounting brackets (2 screws each), 4 screws on the rear, 2 screws top and bottom and 3 screws holding in the small plates on each side. When you remove the back cover (tight fit), watch out for the power cable for the fan, I removed it so I could put the back aside. The mainboard is held in by 1 screw in the middle, 1 aerial at the top and 3 ribbon cables. If you've ever done any laptop stuff the ribbon cables are OK to work with, just pop up the retainer and they slide out. If you are not familiar just grab a 12 year old from an iphone factory, they will know how it works The case should now look like this:
    • Switching the console was tricky. First there were 6 screws to remove, and also the little adapter loom and its screws had to come out. Also don't forget to remove the 2 screws holding the central locking receiver. Then there are 4 clips on either side....these were very tight in this case and needed careful persuading with a long flat screw driver....some force required but not enough to break them...this was probably the fiddliest part of the whole job. In my case I needed both the wiring loom and the central locking receiver module to swap across to the new one. That was it for the console, so "assembly is the reverse of disassembly"
    • But first....while I was there, I also swapped across the centre console box for the other style where the AV inputs don't intrude into the (very limited !) space.  Part# was 96926-4GA0A, 284H3-4GA0B, 284H3-4GA0A. (I've already swapped the top 12v socket for a USB bulkhead in this pic, it fit the hole without modification:) Comparison of the 2: Basically to do the console you need to remove the DS and PS side console trim (they slide up and back, held in by clips only) Then remove the back half of the console top trim with the cupholders, pops up, all clips again but be careful at the front as it is pretty flimsy. Then slide the shifter boot down, remove the spring clip, loose it forever somewhere in the car the pull the shift knob off. Remove the tiny plastic piece on DS near "P" and use something thin and long (most screwdrivers won't fit) to push down the interlock and put the shifter down in D for space. There is one screw at the front, then the shifter surround and ashtray lift up. There are 3 or 4 plugs underneath and it is off. Next is the rear cover of the centre console; you need to open the console lid, pop off the trim covering the lid hinge and undo the 2rd screw from the driver's side (the rest all need to come out later so you can do them all now and remove the lid) Then the rear cover unclips (6 clips), start at the top with a trim tool pulling backwards. Once it is off there are 2 screws facing rearwards to remove (need a short phillips for these) and you are done with the rear of the console. There are 4 plugs at the A/V box to unclip Then there are 2 screws at the front of the console, and 2 clips (pull up and back) and the console will come out.
×
×
  • Create New...