Jump to content
SAU Community

Recommended Posts

  • 3 weeks later...

Quick update before WTAC.

I've rebuilt my front calipers, finished the rear firewall, and done a few other general maintenance things on the checklist. I also fitted up the new larger Fenix oil cooler that I've had sitting around for a while and remounted in front of the radiator as I wasn't really happy with the positioning after the FMIC piping forcing it to be moved back. Hoping this helps with oil temps on track.

Car is pretty much as ready as it's going to be for WTAC. I'm trekking down tomorrow morning to get setup and hopefully get the car scrutineered ready for Friday if possible. If anyone is there swing by the Nulon garage and say hi, I'll be hard parking it with the other Nulon guys :P

Pics and vids to follow after the rush that is WTAC ^_^

Well, that's all finished rather quickly.

Will put some more info up later with a more detailed post, but in short, three days of abuse and absolutely zero issues. Set a new PB for GP Circuit at WTAC, finishing with a 1:45.9. Then on the Sunday I set a new PB for South Circuit with a 1:05.28. Vids of both below:


  • Like 2
13 hours ago, RiseofBrutality said:

I've probably asked you this before Tim but where did you get the front lip from?

Combination of Bunnings, Clark Rubber and a sign writing shop :P


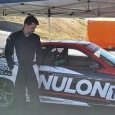
Also, thanks for the photo Leroy   :) 

  • Like 3
  • 1 month later...

Well I'm being terrible with updates in this. Hopefully I'll get a chance to sit down around the Christmas break. Anyway, for those that didn't know, I made a very late entry in to Challenge Bathurst. I has originally planned to enter early on, but was told that it had been filled so never followed up. A week before entries closed, a newsletter was released saying there were still spots, so then the run-a-round began to try and get an entry sorted haha.

Being a local now, and having done so many hill climb and supersprint events on the track, I have been holding out to race around the full circuit for a long time. Funds were tight, especially with the need to purchase some new racing apparel to meet the standards of this being a state level event, but I knew I had to make it happen.

The event was awesome. So good to finally drive the full track in anger!!!

I managed to set a PB lap time of 2:37.2 - I'll be honest, I didn't really care about the Modern Regularity side of things, I just wanted to see how fast I could go. I'm pretty sure this was the case with about 95% of the field haha. My fastest lap time was a bittersweet one though, as you'll see in the video. Still running AD08R's, I was often struggling for grip after only 1 or 2 laps with the heat. Unfortunately I locked up coming in to the chase after a flying lap, but even with this, I still managed to better my previous PB by 0.1s!! Knowing this, I definitely think the car is capable of a 2:35 with a clean lap, just a matter of piecing it together.

And here is footage of a cleaner lap - my fastest on the Saturday which was a 2:37.3

Unfortunately after setting the 2:37.2, I blew a turbo gasket - yet again, so was unable to better my time. I did set a 2:37.4 with the blown gasket so that was definitely a good sign.

I think this will be my last event for the year, so I will take the next couple of months to go over things on the car and make some plans for the next year.

  • Like 3
  • 10 months later...

Ok guys, I have to apologise, I kinda let this one slip...lol.

I'm going to try and bring this back up to date tonight/tomorrow so will be making multiple posts so as to break up the posting process. If you follow my Facebook page (Tim Burt Motorsport) you probably have a fairly good idea on what's been happening anyway, but for those who aren't you will soon be in the know haha.

  • Like 1

So finishing up from my last post at Challenge Bathurst last year, that was my last event for the year. I replaced the turbo gasket (yet again) and got the manifold and turbo housing faces machined to rule out any warpage. The car then sat in the garage for the next month. Couple of pics from the event:

15370171_1379676482052335_15787505463265

15493654_1379676682052315_82087543181699

Image may contain: car, cloud and outdoor

I finished up the year managing to take home a trophy from the local Bathurst Light Car Club (Peter Janson Speed Champion trophy) which was for my results in non-local speed/tarmac events which was pretty cool.

15492140_1377885895564727_14492868400399


Start 2017.

By the time the new year came around, I'd been quite busy with non-car related things in life, but had been planning what I would do through the year. In the process of saving some coin, Nulon asked me to bring the car down to Sydney for Round 1 of Nulon Nationals to put the car on display seeing as I wasn't competing so for the day I joined the stance life :4_joy:

15974910_1413758041977512_81493715666325

15965747_1415449531808363_72677202867086

Fast forward a few months of saving and the car was dropped off at Redsun Motorsport & Mechanical for some much needed love and upgrades.

17807306_1502362959783686_13983882705238

As is always the case, things escalated in the build whilst the car was there. What started as "let's chuck some bigger bolt-ons on the car", turned in to "let's build the head and see how much we can push the bottom end". I partnered up with Andy from Adaptronic whilst he was developing their new plug-in Modular ECU for R34 GTT as well which was exciting. I enjoyed using the Nistune but it did have its limits. The new Adaptronic ECU would rid us of those.

18057954_1523402737679708_55807388509137

Head was removed to be machined and then built in house.

18192379_1532906260062689_14661156574012

We had planned to have the car ready for Nulon Nationals Round 2, but unfortunately a poorly designed part (from a last minute change) held back completion of the car and I missed the event. Going in I was going to keep the original plenum and just redo piping, but once I was there and we had discussed it I decided to install a Plazmaman plenum.

As it turned out, there was a stock shortage at the time and was not expected to be in stock for about a month, which wasn't going to allow the car to be completed before Nulon Nationals Round 2. Matt had a RB26 plenum on the shelf and we opted to use an adaptor to fit this on the RB25 Neo. Turned out this was a bad decision and required some hefty modifications to the water galleries on the section that fits between the head and the throttle bodies (sorry correct name eludes me). I have photos of this but cannot find them at this minute so will post later if I remember.

Before the car was fully ready to go, I picked it up from Redsun and took it home so I could install a 4 point AGI cage. I was pretty close to the time at WTAC where clubsprint cars required a minimum half cage and figured with some more power on its way it was probably time to do this anyway.

18738930_1562770057076309_90914752572221

Anyway, with the cage installed, I took the car back to Redsun to finish everything off and get the car tuned ready to compete at Aus Time Attack on 4th June.

I was eagerly watching the car being run on the dyno hoping nothing would go wrong after changing so much. Started getting excited when it started producing results over the 300kw mark, at less boost, and with better response. The expense was now starting to feel worthwhile. After checking over the vitals and letting the car cool down, Matt was back at it and after a short time I was ecstatic to see a result of 392.6rwkw. 1kw more than Mr Wootten with his "real" track car :4_joy::4_joy: 

18921927_1566710430015605_19899842289363

On this run the boost line blew off the boost controller at about 6500rpm, so there is still a little more left in it. With Aus Time Attack just a couple of days away, and me eager to drive the car, we decided to finish tuning the car on a lower boost setting and just get some kms on the new setup. It was tuned to around 350-360rwkw for Aus Time Attack.

18838929_1566710370015611_65350532898924

  • Like 2

Create an account or sign in to comment

You need to be a member in order to leave a comment

Create an account

Sign up for a new account in our community. It's easy!

Register a new account

Sign in

Already have an account? Sign in here.

Sign In Now


  • Similar Content

  • Latest Posts

    • Wheel alignment immediately. Not "when I get around to it". And further to what Duncan said - you cannot just put camber arms on and shorten them. You will introduce bump steer far in excess of what the car had with stock arms. You need adjustable tension arms and they need to be shortened also. The simplest approach is to shorten them the same % as the stock ones. This will not be correct or optimal, but it will be better than any other guess. The correct way to set the lengths of both arms is to use a properly built/set up bump steer gauge and trial and error the adjustments until you hit the camber you need and want and have minimum bump steer in the range of motion that the wheel is expected to travel. And what Duncan said about toe is also very true. And you cannot change the camber arm without also affecting toe. So when you have adjustable arms on the back of a Skyline, the car either needs to go to a talented wheel aligner (not your local tyre shop dropout), or you need to be able to do this stuff yourself at home. Guess which approach I have taken? I have built my own gear for camber, toe and bump steer measurement and I do all this on the flattest bit of concrete I have, with some shims under the tyres on one side to level the car.
    • Thought I would get some advice from others on this situation.    Relevant info: R33 GTS25t Link G4x ECU Walbro 255LPH w/ OEM FP Relay (No relay mod) Scenario: I accidentally messed up my old AVS S5 (rev.1) at the start of the year and the cars been immobilised. Also the siren BBU has completely failed; so I decided to upgrade it.  I got a newer AVS S5 (rev.2?) installed on Friday. The guy removed the old one and its immobilisers. Tried to start it; the car cranks but doesnt start.  The new one was installed and all the alarm functions seem to be working as they should; still wouldn't start Went to bed; got up on Friday morning and decided to have a look into the no start problem. Found the car completely dead.  Charged the battery; plugged it back in and found the brake lights were stuck on.  Unplugging the brake pedal switch the lights turn off. Plug it back in and theyre stuck on again. I tested the switch (continuity test and resistance); all looks good (0-1kohm).  On talking to AVS; found its because of the rubber stopper on the brake pedal; sure enough the middle of it is missing so have ordered a new one. One of those wear items; which was confusing what was going on However when I try unplugging the STOP Light fuses (under the dash and under the hood) the brake light still stays on. Should those fuses not cut the brake light circuit?  I then checked the ECU; FP Speed Error.  Testing the pump again; I can hear the relay clicking every time I switch it to ON. I unplugged the pump and put the multimeter across the plug. No continuity; im seeing 0.6V (ECU signal?) and when it switches the relay I think its like 20mA or 200mA). Not seeing 12.4V / 7-9A. As far as I know; the Fuel Pump was wired through one of the immobiliser relays on the old alarm.  He pulled some thick gauged harness out with the old alarm wiring; which looks to me like it was to bridge connections into the immobilisers? Before it got immobilised it was running just fine.  Im at a loss to why the FP is getting no voltage; I thought maybe the FP was faulty (even though I havent even done 50km on the new pump) but no voltage at the harness plug.  Questions: Could it be he didnt reconnect the fuel pump when testing it after the old alarm removal (before installing the new alarm)?  Is this a case of bridging to the brake lights instead of the fuel pump circuit? It's a bit beyond me as I dont do a lot with electrical; so have tried my best to diagnose what I think seems to make sense.  Seeking advice if theres for sure an issue with the alarm install to get him back here; or if I do infact, need an auto electrician to diagnose it. 
    • Then, shorten them by 1cm, drop the car back down and have a visual look (or even better, use a spirit level across the wheel to see if you have less camber than before. You still want something like 1.5 for road use. Alternatively, if you have adjustable rear ride height (I assume you do if you have extreme camber wear), raise the suspension back to standard height until you can get it all aligned properly. Finally, keep in mind that wear on the inside of the tyre can be for incorrect toe, not just camber
    • I know I have to get a wheel alignment but until then I just need to bring the rear tyres in a bit they're wearing to the belt on the inside and brand new on the outside edge. I did shorten the arms a bit but got it wrong now after a few klms the Slip and VDC lights come on. I'd just like to get it to a point where I can drive for another week or two before getting an alignment. I've had to pay a lot of other stuff recently so doing it myself is my only option 
    • You just need a wheel alignment after, so just set them to the same as current and drive to the shop. As there are 2 upper links it may also be worth adding adjustable upper front links at the same time; these reduce bump steer when you move the camber (note that setting those correctly takes a lot longer as you have to recheck the camber at each length of the toe arm, through a range of movement, so you could just ignore that unless the handling becomes unpredictable)
×
×
  • Create New...