

inmaniac
-
Posts
242 -
Joined
-
Last visited
-
Days Won
1 -
Feedback
0%
Content Type
Profiles
Forums
Events
Gallery
Media Demo
Store
Everything posted by inmaniac
-
What power do you experts think is possible
inmaniac replied to toldfield's topic in Engines & Forced Induction
Dude, my whole build thread is about doing things the wrong way (and I'm still correcting my faults) - so yeah, definitely do it right! As mentioned, get your turbo High Flowed. I personally have got a Hypergear G3 profile on a 21U turbo, it picks up pretty quick, has no problems on 19psi and I'm not even at my final tune. For the record, I made 230rwkw on this turbo @ 14psi (couldn't hold boost at the time due to wastegate). If you're playing the long game, you can high flow your OP6 housing for more future power, or as ADM said, go 21U for quicker response. Not sure on your boost control plan? As for the AFM, don't make my mistake and buy a cheapie. Get a genuine Bosch Z32 unit. Will cost $250-$320. Ditch the Yellow Jackets. If you absolutely can't spend the money on Splitfires, then gap plugs down as mentioned. Also ensure you've completed the relay mod on your fuel pump so you get full voltage and full juice. If I was in your shoes right now, I'd be going: High Flow Turbo Decent EBC Z32 AFM Splitfires Relay Mod For approx $1800-$2200 in parts you'd then achieve 240-260rwkw. Check out my build thread in the sig. I've gone through all of this already (as have many others on this forum). -
R33 gts25t rb25det fuel pressure regulator and such
inmaniac replied to Wrighty's topic in R Series (R30, R31, R32, R33, R34)
Your second picture is a Fuel Dampener, it's there to restrict "pulsing" and irregularities in fuel flow. It would be on the return, likely after your FPR. If nothing is leaking and your pressure is good, you have no problems. -
The New Official S A U - N S W Spotted Thread
inmaniac replied to GoldZilla's topic in New South Wales
White R34 GTR spotted late this afternoon, plates "ZLR", heading north on Homebush Bay Drive. Looking mint! -
Wheel Sizes & Offsets For Skylines
inmaniac replied to Sydneykid's topic in Suspension, braking, tyres and drivetrain
I'm not an expert, but I'd say yes, with a caveat on the front. Your +30 on the front might be a problem pending the wheels. My 18x8.75 +35mm when fitted to the front scrubbed the caliper and just looked balls. I now run +20 on the front and it's much better. I also had 18x8.75 +35mm on my rear and it left wayyyy too much air in the guard. I now have 18x8.75 +20mm and it fits much better, almost flush. Therefore I reckon your extra inch of rim on the rear will suit a +30mm fine. -
UPDATE: Seriously priced to go. "MaxSpeedingRods" Ebay Special Turbo BRAND NEW IN BOX: $150 Yellow Jacket Coil Packs - Used for 400km: $200 Stock RB25DET ECU from R33 S2 Manual: $50 550cc ebay jecs Injectors with adapters to suit RB25: $100 370cc OEM RB25DET Injectors: $120 OEM Coil Packs suit RB25DET S2 - Working fine, selling due to upgrade to splitfires: $100
-
These? They came out of my S2 R33 GTST when I upgraded to 740cc Nismo's. $120 posted. PM if you want them.
-
I've been waiting for aaaaages to finally get on a track. I'm losing my V plates here. Sign me up for #13 Cheers!
-
The evil laugh in your video cracked me up xD
-
This coolant hose looks fun to get to...
inmaniac replied to inmaniac's topic in General Maintenance
No sir, although I definitely should have! As this is a temporary solution I’ve opted to put a few layers of stretched silicon tape on the end, on which I slid the hose on and it was super tight and only went on with a little bit of rubber grease. I then clamped her down good. I totally acknowledge this isn’t great long term and I’ll aim to sort out something more permanent when I next have a decent play under the bonnet. Cheers - yeah that’s smart I might see what I can dig up -
This coolant hose looks fun to get to...
inmaniac replied to inmaniac's topic in General Maintenance
After posting, I realised one of the pictures I uploaded was of those hose way in the air when I was fiddling around with placement - it didn’t stay at the top of the bay! I was able to route it down behind the head -
This coolant hose looks fun to get to...
inmaniac replied to inmaniac's topic in General Maintenance
Ok so I couldn’t find anywhere on a public holiday to get braided hose. Instead, I did find the perfect shaped heater hose for my application! Funnily enough, the hose I used was for the intake manifold of a 1992-1996 Magna. Go figure. So, as mentioned in my second post, I’ve opted to completely bypass the original route for this hose. I’ve now run a length of hose from the original source at the back of the intake manifold, down the back of the head neatly tucked away, and I then used rotary tool to cut the hard coolant line to the turbo, slip on the new hose and clamped her up. Pictures speak a thousand words. Might not be the ideal solution but it’ll work for me ? -
Hey mate, old thread, but I'm attempting this job soon. Just for absolute clarity, are you saying you replaced this hose in the video below by attacking from beneath the car? You only had to remove the starter? Appreciate further clarity and/or advice if you have it! Cheers
-
This coolant hose looks fun to get to...
inmaniac replied to inmaniac's topic in General Maintenance
Ordered! -
This coolant hose looks fun to get to...
inmaniac replied to inmaniac's topic in General Maintenance
Ok so I've come to the conclusion that there's no way I can get to this hose. I've decided I'll run another hose to bypass this one, should be much easier than trying to replace this one! >.< -
So... Does anyone have advice on how to best attack replacing this hose? I guess I just start pulling things off until I can get to it
-
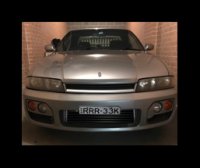
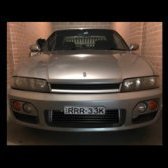
nsw/act VOLK TE37 17inch Staggered Set
inmaniac replied to inmaniac's topic in For Sale (Private Car Parts and Accessories)
Need these gone. Price dropped to $1,500 -
Bump
-
Ok so guys, the theme of my thread has always been about being transparent to silly mistakes so as to not make them again, and deter others from making them as well. Unfortunately, this update is about a silly mistake, one that could have been very bad. Driving along, I happened to hit a large pothole with my front left wheel. Within a few minutes of driving, I heard a whirr and then a slight repeated clunking sound The car pulled slightly to the left. I pulled over, checked my wheel, it looked fine, so I checked all the arms and everything I can see looked fine. On the way home, the car sounded gradually worse to the point where I didn't want to drive it. After jacking up the car, I noticed a little bit of play in the wheel (ever so slight) and that combined with the sounds made me think it was a wheel bearing. This was just before I went away for 2 weeks so I thought f**k it I'll order some wheel bearings and sort it out when I get back. The day I had a mechanic friend coming to look at the car, I decided to jack the car up again and see if I could have a better look, notice anything weird, etc. This time I decided to take the wheel off. It was then that I noticed the nut was barely tight. I checked the next one and it was also finger tight. I had a little wtf moment and pulled of the wheel completely to inspect everything, and then put the wheel back on when I couldn't see or notice anything, this time putting the wheel on extremely tight (and checking all other wheels). After a test drive, everything seemed ok! The sound and issue had gone away completely. It turned out that my wheel nuts were loose and that the pothole likely just put the wheel slightly off centre from the right. It's extremely scary thinking what might have happened to my wheel at speed and I'm just thankful I caught the issue when I did. TLDR: I thought I had a stuffed bearing when in fact my wheel nuts were loose. For those wondering, yeah it was I who had the wheels off last (when I did coilovers) and I zipped the nuts back up with a rattle gun, which has always been fine until now. I've learnt my lesson and will always be using a torque wrench. The other wheels were still tight which makes this case very strange to me. In any case, always be careful of your wheel nuts! (and also, as always, try to eliminate obvious issues before thinking they might be more extreme). Hopefully my next update is more exciting and less about being silly
-
Curious how you went with this @sonicz
-
"MaxSpeedingRods" Ebay Special Turbo: $200 Yellow Jacket Coil Packs - Used for 400km: $250 Stock RB25DET ECU from R33 S2 Manual: $80 550cc ebay jecs Injectors with adapters to suit RB25: $100 370cc OEM RB25DET Injectors: $120 OEM Coil Packs suit RB25DET S2 - Working fine, selling due to upgrade to splitfires: $120 JVC KW-R500 Double Din Head Unit/Car Stereo, works fine and comes with harnesses: $40 Alpine MRX-F35 4 Channel Amp - Works fine: $150 Update - now priced to go go go Also got my staggered set of VOLK TE37's here:
-
New to Skylines, Need Assistance
inmaniac replied to AusFreak's topic in R Series (R30, R31, R32, R33, R34)
Looks like it, yep. -
nsw/act VOLK TE37 17inch Staggered Set
inmaniac replied to inmaniac's topic in For Sale (Private Car Parts and Accessories)
Still for sale. -
Big Turbo Bigger Fuel Pump (255 won't cut it) 1000cc + Injectors Rail to support injectors FPR Flex Sensor ECU w/ flex tune AFM/MAP Sensor Headstuds (recommended) Headgasket (recommended) 3.5in TBE Probably a few other bits Plenty of threads on this site that could answer this question. Try using "search" top right of page. I literally searched "450hp" and found plenty of threads that would help:
-
The nut is pre-load. There should be a little bit of pre-load on the wastegate, usually 3-6 turns. And dude, the boost controller just goes inline with that blue hose. In essence, you could cut that blue hose in half, run the hose voming form the compressor as your source, and the other is the signal to wastegate. Where are you located? DM me. If you're in trouble next week I'll swing by and answer all these questions in 2mins.
-
You're complicating this bro... Do you want it done or do you want it done right? You want it done... So, from what I can see, the kink isn't too big of a drama. I would replace if possible. Secondly, no, the reducer on the intake won't noticeably harm your performance at wastegate boost pressure. As I replied above, get a reducer and a pipe so you can connect. IIRC wastegate pressure for that turbo was between 10-12 PSI.

